2

Deploying SQL Server to an Azure Container Instance using Terraform – Part One

A couple of weeks ago I attended John Martin’s (t) Terraform pre-con at Data in Devon. I’ve been hearing about Terraform recently so was excited to check it out.

John’s pre-con was absolutely fantastic, he provided a great insight into Terraform and I highly recommend it to anyone who’s looking at learning it to sign up if you see it at a future event.

So armed with my new found knowledge, I wanted to go about deploying SQL Server into an Azure Container Instance using Terraform. This blog is the first in a series where I’ll go through how to use Terraform. This post will get SQL Server up and running in an ACI and then future posts will go a bit deeper.

To follow along with this blog you will need the following tools: –

Terraform
Azure CLI
VSCode
Terraform extension for VSCode
Azure Terraform extension for VSCode

OK, let’s go through building the required Terraform files to deploy SQL Server to an Azure Container Instance.

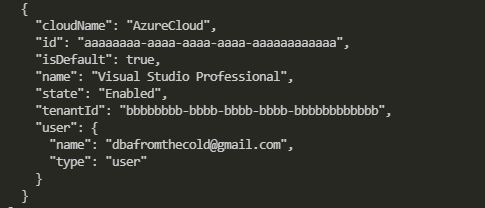
First, log into your Azure account: –

az login

az-login.JPG

Make a note of the id and tenantId.

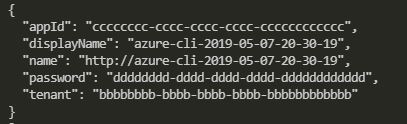
Next, create a service principal which we will reference to allow Terraform to create resources in Azure. Make a note of the appid and secret: –

az ad sp create-for-rbac --role="Contributor" --scopes="/subscriptions/aaaaaaaa-aaaa-aaaa-aaaa-aaaaaaaaaaaa"

Create service principal.JPG

Ok, now we can start creating Terraform files.

Let’s create a directory for the terraform files and navigate to it: –

mkdir Terraform-ACI

cd Terraform-ACI

The first file to create is a providers file. This tells Terraform that we will be working in Azure so it will pull down the relevant plugin: –

new-item providers.tf

Now drop the following into the providers.tf file (using the values you noted above): –

provider "azurerm" {
version = "1.24.0"
subscription_id = "aaaaaaaa-aaaa-aaaa-aaaa-aaaaaaaaaaaa"
tenant_id = "bbbbbbbb-bbbb-bbbb-bbbb-bbbbbbbbbbbb"
client_id = "cccccccc-cccc-cccc-cccc-cccccccccccc"
client_secret = "dddddddd-dddd-dddd-dddd-dddddddddddd"
}

The first resource we’ll create in Azure is a resource group to hold the ACI: –

new-item resourcegroup.tf

Drop the following into the resource group file

resource "azurerm_resource_group" "azurecontainerinstances" {
name = "azurecontainerinstances"
location = "eastus"
}

Note the format of the file, it’s laid out as: –

resource "RESOURCE_TYPE" "RESOURCE_NAME" {
attribute_name = "attribute_value"
}

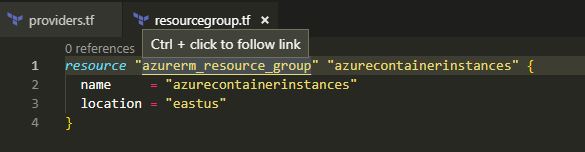
The RESOURCE_NAME is the name of the resource that will be referenced in Terraform. It can look a little confusing as in the code above I’ve called the resource name in Terraform the same name as the name of the resource group in Azure (the name attribute).

What’s cool is with the Azure Terraform VSCode extension, we can click on the RESOURCE_TYPE field and it will take us to the documentation for that resource. Makes things a lot easier!

Resource Group.JPG

Ok, now that we have a resource group we can create the Terraform file to deploy the Azure Container Instance into it: –

new-item azurecontainerinstance.tf

Drop the following into the file: –

resource "azurerm_container_group" "testcontainergroup1" {
name = "testcontainergroup1"
location = "${azurerm_resource_group.azurecontainerinstances.location}"
resource_group_name = "${azurerm_resource_group.azurecontainerinstances.name}"
ip_address_type = "public"
dns_name_label = "testcontainergroup1"
os_type = "Linux"

container {
name = "testcontainer"
image = "mcr.microsoft.com/mssql/server:2019-CTP2.5-ubuntu"
cpu = "1.0"
memory = "2.0"

ports {
port = 1433
protocol = "TCP"
}

environment_variables = {
"ACCEPT_EULA" = "Y"
"SA_PASSWORD" = "Testing1122"
}
}
}

What this is going to do is create an Azure Container Instance Group with one container it in, running SQL Server 2019 CTP 2.5. It’ll be publicly exposed to the internet on port 1433 (I’ll cover fixing that in a future post) so we’ll get a public IP that we can use to connect to.

Notice that the location and resource_group_name are set using variables that retrieve the values of the resource group are going to create.

Cool! We are ready to go!

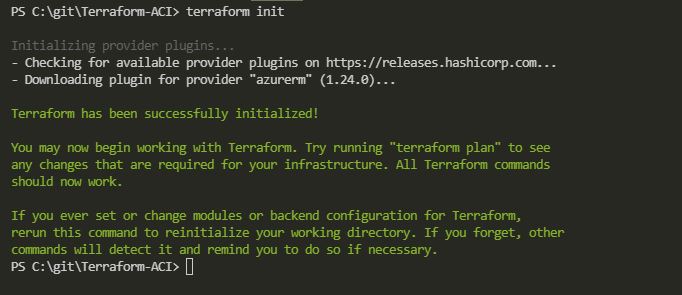
Initialise the directory: –

terraform init

Terraform init.JPG

One cool feature of Terraform is the ability to format all the files (seriously love this): –

terraform fmt

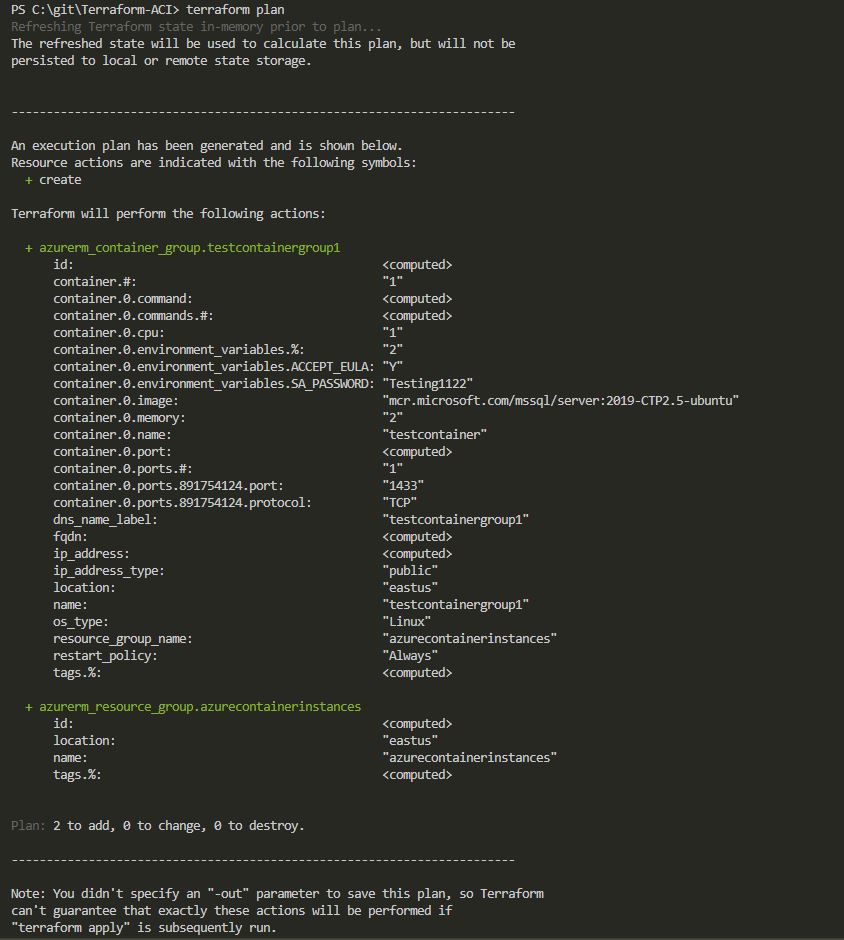
And now we can test the deployment (also love this feature): –

terraform plan

Terraform Plan.JPG

If all looks good, we can deploy!

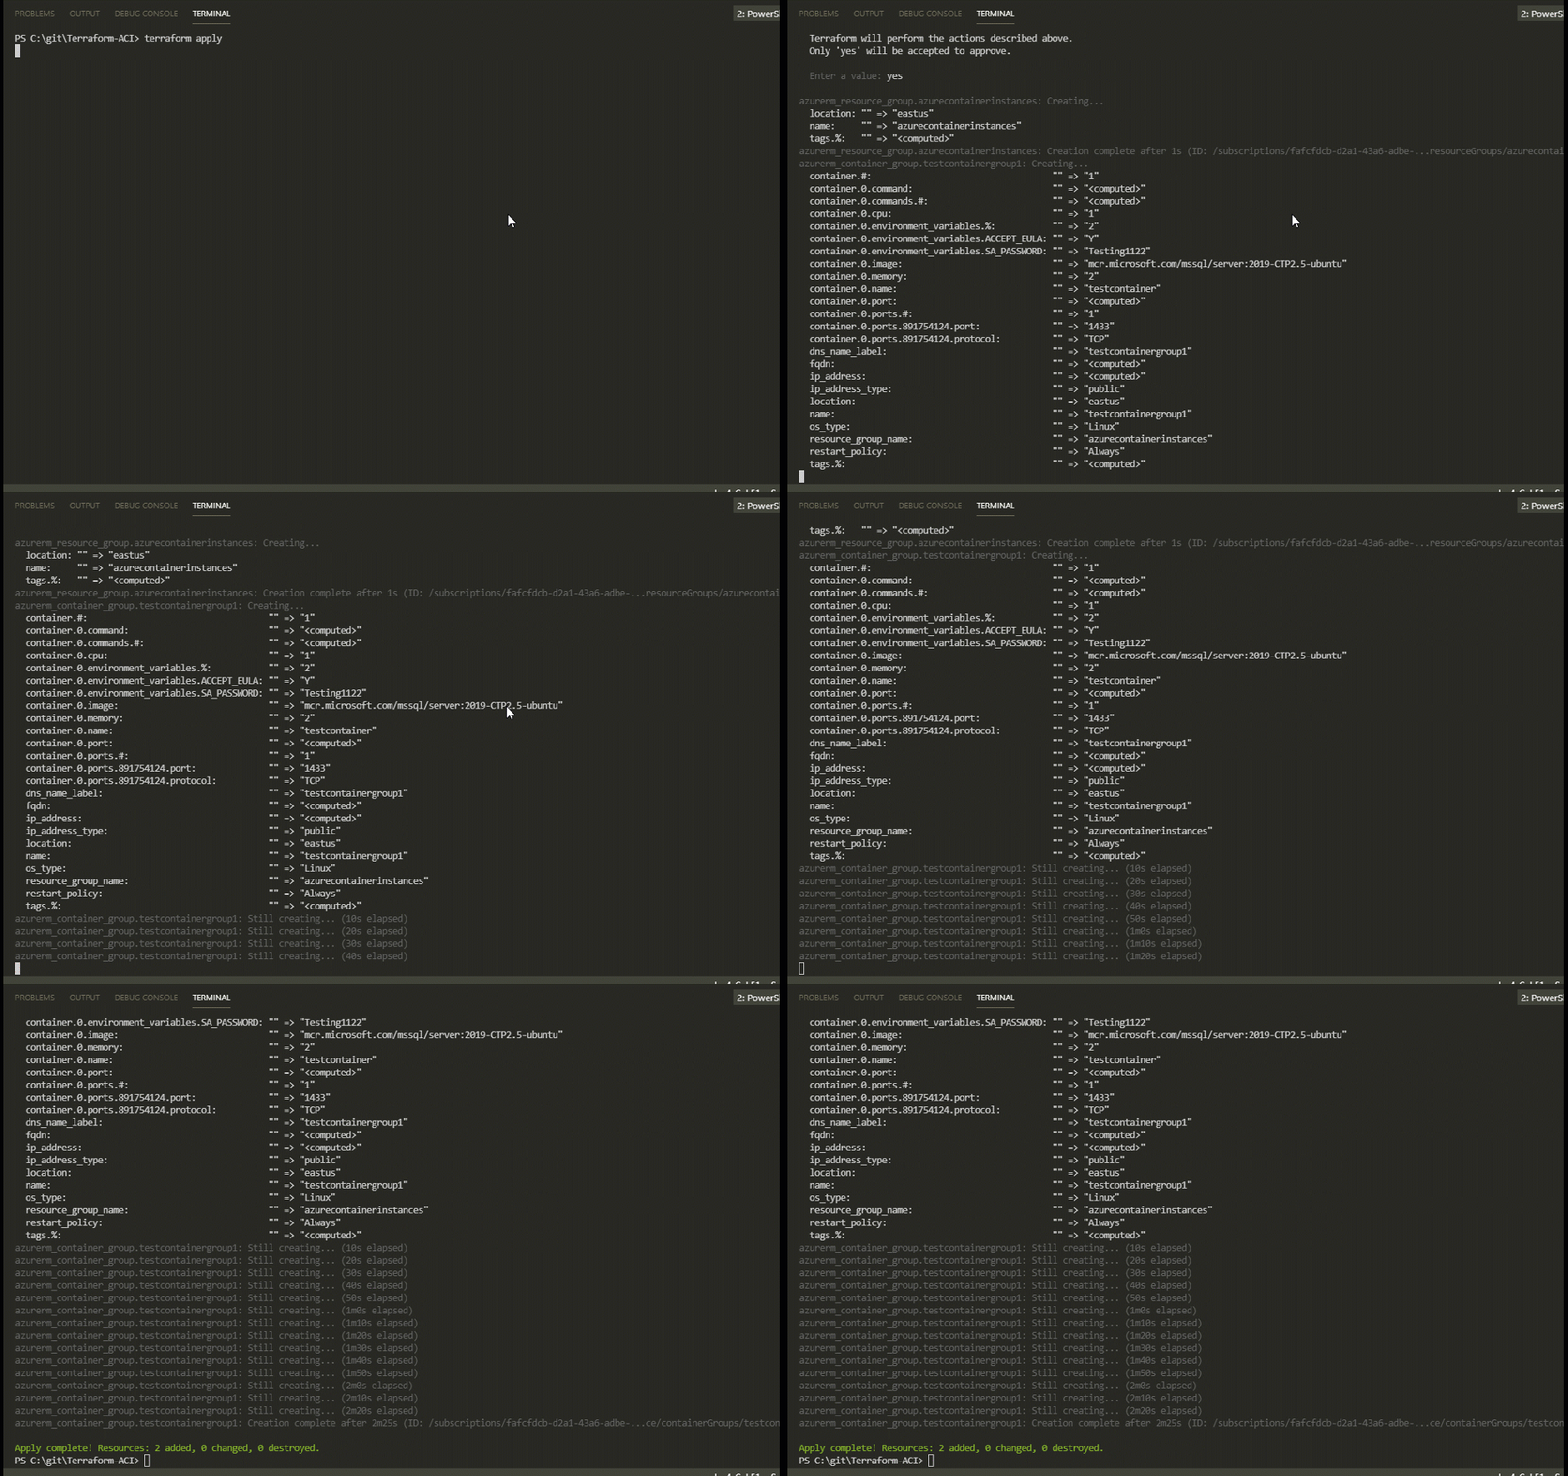
terraform apply

Awesome stuff. Terraform will give us updates on how the deployment is doing: –

Terraform-ACI-1.gif

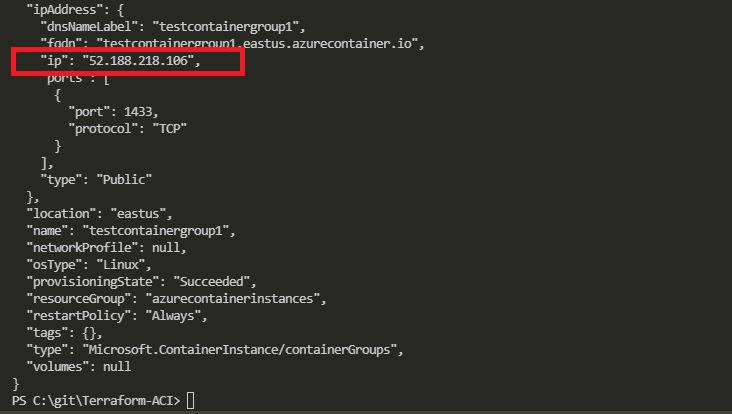
To get the IP address of the new Azure Container Instance: –

az container show --name testcontainergroup1 --resource-group azurecontainerinstances

Show Container Details.JPG

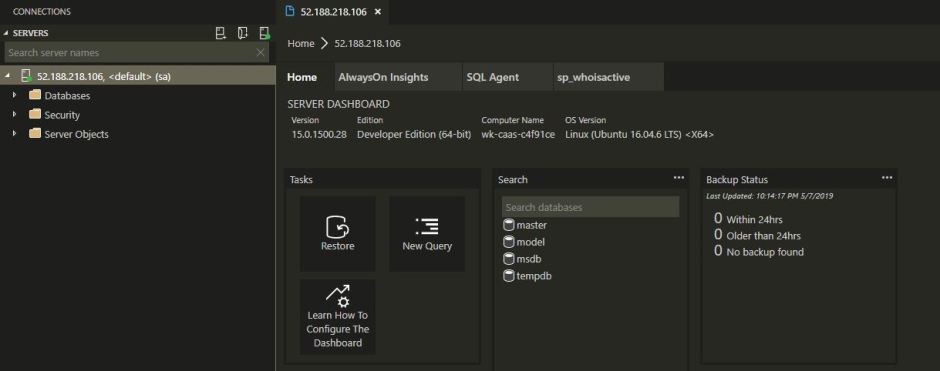
Drop that IP Address into SSMS or ADS: –

Azure Data Studio.JPG

And boom! We are connected to SQL Server 2019 CTP2.5 running in an Azure Container Instance deployed with Terraform.

If you want to tear down what’s just been built, you can run: –

terraform destroy

Thanks for reading!

0

Creating a custom kubectl plugin to connect to SQL Server in Kubernetes

One of the really cool things about kubectl (pronounced cube control) is the ability to extend it’s functionality with custom plugins.

These plugins are simply files named kubectl-xxx dropped into a PATH directory on your local machine that contain some code. Let’s have a go building a couple here.


N.B. – Try as I might I could not get this to work from a powershell session (where I usually run all my kubectl commands). It either wouldn’t recognise the new plugin or threw unsupported on windows at me. To get plugins to work on Windows I used the Windows Subsystem for Linux


OK, let’s create a file called kubectl-foo that’ll return Hello SQL Server folks! when executed: –

echo '#!/bin/bash
echo "Hello SQL Server folks!"' > kubectl-foo

Make the file executable: –

chmod +x kubectl-foo

And then copy it into one of your PATH locations (I’m using /usr/local/bin): –

sudo cp kubectl-foo /usr/local/bin

Now we can test to see if kubectl is picking it up: –

kubectl plugin list

Cool! Now we can run it: –

kubectl foo

Great stuff! Let’s build another one but this time a little more complicated.

When I deploy SQL Server to Kubernetes I usually create a load balanced service so that I can get an external IP to connect from my local machine to SQL running in the cluster. So how about creating a plugin that will grab that external IP and drop it into mssql-cli?

Let’s have a go at creating that now.

Create a file called kubectl-prusk 🙂 and open it in your favourite editor (I’m using nano): –

touch kubectl-prusk

nano kubectl-prusk

Then drop the following into it: –

#!/bin/bash

ExternalIP=$(kubectl get services -o=jsonpath='{..status.loadBalancer.ingress[*].ip}' $1)

mssql-cli -S $ExternalIP -U sa -P  $2

EDIT – 2019-09-12

David Barbarin (b|t) advised that the following can be used to grab the port of the service:-

ExternalPort=$(kubectl get services -o=jsonpath='{..ports[*].port}' $1)

And then connect in by: –

mssql-cli -S $ExternalIP,$ExternalPort -U sa -P $2

Thanks David!


What we’re doing here is parsing the output of kubectl get services (I use http://jsonpath.com/ as a guide), collecting the external IP of the service, and then passing it into mssql-cli.

$1 and $2 are variables for the service name and SQL sa password that will be passed in when we call the plugin.

Now, same as before, we need to make the file executable: –

chmod +x kubectl-prusk

And copy it to a PATH location: –

sudo cp kubectl-prusk /usr/local/bin

Check that it’s there: –

kubectl plugin list

Awesome. Ok, I’ve already got a SQL deployment and load balanced service running
in my K8s cluster up in AKS (check out how to do that here): –

kubectl get all

So let’s try out the new kubectl prusk plugin.

The plugin will grab the external IP of the service (called sqlserver-service) and drop it into mssql-cli with the sa password that we pass in (Testing1122 in this case): –

kubectl prusk sqlserver-service Testing1122

And boom! We’re connected into SQL running in our cluster. 🙂

That was a couple of really simple examples but I hope they showed the power of kubectl plugins, we can write some really cool things with them.

Thanks for reading!


N.B. – You may get the following error when running the plugin


It’s intermittent so try re-running the command


12

Using docker named volumes to persist databases in SQL Server

I’ve previously talked about using named volumes to persist SQL Server databases but in that post I only used one named volume and I had to manually reattach the databases after the container spun up.

This isn’t really ideal, what we’d want is for the databases to automatically be attached to the new container. Thankfully there’s an easy way to do it, so let’s run through how here.

N.B. – Thanks to Anthony Nocentino (b|t) for pointing this out to me…it was a real d’oh moment 🙂

First thing, is to create two named volumes: –

docker volume create mssqlsystem
docker volume create mssqluser

And now spin up a container with the volumes mapped: –

docker container run -d -p 16110:1433 \
--volume mssqlsystem:/var/opt/mssql \
--volume mssqluser:/var/opt/sqlserver \
--env ACCEPT_EULA=Y \
--env SA_PASSWORD=Testing1122 \
--name testcontainer \
mcr.microsoft.com/mssql/server:2019-CTP2.3-ubuntu

The mssqluser named volume is going to be mounted as /var/opt/sqlserver and the mssqlsystem volume is going to be mounted as /var/opt/mssql. This is the key to the databases automatically being attached in the new container, /var/opt/mssql is the location of the system databases.

If we didn’t mount a named volume for the system databases any changes to those databases (particularly for the master database) would not be persisted so the new container would have no record of any user databases created.

By persisting the location of the system databases, when SQL starts up in the new container the changes made to the master database are retained and therefore has a record of the user databases. This means the user databases will be in the new instance in the new container (as long as we’ve persisted the location of those databases, which we’re doing with the mssqluser named volume).

Let’s create a database on the mssqluser named volume: –

USE [master];
GO

CREATE DATABASE [testdatabase]
ON PRIMARY
    (NAME = N'testdatabase', FILENAME = N'/var/opt/sqlserver/testdatabase.mdf')
LOG ON
    (NAME = N'testdatabase_log', FILENAME = N'/var/opt/sqlserver/testdatabase_log.ldf');
GO

And now blow the container away: –

docker kill testcontainer
docker rm testcontainer

That container is gone, but we still have our named volumes: –

docker volume ls

So we can now spin up another container, using those volumes: –

docker container run -d -p 16120:1433 \
--volume mssqlsystem:/var/opt/mssql \
--volume mssqluser:/var/opt/sqlserver \
--name testcontainer2 \
mcr.microsoft.com/mssql/server:2019-CTP2.3-ubuntu

UPDATE – As pointed out in the comments by Patrick Flynn, the environment variables ACCEPT_EULA and SA_PASSWORD do not need to be set for the second container as we have persisted the system databases so their values have been retained

Connect to the SQL instance in the new container…

And boom! The database is there!

Thanks for reading!

0

Using Github as a repository for SQL Server Helm Charts

In a previous post I ran through how to create a custom SQL Server Helm chart.

Now that the chart has been created, we need somewhere to store it.

We could keep it locally but what if we wanted to use our own Helm chart repository? That way we wouldn’t have to worry about deleting the chart on our local machine.

I use Github to store all my code to guard against accidentally deleting it (I’ve done that more than once) so why not use Github to store my Helm charts?

Let’s run through setting up a Github repo to store our Helm charts.

First thing to do is create a new Github repo: –

Clone the new repo down:-

git clone https://github.com/dbafromthecold/SqlServerHelmCharts.git

Navigate to the repo:-

cd C:\git\dbafromthecold\SqlServerHelmCharts

And now package the SQL Server Helm chart and copy it to the cloned, empty repo:-

helm package C:\Helm\testsqlchart \

Now create the index.yaml file in the repo (this is what we’ll link to in order to identify the repo locally):-

helm repo index .

Commit the changes and push to GitHub:-

git add .
git commit -m 'Added testsqlchart to repo'
git push

Go back to the Github repo and view the raw index.yaml file: –

Grab the HTTPS address (removing the index.yaml from the end) and drop it into the helm repo add statement:-

helm repo add dbafromthecold https://raw.githubusercontent.com/dbafromthecold/SqlServerHelmCharts/master

To confirm the repo has been added:-

helm repo list

To see if all is well:-

helm repo update

If you’re using VS Code and have the Kubernetes extension, you will be able to view the new repo under the Helm section: –

Final test is to perform a dry run:-

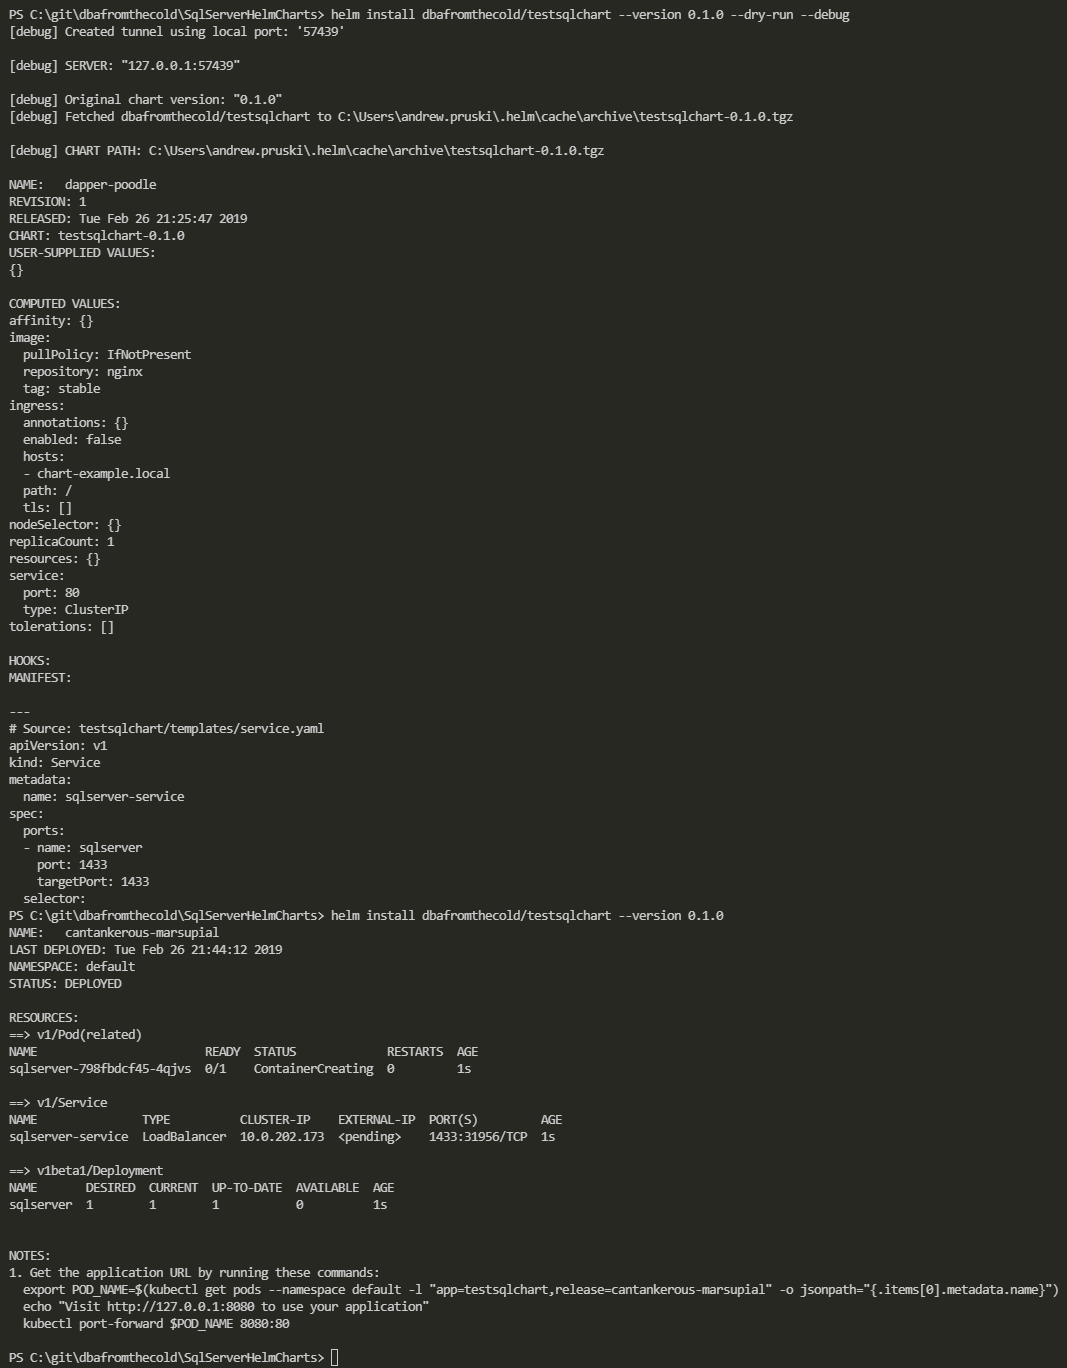
helm install dbafromthecold/testsqlchart --version 0.1.0 --dry-run --debug

If all looks good, then deploy!

helm install dbafromthecold/testsqlchart --version 0.1.0

To check your helm deployments: –

helm list

To check on the deployment/pod/service created by the helm chart: –

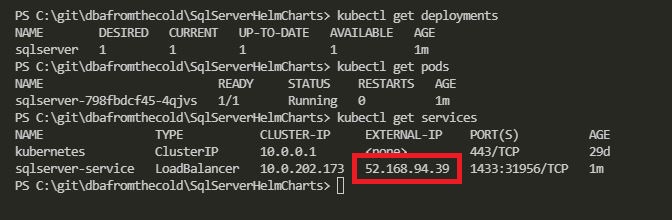
kubectl get deployments

kubectl get pods

kubectl get services

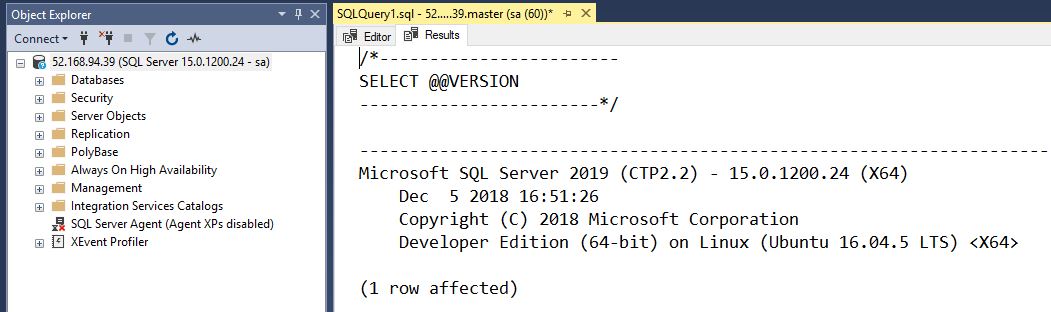
Once that external IP comes up it can be dropped into SSMS to connect: –

And BOOM! Connected to SQL Server running in Kubernetes deployed via a Helm package from a custom repo! 🙂

N.B. – To delete the deployment (deployment name grabbed from helm list): –

helm delete cantankerous-marsupial

Thanks for reading!

0

Displaying the tags within the SQL Server docker repository

A while back Microsoft moved all their SQL images to their new registry mcr.microsoft.com which means that we can no longer see the SQL repository when running docker search

Error response from daemon: Unexpected status code 404

To be honest, this isn’t really that much of an issue for me. I know the name of the repository that has the SQL Server images in it. What I really want to be able to do is view the tags of the images within it (this was a pain point with the images in the mssql-server-linux repository as well).

So I was pretty excited when a few days ago I saw this tweet by Tobias Fenster which said that mcr.microsoft.com supports the hub catalog API.

The hub catalog API allows us to view the tags of images within a repository!

It’s really simple to get the tags (the trick was finding the correct HTTP address): –

$repo = invoke-webrequest https://mcr.microsoft.com/v2/mssql/server/tags/list
$repo.content

And there we have it, all the tags listed for the SQL Server images within the repository.

Thanks for reading!