0

Shutting down nodes in Azure Kubernetes Service

A while back I wrote a post on Adjusting Pod Eviction Timings in Kubernetes. To test the changes made in that post I had to shut down nodes in an Azure Kubernetes Service cluster.

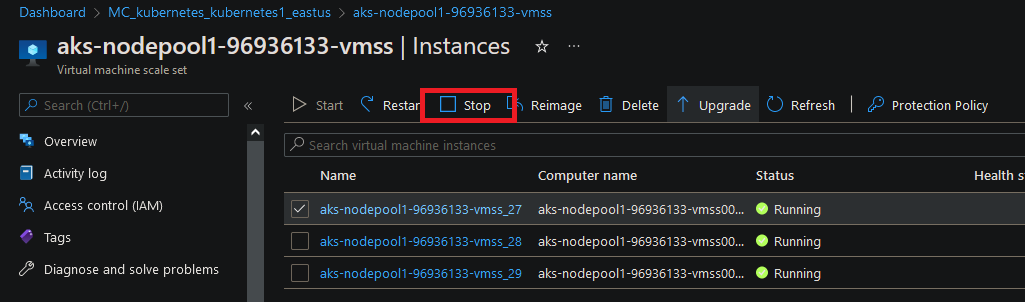
This can be done easily in the Azure portal: –

However I did a presentation recently and didn’t want to have to keep jumping into the portal from VS Code…so I wanted to be able to shut down the nodes in code.

So here’s how to use the azure-cli to shut down a node in an Azure Kubernetes Service cluster.


DISCLAIMER – the following code should only be run against a test cluster!


Firstly, to test, let’s deployment a simple application to the cluster: –

kubectl create deployment test --image=nginx

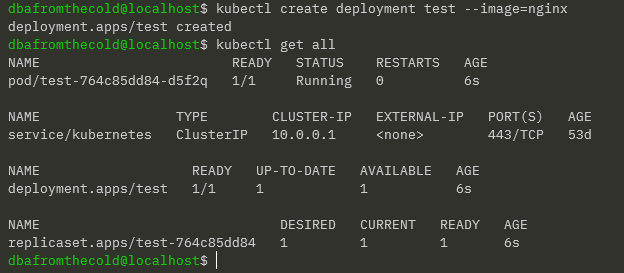
Confirm: –

kubectl get all

To check the node that the pod is running on: –

kubectl get pods -o wide

kubectl get pods -o jsonpath="{.items[0].spec.nodeName}"

Assign the node that the pod is running on to a variable (we’ll use this in a minute): –

NODE=$(kubectl get pods -o jsonpath="{.items[0].spec.nodeName}" | sed 's/.$/\U&/')  && echo $NODE

N.B. – the sed command at the end of the statement above is to make sure that the last character of the node name is in upper case, which is needed to get the instance ID of the VM in a later statement.

OK now we can look at shutting down the node that the pod is running on.

Nodes in AKS run in a nodepool which is a virtual machine scale set that is in a different resource group that the kubernetes cluster itself. The naming convention of that resource group is: –

MC_resourcegroup_clustername_location

The cluster in the examples here is called kubernetes1 in the resource group kubernetes in EASTUS.

So set the resource group name: –

RESOURCEGROUP="MC_kubernetes_kubernetes1_eastus"

Now we can grab the VMSS name in two ways, firstly by running: –

VMSSNAME=$(az vmss list --resource-group $RESOURCEGROUP --query "[].name" -o tsv) && echo $VMSSNAME 

N.B. – AKS clusters can have multiple nodepools in which case the query above will return multiple values and won’t work.

Or we use the $NODE variable we set earlier and strip out the last few characters: –

VMSSNAME=${NODE:0:27} && echo $VMSSNAME 

Once we have the NODE name and the VMSS name, we need to get the instance ID of the VM in the scale set:-

INSTANCEID=$(az vmss list-instances --name $VMSSNAME --resource-group $RESOURCEGROUP --query "[?osProfile.computerName=='$NODE'].[instanceId]" -o tsv) && echo $INSTANCEID

And now we can shut down the node: –

az vmss deallocate --name $VMSSNAME --instance-ids $INSTANCEID --resource-group $RESOURCEGROUP

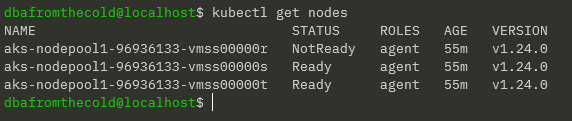
Confirm that the node is offline: –

kubectl get nodes

Great! The node is offline! Our test pod didn’t have any tolerations set so it’ll take 5 minutes for a new pod to be created on a healthy node. You can check out how to adjust this in my previous post.

Finally, to restart the node: –

az vmss start --name $VMSSNAME --instance-ids $INSTANCEID --resource-group $RESOURCEGROUP

And that’s how to shutdown a node in AKS to test pod eviction!

Thanks for reading!

5

Installing the mssql-cli on Ubuntu 22.04

I really like the mssql-cli tool. I use it pretty much everyday however it seems like it’s not being maintained anymore and as such, there are issues when trying to install it on Ubuntu 22.04.

The issue with Ubuntu 22.04 is that it has python 3.10 installed by default which the current mssql-cli is not compatible with. I did try installing previous versions of python (3.8 and 3.9) but had no luck so kept the default version.

The steps that follow are how I worked out how to get the mssql-cli installed on an Azure Ubuntu 22.04 fresh install. This is pretty hacky tbh so should only be done on development and test servers.

Also, if you’re running Ubuntu 20.04 only the first steps are required to get the mssql-cli working (as that has python 3.8 installed by default).

First ssh to the VM: –

ssh dbafromthecold@XXXXXXXXXXXXX

Confirm the python version: –

python3 --version

In order to test the mssql-cli we’ll need to spin up a SQL container and to do that we’ll need Docker installed.

The instructions on how to install Docker on Ubuntu are here: – https://docs.docker.com/engine/install/ubuntu/

Once docker is installed, run a SQL container: –

docker container run -d \
--publish 1433:1433 \
--env ACCEPT_EULA=Y \
--env MSSQL_SA_PASSWORD=Testing1122 \
--name sqlcontainer1 \
mcr.microsoft.com/mssql/server:2019-CU15-ubuntu-18.04
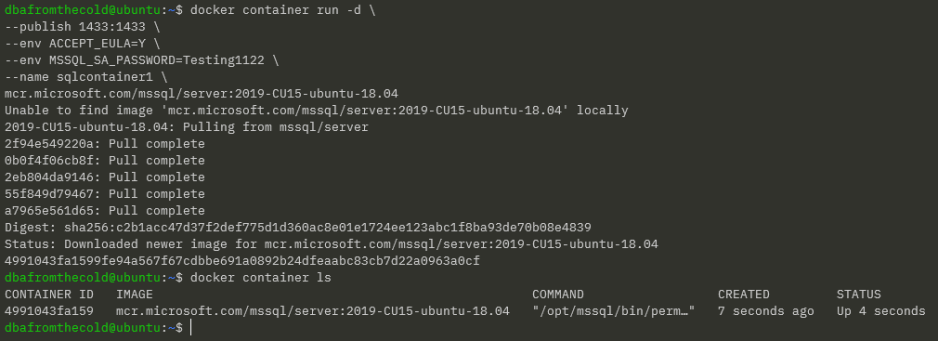
Now install pip: –

sudo apt install -y python3-pip

And then install mssql-cli with pip: –

pip install mssql-cli

Add location of mssql-cli to our path: –

export PATH=$PATH:~/.local/bin

N.B. – Add this to .bashrc to make permanent

Ok, now we have the mssql-cli we can test connecting to SQL in our container: –

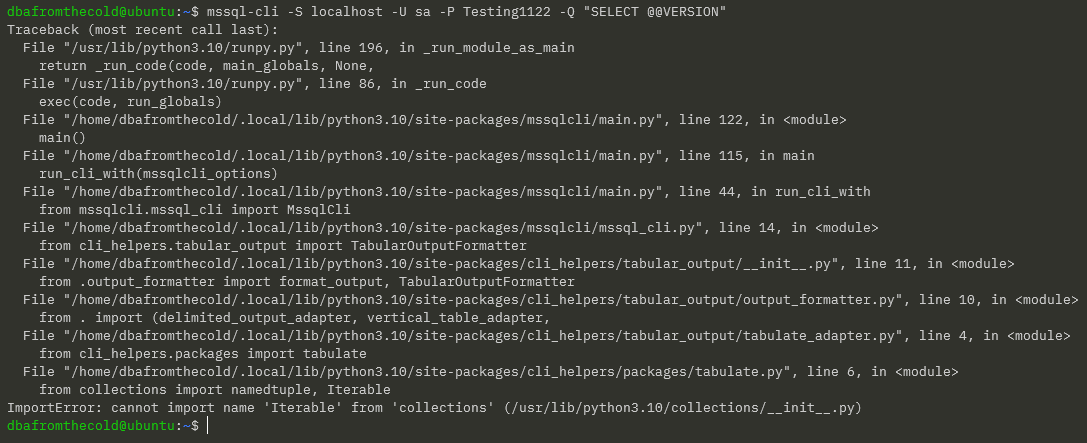
mssql-cli -S localhost -U sa -P Testing1122 -Q "SELECT @@VERSION"

Which gives us this error: –

Ok, let’s have a look at the file: –

cat ~/.local/bin/mssql-cli

The issue is that the reference to python here needs to be updated to python3: –

sed -i 's/python/python3/g' ~/.local/bin/mssql-cli

Confirm the update: –

cat ~/.local/bin/mssql-cli
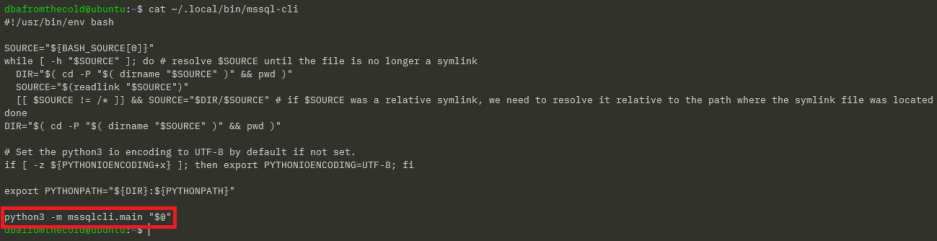
Test connecting to SQL container again: –

mssql-cli -S localhost -U sa -P Testing1122 -Q "SELECT @@VERSION"

N.B. – if you’re on Ubuntu 20.04 the mssql-cli should now be working
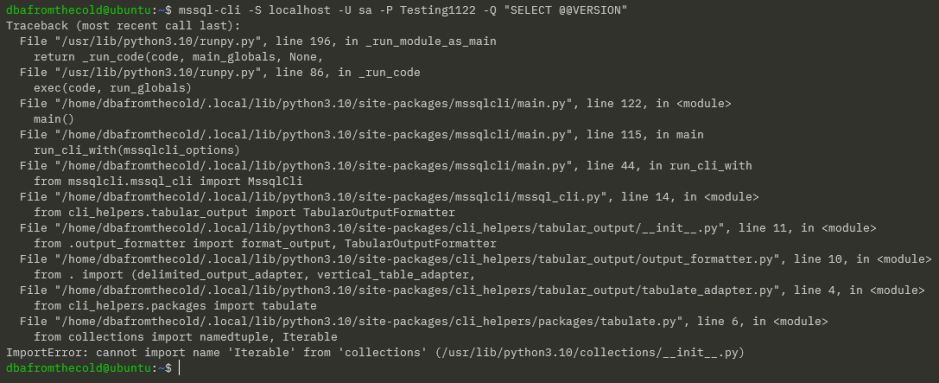
But on Ubuntu 22.04 we get a new error. From looking at the open issues on the mssql-cli issues page on Github…we need to force upgrade the cli-helpers python module: –

pip install cli-helpers --upgrade --force

Test connecting to SQL container again: –

mssql-cli -S localhost -U sa -P Testing1122 -Q "SELECT @@VERSION"
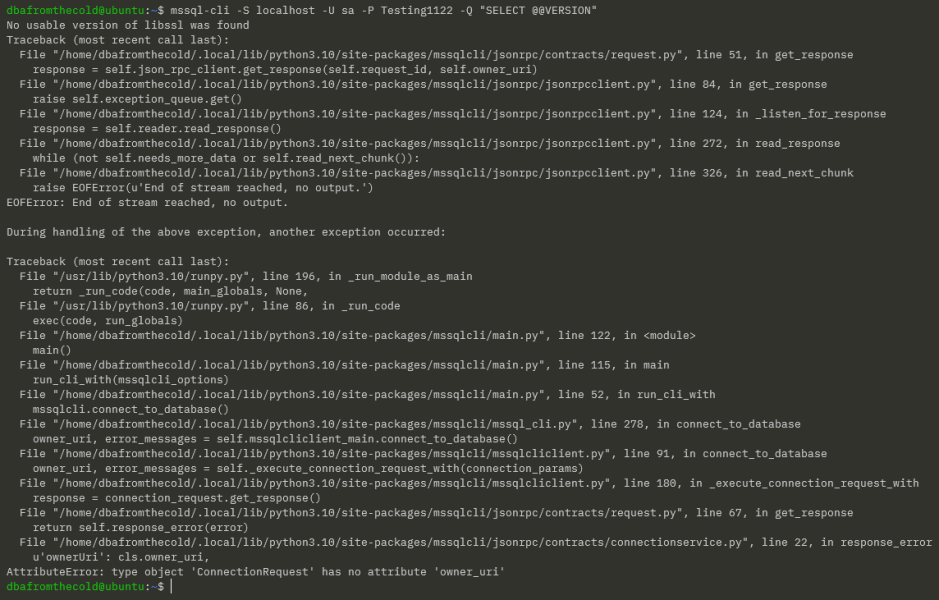
OK new error! Progress 🙂

To resolve this we need to remove references to ownerUri on lines 22 and 93 in the connectionservice.py file: –

vim ~/.local/lib/python3.10/site-packages/mssqlcli/jsonrpc/contracts/connectionservice.py

Test connecting to SQL container again: –

mssql-cli -S localhost -U sa -P Testing1122 -Q "SELECT @@VERSION"

OK that’s pretty clear…install libssl1.0.0: –

wget http://archive.ubuntu.com/ubuntu/pool/main/o/openssl1.0/libssl1.0.0_1.0.2n-1ubuntu5_amd64.deb
sudo dpkg -i libssl1.0.0_1.0.2n-1ubuntu5_amd64.deb

Test connecting to SQL container again: –

mssql-cli -S localhost -U sa -P Testing1122 -Q "SELECT @@VERSION"
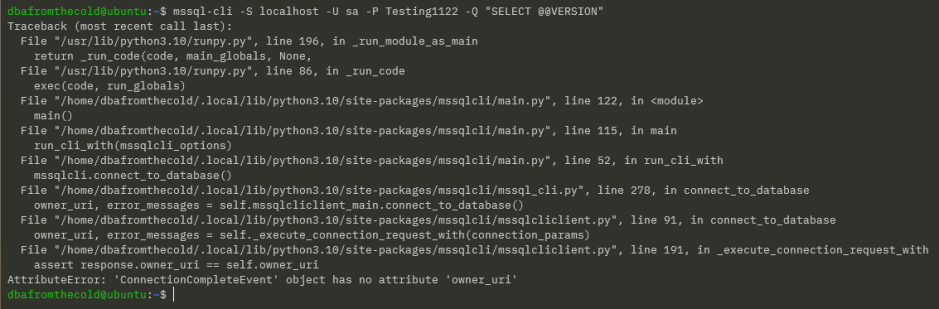
Ha, OK another new error!

To resolve this one we need to remove references to owner_uri from lines 91, 93, and 191 in the mssqlcliclient.py file: –

vim ~/.local/lib/python3.10/site-packages/mssqlcli/mssqlcliclient.py

One more test connecting to SQL in the container: –

mssql-cli -S localhost -U sa -P Testing1122 -Q "SELECT @@VERSION" to the server: -
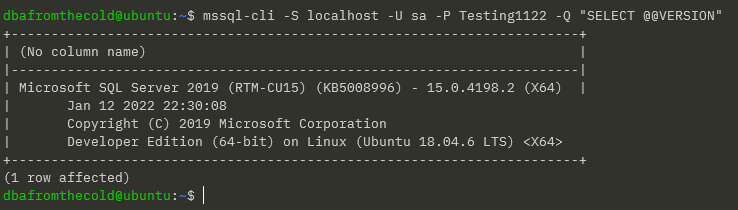
Ha success! I’ve dropped all the commands into this gist

Thanks for reading!
2

Space Invaders on Kubernetes

A while ago I blogged about an awesome Chaos Engineering tools built by Eugenio Marzo (t) call KubeInvaders.

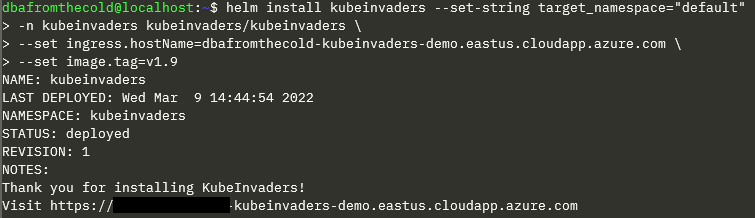
Since then Eugenio has updated the repo to make it easier to deploy KubeInvaders using Helm! So here’s how to deploy KubeInvaders to Azure Kubernetes Service using Helm.

Pre-requisities that need to be installed to run the code here are: –

Windows Subsystem for Linux (or a bash terminal)
Azure-Cli
Kubectl
Helm

First thing to do is log in with the azure cli: –

az login

Create a resource group: –

az group create --name kubeinvaders --location EASTUS

Spin up a AKS cluster: –

az aks create --resource-group kubeinvaders --name kubeinvadersclu --node-count 2

Get credentials to connect kubectl to AKS cluster: –

az aks get-credentials --resource-group kubeinvaders --name kubeinvadersclu

Confirm connection to AKS cluster: –

kubectl get nodes

Add the helm repo for the ingress-nginx controller: –

helm repo add ingress-nginx https://kubernetes.github.io/ingress-nginx

Confirm helm repositories: –

helm repo list

Install the ingress-nginx controller: –

helm install ingress-nginx ingress-nginx/ingress-nginx \
--create-namespace \
--namespace ingress-basic \
--set controller.service.annotations."service\.beta\.kubernetes\.io/azure-load-balancer-health-probe-request-path"=/healthz

EDIT – 2023-01 – Updated to add in the annotation

List resources in the ingress-basic namespace: –

kubectl get all -n ingress-basic

Note the external IP of the controller and set the IP address to a variable: –

IP="XX.XX.XXX.XX"

Set a DNS name for the external IP address to a variable: –

DNSNAME="SOMETHING-kubeinvaders"

Get the resource-id of the external ip: –

PUBLICIPID=$(az network public-ip list --query "[?ipAddress!=null]|[?contains(ipAddress, '$IP')].[id]" --output tsv)

Update external ip address with DNS name: –

az network public-ip update --ids $PUBLICIPID --dns-name $DNSNAME

Display the FQDN: –

az network public-ip show --ids $PUBLICIPID --query "[dnsSettings.fqdn]" --output tsv

Now we’re ready to deploy KubeInvaders!

Add the kubeinvaders helm repository: –

helm repo add kubeinvaders https://lucky-sideburn.github.io/helm-charts/

Confirm helm repositories: –

helm repo list

Create a kubeinvaders namespace: –

kubectl create namespace kubeinvaders

Deploy kubeinvaders: –

helm install kubeinvaders --set-string target_namespace="default" \
-n kubeinvaders kubeinvaders/kubeinvaders \
--set ingress.enabled=true \
--set ingress.hostName=SOMETHING-kubeinvaders.eastus.cloudapp.azure.com \
--set image.tag=v1.9

EDIT – 2023-01 – Updated to add in –set ingress.enabled=true

Now go to the FQDN set above in your browser.

If you get a 404 when going to the website it is because there’s a line missing from the annotations of the kubeinvaders ingress.

To fix this edit the ingress: –

kubectl edit ingress -n kubeinvaders

And add the following line: –

kubernetes.io/ingress.class: "nginx"

Save the updated ingress and go back to your FQDN and there is KubeInvaders!

Thanks for reading!
0

Replacing VS Code with Vim

OK so maybe not replacing, this is more like emulating VS Code in Vim.

Disclaimer – I like VS Code and I won’t be uninstalling it anytime soon and I’m not recommending people do.

However, I feel it can be overkill for 90% of the work that I do. So I’ve been playing around with Vim to see if it will give me what I want.

What I really want is a light weight text editor that allow me to run commands in a terminal…that’s it!

So here’s what my Vim setup looks like: –

I have a file system explorer on the left, a code editor panel to the right, and a terminal open below that. I can select code in the editor and pass it down to the terminal.

Ok, I’ll admit…configuring Vim can be daunting, especially when (like myself) you have limited experience with it. BUT it is endlessly customisable and can do pretty much anything you need.

Let’s go through my setup, starting with the file tree explorer which is NERDTree.

I’m not using any Vim plugin manager. I just cloned the NERDTree repo down, and dropped it into: –

~\vimfiles\pack\vendor\start

Then once in Vim I can run :NERDTree and voila! It opens up on the left hand side.

That’s the only plugin I currently have. There are thousands of Vim plugins but I’m trying to keep this setup as lightweight as possible so I haven’t installed any others.

Ok, time for the rest of the configuration…which is all done in my vimrc file.

First thing is to switch NERDTree to a minimal UI config: –

let NERDTreeMinimalUI=1

OK, now to configure the shell. I want to use powershell v7 as my default shell (without that annoying startup message), so I dropped this into the file: –

set shell=pwsh\ -nologo

Then I enabled syntax highlighting in the editor: –

syntax on

And I also wanted the current line to be highlighted in the editor: –

set cursorline
highlight CursorLine cterm=NONE ctermbg=0

Cool, ok now for some shortcuts. To use Ctrl+/ to switch between the editor and the terminal: –

noremap <C-/> <C-w>j
tnoremap <C-/> <C-w>k

And to use Ctrl+; to execute code from the editor in the terminal: –

noremap <C-;> Y<C-W>j<C-W>"0<C-W>k

Now to open NERDTree and a terminal on Vim startup: –

autocmd vimenter * below terminal
autocmd vimenter * NERDTree

Then I’m setting a couple of aliases for the terminal and NERDTree: –

cabbrev bterm below term
cabbrev ntree NERDTree

Finally, some generic Vim settings: –

set number
set nocompatible
set backspace=indent,eol,start
set nowrap
set nobackup
set noswapfile
set noundofile

My whole vimrc file is available here. It’s very much a work in progress as I find myself constantly tweaking it 🙂

But that’s how I’ve got Vim configured…coupled with the Windows Terminal and powershell profile settings…it’s pretty awesome!

Ok, it’ll never have all the features that VS Code does but this was fun to configure and play around with.

Thanks for reading!

0

Running Powershell code in Vim

I’ve been mucking about with Vim a bit recently and recently found myself (for reasons unknown tbh) writing powershell scripts in it.

Once I’d written a script, I would exit Vim to run it…however…that got me thinking, can I run powershell scripts directly in Vim?


DISCLAIMER – There’s no real reason to do this, I’d recommend using Visual Studio Code if you’re working with powershell. This is just a bit of fun 🙂


Anyway, there does seem to be a bunch of different ways to run code directly from Vim but I thought I’d share the way I’ve been doing it.

First things first, let’s install Vim. The easiest way to do so is via chocolately: –

choco install vim-tux

Once that’s installed we’re good to go! Let’s create a simple test file: –

New-Item C:\temp\test.ps1

And now open it in Vim: –

vim C:\temp\test.ps1

Let’s run something simple to try it out, add the following to test.ps1: –

$psversiontable.psversion

Ok, to run that line of powershell, hit esc and then type: –

:.w !powershell

And hit enter!

What this is doing is sending that one line to powershell which is then executing it. But what if we want to execute multiple lines of code?

To do that, we hit v to enter visual mode in Vim, then select the lines we want to execute with j, and then enter: –

: w !powershell

Vim will automatically add in ‘<,’> after the colon which indicates the selected lines.

So say we wanted to retrieve the versions of a bunch of SQL instances with this: –

Import-Module sqlserver

$Servers = Get-Content C:\temp\sqlserver.txt

foreach($Server in $Servers){
    Invoke-SqlCmd -ServerInstance $Server -Query "SELECT @@VERSION"
}

We can do that (somewhat) easily!

Kinda cool, eh?

Oh, and if you want to get rid of that annoying logo that pops up when powershell starts…add this to your vimrc file: –

cnoreabbrev powershell powershell -nologo

N.B. – The vimrc file usually lives at C:\users\USERNAME\vimfiles\vimrc, you may need to create the folder and the file itself.

Ok, not the most practical way of running powershell code but I thought it was kinda cool 🙂

Thanks for reading!