Running SQL Server containers as non-root

Recently I noticed that Microsoft uploaded a new dockerfile to the mssql-docker repository on Github. This dockerfile was under the mssql-server-linux-non-root directory and (you guessed it) allows SQL Server containers to run as non-root.

But why is running a container as root bad? Let’s run through an example.

Using a non-root user: –

Run a SQL Server 2019 container with /etc mounted:-

docker run -d -p 15789:1433 \
--volume /etc:/etc \
--env SA_PASSWORD=Testing1122 \
--env ACCEPT_EULA=Y \
--name testcontainer \
mcr.microsoft.com/mssql/server:2019-RC1-ubuntu

Have a look at the logs: –

docker logs testcontainer

So even though I ran the container as a non-root user, the container is running as root.

Here’s the reason that’s bad. Exec into the container: –

docker exec -it testcontainer bash

Now create a user and add to the super user’s group: –

useradd testuser
passwd testuser
adduser testuser sudo

The user has been created and added to the super user’s group within the container. But if we come out of the container and run: –

cat /etc/group | grep sudo

The user is in the super user group on the host! Which means we can do: –

su testuser

Because we mounted the /etc directory into the container, the user created in the container is also created on the host!

And that’s why running containers as root is bad.


EDIT: November 2019

The new SQL Server 2019 run as a non-root user by default, these images are: –

mcr.microsoft.com/mssql/server:2019-GA-ubuntu-16.04
mcr.microsoft.com/mssql/server:2019-GDR1-ubuntu-16.04

So there’s no need to build your own image but the process below will show you how to (if you want to see how it’s done).


Let’s fix this by running SQL Server 2019 in a non-root container. First thing to do is create a mssql user on the host (you’ll have to run this as a user with sudo rights): –

useradd -M -s /bin/bash -u 10001 -g 0 mssql

N.B. – this user is needed as it’s created in the dockerfile, without it on the host the build will complete but any containers created from the image will crash.

Now, build the image from the dockerfile on Github: –

docker build -t 2019-nonroot .

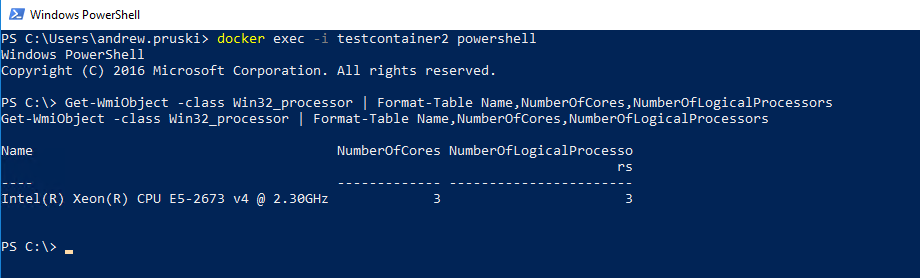
Let’s try to run this container with /etc mounted: –

docker run -d -p 15799:1433 \
--volume /etc:/etc \
--env SA_PASSWORD=Testing1122 \
--env ACCEPT_EULA=Y \
--name testcontainer2 \
2019-nonroot

We can see that the container is running as the user mssql and it’s errored out as it does not have access to the /etc directory that we tried to mount!

So now that we have the option to run SQL Server in containers as a non-root user, I would absolutely recommend that you do so.

Thanks for reading!

Converting SQL Server docker compose files for Kubernetes with Kompose

Docker compose is a great tool for easily deploying docker container without having to write lengthy docker run commands. But what if I want to deploy my docker-compose.yaml file into Kubernetes?

Kompose is a tool that can convert docker compose files so that they can be deployed to a Kubernetes cluster.

Here’s a typical docker-compose.yaml file I use: –

version: '3'
 
services:
    sqlserver1:
        image: mcr.microsoft.com/mssql/server:2019-CTP3.1-ubuntu
        ports:  
          - "15789:1433"
        environment:
          SA_PASSWORD: "Testing1122"
          ACCEPT_EULA: "Y"
          MSSQL_DATA_DIR: "/var/opt/sqlserver/data"
          MSSQL_LOG_DIR: "/var/opt/sqlserver/log"
          MSSQL_BACKUP_DIR: "/var/opt/sqlserver/backup"
        volumes: 
          - sqlsystem:/var/opt/mssql/
          - sqldata:/var/opt/sqlserver/data
          - sqllog:/var/opt/sqlserver/log
volumes:
  sqlsystem:
  sqldata:
  sqllog:

This will spin up one container running SQL Server 2019 CTP 3.1, accept the EULA, set the SA password, and set the default location for the database data/log/backup files using named volumes created on the fly.

Let’s convert this using Kompose and deploy to a Kubernetes cluster.

To get started with Kompose first install by following the instructions here. I installed on my Windows 10 laptop so I downloaded the binary and added to my PATH environment variable.

Before running Kompose I had to make a slight change to the docker-compose.yaml file because when I deploy SQL Server to Kubernetes I want to create a LoadBalanced service so that I can connect to the SQL instance remotely. To get Kompose to create a LoadBalanced service I had to add the following to my docker-compose.yaml file (under the first volumes section): –

        labels:
          kompose.service.type: LoadBalancer

Then I navigated to the location of my docker-compose.yaml file and ran: –

kompose convert -f docker-compose.yaml

Which created the corresponding yaml files!

Looking through the created files, they all look good! The PVCs will use the default storage class of the Kubernetes cluster that you’re deploying to and the deployment/service don’t need any adjustment either.

So now that I have the yaml files to deploy into Kubernetes, I simply run:-

kompose up

And the files will be deployed to my Kubernetes cluster!

OK, kubectl describe pods will show errors initially when the pod is first created as the PVCs haven’t been created but it will retry.

Once the pod is up and the service has an external IP address, the SQL instance can be connected to. Nice and easy!

Cleaning up is also a cinch, just run:-

kompose down

And the objects will be deleted from the cluster.

Thanks for reading!

Chaos engineering for SQL Server running on AKS using KubeInvaders


UPDATE – March 2022
I have publised an updated guide to deploying KubeInvaders on AKS here: –
Space Invaders on Kubernetes


A couple of weeks ago I came across an awesome GitHub repo called KubeInvaders which is the brilliant work of Eugenio Marzo (b|t)

KubeInvaders allows you to play Space Invaders in order to kill pods in Kubernetes and watch new pods be created (this actually might be my favourite github repo of all time).

I demo SQL Server running in Kubernetes a lot so really wanted to get this working in my Azure Kubernetes Service cluster. Here’s how you get this up and running.


Prerequisites

1. A DockerHub repository
2. An Azure Kubernetes Service cluster – I blogged about spinning one up here
3. A HTTPS ingress controller on AKS with a FQDN for the ingress controller IP. I didn’t have to change anything in the instructions in the link but don’t worry if the final test doesn’t work…it didn’t work for me either.


Building the image

First, clone the repo:-

git clone https://github.com/lucky-sideburn/KubeInvaders.git

Switch to the AKS branch:-

cd KubeInvaders
git checkout aks

Build the image:-

docker build -t kubeinvaders .

Once the image has built, tag it with a public repository name and then push:-

docker tag kubeinvaders dbafromthecold/kubeinvaders:aks
docker push

Deploying to AKS

Now that the image is in a public repository, we can deploy to Kubernetes. Eugenio has provided all the necessary yaml files, so it’s really easy! Only a couple of changes are needed.

First one is the the kubeinvaders-deployment.yaml file, the image name needs to be updated:-

    spec:
      containers:
      - image: dbafromthecold/kubeinvaders:aks

And the host in the kubeinvaders-ingress.yaml file needs to be set to the FQDN of your ingress (set when following the MS docs): –

spec:
  tls:
  - hosts:
    - apruski-aks-ingress.eastus.cloudapp.azure.com
  rules:
  - host: apruski-aks-ingress.eastus.cloudapp.azure.com

Cool. So now each of the files can be deployed to your cluster: –

kubectl apply -f kubernetes/kubeinvaders-namespace.yml

kubectl apply -f kubernetes/kubeinvaders-deployment.yml -n kubeinvaders

kubectl expose deployment kubeinvaders --type=NodePort --name=kubeinvaders -n kubeinvaders --port 8080

kubectl apply -f kubernetes/kubeinvaders-ingress.yml -n kubeinvaders

kubectl create sa kubeinvaders -n foobar 

kubectl apply -f kubernetes/kubeinvaders-role.yml

kubectl apply -f kubernetes/kubeinvaders-rolebinding.yml

Finally, set some environment variables: –

TARGET_NAMESPACE='foobar'
TOKEN=`kubectl describe secret $(kubectl get secret -n foobar | grep 'kubeinvaders-token' | awk '{ print $1}') -n foobar | grep 'token:' | awk '{ print $2}'`
ROUTE_HOST=apruski-aks-ingress.eastus.cloudapp.azure.com

kubectl set env deployment/kubeinvaders TOKEN=$TOKEN -n kubeinvaders
kubectl set env deployment/kubeinvaders NAMESPACE=$TARGET_NAMESPACE -n kubeinvaders
kubectl set env deployment/k/ubeinvaders ROUTE_HOST=$ROUTE_HOST -n kubeinvaders

Now navigate to the FQDN of the ingress in a browser and you should see…


Testing the game!

By default KubeInvaders points to a namespace called foobar so we need to create it: –

kubectl create namespace foobar

And now create a deployment running 10 SQL Server pods within the foobar namespace: –

kubectl run sqlserver --image=mcr.microsoft.com/mssql/server:2019-CTP3.1-ubuntu --replicas=10 -n foobar

Now the game will have 10 invaders which represent the pods!

Let’s play! Watch the pods and kill the invaders!

kubectl get pods -n foobar --watch

How awesome is that! You can even hit a to switch to automatic mode!

What a cool way to demo pod regeneration in Kubernetes.

Thanks for reading!

Default resource limits for Windows vs Linux containers in Docker Desktop

Docker Desktop is a great product imho. The ability to run Windows and Linux containers locally is great for development and has allowed me to really dig into SQL Server on Linux. I also love the fact that I no longer need to install SQL 2016/2017, I can run it in Windows containers.

However there are some differences between how Windows and Linux containers run in Docker Desktop. One of those differences being the default resource limits that are set.

Linux containers’ resource limits are set in the Advanced section of the Docker Desktop settings: –

These setting control the resources available to the MobyLinuxVM, where the Linux containers run (and that’s how you get Linux containers running on Windows 10): –

This can be confirmed by spinning up a Linux container (I’m running SQL but you can use any image): –

docker run -d -p 15789:1433 `
--env ACCEPT_EULA=Y --env SA_PASSWORD=Testing1122 `
--name testcontainer `
mcr.microsoft.com/mssql/server:2019-CTP3.0-ubuntu

And then running the following to confirm resources available to the container: –

docker exec testcontainer /bin/bash -c 'cat /proc/meminfo | grep MemTotal'

docker exec testcontainer nproc

The container has the memory and CPUs that were set in the Docker settings.

But what about Windows containers? When you switch to Windows containers in Docker, there’s no option to set CPU and memory limits. This is because Windows containers run on the host, not in the MobyLinuxVM. The host I’m running on has 4 cores and 32GB of RAM, so the containers should have all the host resources available to it, right?

This can be checked by spinning up a Windows container:-

docker run -d -p 15789:1433 `
--env ACCEPT_EULA=Y --env SA_PASSWORD=Testing1122 `
--name testcontainer `
microsoft/mssql-server-windows-developer:latest

And then running: –

docker exec testcontainer systeminfo | select-string 'Total Physical Memory'

docker exec testcontainer systeminfo | select-string 'Processor'

Ok, the container can only see the one processor (same as my host), so let’s exec into the container and check the number of cores.

docker exec -i testcontainer powershell

Get-WmiObject -class Win32_processor | Format-Table Name,NumberOfCores,NumberOfLogicalProcessors

Ok, so it looks like Windows containers are limited to 2 cores and 1GB of RAM by default. Not exactly great if we’re running SQL Server, but can we change those limits? As I said earlier, there’s no way to adjust the resources available to Windows containers in the Docker settings.

What we can do is change the resources available to the individual containers at runtime using the –cpus and –memory options:-

docker run -d -p 15799:1433 `
--cpus=3 --memory=8192m `
--env ACCEPT_EULA=Y --env SA_PASSWORD=Testing1122 `
--name testcontainer2 `
microsoft/mssql-server-windows-developer:latest

N.B. – I’m setting 3 cores as when I tried 4, the container crashed (something to watch out for).

Now if we check the resources again: –

docker exec testcontainer2 systeminfo | select-string 'Total Physical Memory'

docker exec testcontainer2 systeminfo | select-string 'Processor'

The memory available to the container has increased, let’s exec into the container and check the number of cores: –

docker exec -i testcontainer2 powershell

Get-WmiObject -class Win32_processor | Format-Table Name,NumberOfCores,NumberOfLogicalProcessors

The core count has also increased.

So the limits of Windows containers running on Docker Desktop can be altered, just not in the settings as with Linux containers.

Thanks for reading!

Using docker named volumes to persist databases in SQL Server

I’ve previously talked about using named volumes to persist SQL Server databases but in that post I only used one named volume and I had to manually reattach the databases after the container spun up.

This isn’t really ideal, what we’d want is for the databases to automatically be attached to the new container. Thankfully there’s an easy way to do it, so let’s run through how here.

N.B. – Thanks to Anthony Nocentino (b|t) for pointing this out to me…it was a real d’oh moment 🙂

First thing, is to create two named volumes: –

docker volume create mssqlsystem
docker volume create mssqluser

And now spin up a container with the volumes mapped: –

docker container run -d -p 16110:1433 \
--volume mssqlsystem:/var/opt/mssql \
--volume mssqluser:/var/opt/sqlserver \
--env ACCEPT_EULA=Y \
--env SA_PASSWORD=Testing1122 \
--name testcontainer \
mcr.microsoft.com/mssql/server:2019-CTP2.3-ubuntu

The mssqluser named volume is going to be mounted as /var/opt/sqlserver and the mssqlsystem volume is going to be mounted as /var/opt/mssql. This is the key to the databases automatically being attached in the new container, /var/opt/mssql is the location of the system databases.

If we didn’t mount a named volume for the system databases any changes to those databases (particularly for the master database) would not be persisted so the new container would have no record of any user databases created.

By persisting the location of the system databases, when SQL starts up in the new container the changes made to the master database are retained and therefore has a record of the user databases. This means the user databases will be in the new instance in the new container (as long as we’ve persisted the location of those databases, which we’re doing with the mssqluser named volume).

Let’s create a database on the mssqluser named volume: –

USE [master];
GO

CREATE DATABASE [testdatabase]
ON PRIMARY
    (NAME = N'testdatabase', FILENAME = N'/var/opt/sqlserver/testdatabase.mdf')
LOG ON
    (NAME = N'testdatabase_log', FILENAME = N'/var/opt/sqlserver/testdatabase_log.ldf');
GO

And now blow the container away: –

docker kill testcontainer
docker rm testcontainer

That container is gone, but we still have our named volumes: –

docker volume ls

So we can now spin up another container, using those volumes: –

docker container run -d -p 16120:1433 \
--volume mssqlsystem:/var/opt/mssql \
--volume mssqluser:/var/opt/sqlserver \
--name testcontainer2 \
mcr.microsoft.com/mssql/server:2019-CTP2.3-ubuntu

UPDATE – As pointed out in the comments by Patrick Flynn, the environment variables ACCEPT_EULA and SA_PASSWORD do not need to be set for the second container as we have persisted the system databases so their values have been retained

Connect to the SQL instance in the new container…

And boom! The database is there!

Thanks for reading!