I haven’t touched Docker Swarm for a looooong time but I was asked about running SQL Server in Swarm at a conference a while back…so here’s how it can be done!
I have a lab setup on my local machine which consists of three Hyper-V VMs with static IP addresses, that can all communicate with each other: –
- AP-NODE-01
- AP-NODE-02
- AP-NODE-03
So, first thing to do is install docker on each node: –
sudo apt install -y docker.io
Then add our user to the docker group: –
sudo usermod -aG docker apruski
Now we can initialise the “manager” node, aka which node will manage the cluster. This can be thought of as like the control plane in a Kubernetes cluster. Much like a Kubernetes cluster…there are two types of node in Docker Swarm…managers and workers. Again like Kubernetes, a node can perform both roles.
On the VM that’s going to manage the cluster, run the following: –
docker swarm init --advertise-addr <VM IP ADDRESS>
Grab the join script from the output of the previous command and add each node to the cluster: –
docker swarm join \
--token SWMTKN-1-4c6pchrpjf0e35h4wvpq1otjkgc6thrpiriq6pndg8811bxorn-7qxoxclibjlz5nejj027q34yv \
10.0.0.40:2377
Then run the following on the leader node to confirm the cluster: –
docker node ls
And there we have our cluster setup! Pretty simple, eh?
Ok…now let’s look at deploying SQL Server to our cluster. In Docker Swarm, we deploy services to the cluster.
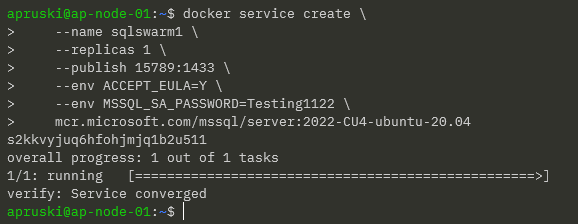
Services in Docker Swarm (unlike services in Kubernetes) define everything that we want to deploy…so we include what we usually would have in a docker container run statement: –
docker service create \
    --name sqlswarm1 \
    --replicas 1 \
    --publish 15789:1433 \
    --env ACCEPT_EULA=Y \
    --env MSSQL_SA_PASSWORD=Testing1122 \
    mcr.microsoft.com/mssql/server:2022-CU4-ubuntu-20.04
Looks pretty much like a docker container run statement yeah? The only difference really is the –replicas=1 statement. This essentially is how many containers we want to run in our service (called tasks in Docker Swarm). As we’re running SQL Server, we only want one running for this service.
Once deployed, we can verify with: –
docker service ls
And if we want some more info (like which node the service is running on), we can run: –
docker service ps sqlswarm1
Cool! So we can see which node in the cluster our SQL container is running on.
If we jump on that node, we can run: –
docker container ls
Which is pretty much what we’re used to seeing when we run SQL Server in a Docker container.
Ok, but how can we connect to SQL in Docker Swarm?
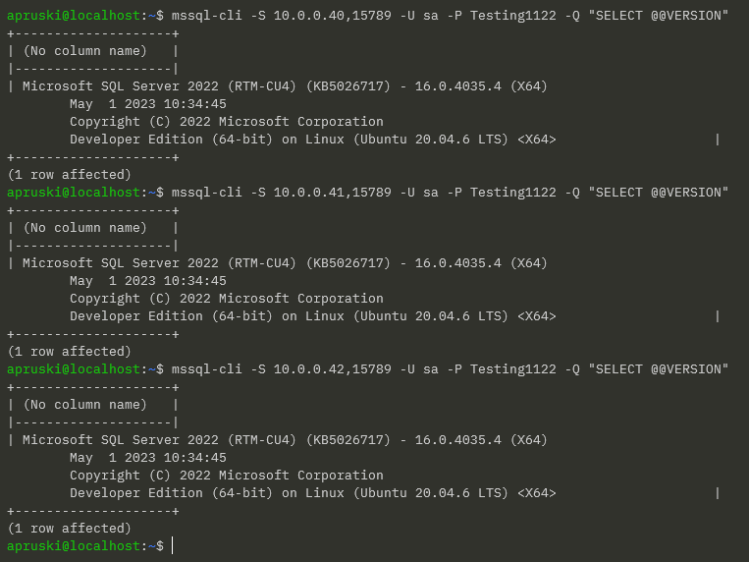
Our container was run with the –publish 15789:1433 flag. This means that we can connect to SQL in the Swarm via any of the nodes’ IP addresses and the port 15789 (kinda like a NodePort service in Kubernetes).
So for example, using the mssql-cli from my laptop: –
mssql-cli -S 10.0.0.40,15789 -U sa -P Testing1122 -Q "SELECT @@VERSION"
But I can use any node IP address: –
Ok, that’s all well and good…but what about the main reason for running in Docker Swarm?
What about high availability?
My service is running on AP-NODE-01…that’s the manager node for the cluster so we probably don’t want our service running there. Let’s move it to another node.
To do that, let’s drain the manager node: –
docker node update --availability drain ap-node-01
Then confirm where the service has moved to: –
docker service ps sqlswarm1
Cool! Our service has moved to AP-NODE-02 and we can see a history of where it has been placed in the Swarm.
We can also confirm that AP-NODE-01 is no longer available to host services: –
docker node ls
Alright, manually moving a service works…but what about a node failure?
The service is running on AP-NODE-02 so let’s shut that node down: –
Let’s see what happened: –
docker service ps sqlswarm1
Haha! Our service has moved to AP-NODE-03! Cool!
So that’s how to get SQL Server running in Docker Swarm and tested for high availability!
Ok, there’s a whole bunch of other stuff that we need to consider (persistent storage for example) which we’ll have a look at in future posts.
Thanks for reading!


