Data Relay 2019

My favourite UK Data Platform event is back for 2019 and has just opened for registration!

If you haven’t heard of Data Relay before, it’s pretty unique. It’s a 5 day conference but each of those 5 days is in a different city. Typically cities that don’t host their own data event.

This means that after each day, the event packs up and moves on. As you can imagine this poses quite a few challenges but it’s extremely satisfying to see it all come together.

The reason I like Data Relay so much is that it really fosters a sense of camaraderie between everyone involved. We’re all in it together to get each event up and running every day.

That’s how I got involved in the first place. I got selected to speak at each event in 2017 and ended up helping out with packing swag bags, moving boxes, and generally doing anything else that needed to be done. Have to admit, it was exhausting but really really good fun.

So if you’d like to come to one of the best community events on the calendar, this year’s schedule is: –

  • Newcastle – October 7th – Register here
  • Leeds – October 8th – Register here
  • Nottingham – October 9th – Register here
  • Birmingham – October 10th – Register here
  • Bristol – October 11th – Register here

Thanks for reading and hope to see you at Data Relay 2019!

Converting SQL Server docker compose files for Kubernetes with Kompose

Docker compose is a great tool for easily deploying docker container without having to write lengthy docker run commands. But what if I want to deploy my docker-compose.yaml file into Kubernetes?

Kompose is a tool that can convert docker compose files so that they can be deployed to a Kubernetes cluster.

Here’s a typical docker-compose.yaml file I use: –

version: '3'
 
services:
    sqlserver1:
        image: mcr.microsoft.com/mssql/server:2019-CTP3.1-ubuntu
        ports:  
          - "15789:1433"
        environment:
          SA_PASSWORD: "Testing1122"
          ACCEPT_EULA: "Y"
          MSSQL_DATA_DIR: "/var/opt/sqlserver/data"
          MSSQL_LOG_DIR: "/var/opt/sqlserver/log"
          MSSQL_BACKUP_DIR: "/var/opt/sqlserver/backup"
        volumes: 
          - sqlsystem:/var/opt/mssql/
          - sqldata:/var/opt/sqlserver/data
          - sqllog:/var/opt/sqlserver/log
volumes:
  sqlsystem:
  sqldata:
  sqllog:

This will spin up one container running SQL Server 2019 CTP 3.1, accept the EULA, set the SA password, and set the default location for the database data/log/backup files using named volumes created on the fly.

Let’s convert this using Kompose and deploy to a Kubernetes cluster.

To get started with Kompose first install by following the instructions here. I installed on my Windows 10 laptop so I downloaded the binary and added to my PATH environment variable.

Before running Kompose I had to make a slight change to the docker-compose.yaml file because when I deploy SQL Server to Kubernetes I want to create a LoadBalanced service so that I can connect to the SQL instance remotely. To get Kompose to create a LoadBalanced service I had to add the following to my docker-compose.yaml file (under the first volumes section): –

        labels:
          kompose.service.type: LoadBalancer

Then I navigated to the location of my docker-compose.yaml file and ran: –

kompose convert -f docker-compose.yaml

Which created the corresponding yaml files!

Looking through the created files, they all look good! The PVCs will use the default storage class of the Kubernetes cluster that you’re deploying to and the deployment/service don’t need any adjustment either.

So now that I have the yaml files to deploy into Kubernetes, I simply run:-

kompose up

And the files will be deployed to my Kubernetes cluster!

OK, kubectl describe pods will show errors initially when the pod is first created as the PVCs haven’t been created but it will retry.

Once the pod is up and the service has an external IP address, the SQL instance can be connected to. Nice and easy!

Cleaning up is also a cinch, just run:-

kompose down

And the objects will be deleted from the cluster.

Thanks for reading!

Chaos engineering for SQL Server running on AKS using KubeInvaders


UPDATE – March 2022
I have publised an updated guide to deploying KubeInvaders on AKS here: –
Space Invaders on Kubernetes


A couple of weeks ago I came across an awesome GitHub repo called KubeInvaders which is the brilliant work of Eugenio Marzo (b|t)

KubeInvaders allows you to play Space Invaders in order to kill pods in Kubernetes and watch new pods be created (this actually might be my favourite github repo of all time).

I demo SQL Server running in Kubernetes a lot so really wanted to get this working in my Azure Kubernetes Service cluster. Here’s how you get this up and running.


Prerequisites

1. A DockerHub repository
2. An Azure Kubernetes Service cluster – I blogged about spinning one up here
3. A HTTPS ingress controller on AKS with a FQDN for the ingress controller IP. I didn’t have to change anything in the instructions in the link but don’t worry if the final test doesn’t work…it didn’t work for me either.


Building the image

First, clone the repo:-

git clone https://github.com/lucky-sideburn/KubeInvaders.git

Switch to the AKS branch:-

cd KubeInvaders
git checkout aks

Build the image:-

docker build -t kubeinvaders .

Once the image has built, tag it with a public repository name and then push:-

docker tag kubeinvaders dbafromthecold/kubeinvaders:aks
docker push

Deploying to AKS

Now that the image is in a public repository, we can deploy to Kubernetes. Eugenio has provided all the necessary yaml files, so it’s really easy! Only a couple of changes are needed.

First one is the the kubeinvaders-deployment.yaml file, the image name needs to be updated:-

    spec:
      containers:
      - image: dbafromthecold/kubeinvaders:aks

And the host in the kubeinvaders-ingress.yaml file needs to be set to the FQDN of your ingress (set when following the MS docs): –

spec:
  tls:
  - hosts:
    - apruski-aks-ingress.eastus.cloudapp.azure.com
  rules:
  - host: apruski-aks-ingress.eastus.cloudapp.azure.com

Cool. So now each of the files can be deployed to your cluster: –

kubectl apply -f kubernetes/kubeinvaders-namespace.yml

kubectl apply -f kubernetes/kubeinvaders-deployment.yml -n kubeinvaders

kubectl expose deployment kubeinvaders --type=NodePort --name=kubeinvaders -n kubeinvaders --port 8080

kubectl apply -f kubernetes/kubeinvaders-ingress.yml -n kubeinvaders

kubectl create sa kubeinvaders -n foobar 

kubectl apply -f kubernetes/kubeinvaders-role.yml

kubectl apply -f kubernetes/kubeinvaders-rolebinding.yml

Finally, set some environment variables: –

TARGET_NAMESPACE='foobar'
TOKEN=`kubectl describe secret $(kubectl get secret -n foobar | grep 'kubeinvaders-token' | awk '{ print $1}') -n foobar | grep 'token:' | awk '{ print $2}'`
ROUTE_HOST=apruski-aks-ingress.eastus.cloudapp.azure.com

kubectl set env deployment/kubeinvaders TOKEN=$TOKEN -n kubeinvaders
kubectl set env deployment/kubeinvaders NAMESPACE=$TARGET_NAMESPACE -n kubeinvaders
kubectl set env deployment/k/ubeinvaders ROUTE_HOST=$ROUTE_HOST -n kubeinvaders

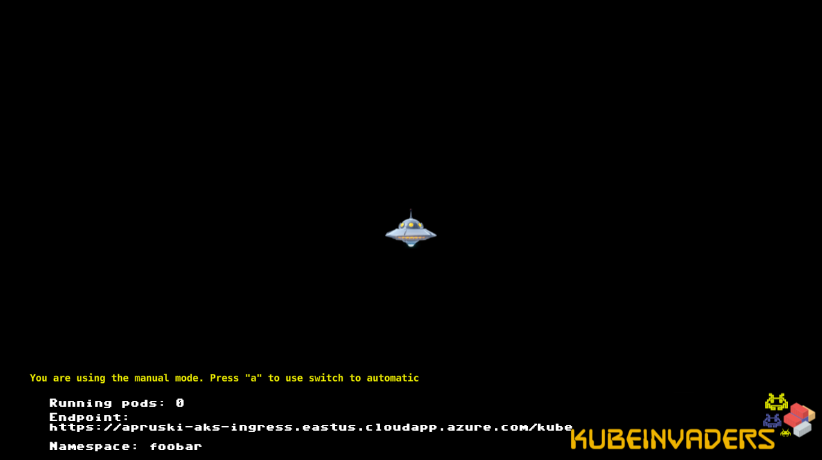
Now navigate to the FQDN of the ingress in a browser and you should see…


Testing the game!

By default KubeInvaders points to a namespace called foobar so we need to create it: –

kubectl create namespace foobar

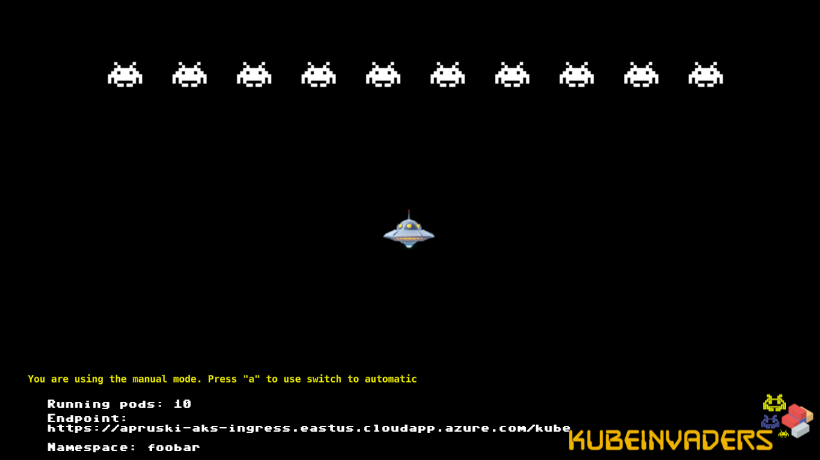
And now create a deployment running 10 SQL Server pods within the foobar namespace: –

kubectl run sqlserver --image=mcr.microsoft.com/mssql/server:2019-CTP3.1-ubuntu --replicas=10 -n foobar

Now the game will have 10 invaders which represent the pods!

Let’s play! Watch the pods and kill the invaders!

kubectl get pods -n foobar --watch

How awesome is that! You can even hit a to switch to automatic mode!

What a cool way to demo pod regeneration in Kubernetes.

Thanks for reading!