9

SQL Server and Docker Compose

I used to think that Docker Compose was used solely to spin up multiple containers, in fact I blogged about doing just that here.

That opinion changed when I went to DockerCon in 2018 and had a chance to speak to some Docker Captains who told me that they used compose for everything!

And it makes sense, let’s have a look at spinning up one container running SQL Server 2019: –

docker run -d -p 15789:1433 `
--env ACCEPT_EULA=Y `
--env MSSQL_SA_PASSWORD=Testing1122 `
--name testcontainer `
mcr.microsoft.com/mssql/server:2019-CU5-ubuntu-18.04

Quite a bit to type there, no? Do we really want to be typing that out every time we run a container?

And it gets even worse if we want to persist our databases from one container to another: –

docker container run -d `
-p 15789:1433 `
--volume systemdbs:/var/opt/mssql `
--volume userdbs:/var/opt/sqlserver `
--env MSSQL_SA_PASSWORD=Testing1122 `
--env ACCEPT_EULA=Y `
--env MSSQL_BACKUP_DIR="/var/opt/sqlserver" `
--env MSSQL_DATA_DIR="/var/opt/sqlserver" `
--env MSSQL_LOG_DIR="/var/opt/sqlserver" `
--name testcontainer `
mcr.microsoft.com/mssql/server:2019-CU5-ubuntu-18.04

That’s a lot of typing! And if we try to create a database with the default values set in that statement, we’ll get the following error: –

CREATE FILE encountered operating system error 2(The system cannot find the file specified.) while attempting to open or create the physical file ‘/var/opt/sqlserver/testdatabase.mdf’.

This is because SQL in 2019 runs as non-root. This is a good thing but it means that after the container comes up, we have to run: –

docker exec -u 0 testcontainer bash -c "chown mssql /var/opt/sqlserver"

The solution here is to create a custom image with the volume created and permissions set.

But wouldn’t it be easier to just have to run one command to spin up a custom 2019 image, with volumes created and permissions set?

Enter Docker Compose.

I’ve created a GitHub repository here with all the necessary files: –
https://github.com/dbafromthecold/SqlServerDockerCompose

If we clone that repo down, we’ll get the following: –

Let’s go through each of the files

.gitignore
Standard ignore file, this is to prevent the sapassword.env file from being uploaded to Github

docker-compose.yaml
Compose file that when executed will reference our dockerfile and build us a custom image

dockerfile
File to create a custom SQL 2019 image

sapassword.env
Environment variable file to contain our SA password. We’ll need to create this file, it’s not in the repo

sqlserver.env
Environment variable file that contains all the environment variables required to spin up SQL Server in a container

Let’s dive in a little deeper and first have a look at the dockerfile: –

# build from the Ubuntu 18.04 image
FROM ubuntu:18.04

# create the mssql user
RUN useradd -u 10001 mssql

# installing SQL Server
RUN apt-get update && apt-get install -y wget software-properties-common apt-transport-https
RUN wget -qO- https://packages.microsoft.com/keys/microsoft.asc | apt-key add -
RUN add-apt-repository "$(wget -qO- https://packages.microsoft.com/config/ubuntu/18.04/mssql-server-2019.list)"
RUN apt-get update && apt-get install -y mssql-server

# creating directories
RUN mkdir /var/opt/sqlserver
RUN mkdir /var/opt/sqlserver/data
RUN mkdir /var/opt/sqlserver/log
RUN mkdir /var/opt/sqlserver/backup

# set permissions on directories
RUN chown -R mssql:mssql /var/opt/sqlserver
RUN chown -R mssql:mssql /var/opt/mssql

# switching to the mssql user
USER mssql

# starting SQL Server
CMD /opt/mssql/bin/sqlservr

This file when executed is going to create a custom SQL 2019 image, not from the microsoft images but installed via apt-get (the way you would install SQL on Linux).

It’s based on the Ubuntu 18.04 image and the steps are: –

  1. Pull down the Ubuntu 18.04 image and base this new image off it
  2. Create the mssql user
  3. Install SQL Server as you would on Linux, detailed instructions here
  4. Create the required directories
  5. Change the owner of those directories to the mssql user
  6. Switch over to run the next command as the mssql user
  7. Start SQL Server

Ok, cool. Let’s now have a look at the docker-compose.yaml file: –

version: '3.7'
services:
    sqlserver1:
        build: 
          context: .
          dockerfile: dockerfile
        ports:  
          - "15789:1433"
        env_file:
          - sqlserver.env
          - sapassword.env
        volumes: 
          - sqlsystem:/var/opt/mssql/
          - sqldata:/var/opt/sqlserver/data
          - sqllog:/var/opt/sqlserver/log
          - sqlbackup:/var/opt/sqlserver/backup
volumes:
  sqlsystem:
  sqldata:
  sqllog:
  sqlbackup:

Stepping through this we: –

  1. Define a service called sqlserver1, setting a build context to the current directory and specifying our dockerfile
  2. Set our ports, mapping 15789 on the host to 1433 in the container
  3. Specify our environment variable files
  4. Then set our volumes, matching the directories created in the dockerfile

And finally, let’s have a look at the two environment variable files: –

sqlserver.env

ACCEPT_EULA=Y
MSSQL_DATA_DIR=/var/opt/sqlserver/data
MSSQL_LOG_DIR=/var/opt/sqlserver/log
MSSQL_BACKUP_DIR=/var/opt/sqlserver/backup

sapassword.env

MSSQL_SA_PASSWORD=Testing1122

The SA password is set in a separate file so that we don’t end up putting it somewhere public 🙂
The other file can contain any environment variable for SQL Server, a full list is here.

Awesome stuff. OK, now we can run: –

docker-compose up -d

And we can check the objects created by compose by running: –

docker network ls
docker volume ls
docker image ls
docker container ls

There we can see our custom network, volumes, image, and container up and running!

So we’re good to do our work on SQL Server 2019 and when we’re finished we can just run: –

docker-compose down

That’ll delete our custom network and the container but we’ll still have our custom image and volumes, ready for next time we want to do some work against SQL Server 2019.

Thanks for reading!

0

EightKB – Schedule published

Today we announced the schedule for EightKB

EightKB was setup by Anthony Nocentino (b|t), Mark Wilkinson (b|t), and myself as we wanted to put on an event that delved into the internals of SQL Server.

We’re talking straight up, geeking out on the techy side here. We wanted mind-melting sessions with tonnes of demos and well, that’s exactly what we got!

This is an absolutely amazing line-up with in-depth sessions from people who are the top of our industry.

I couldn’t be more excited!

I want to say a massive thank you to all the speakers who submitted. Selection was difficult as we kept this first event small, with only 5 slots available for the 70+ sessions that were submitted, which meant making difficult decisions (there was foot stamping and childish name calling).

N.B. – that last bit didn’t happen, we all get along 🙂

EightKB will be back however! And we will be in touch with the new dates so we will be reaching out to you soon.

EightKB is happening on the 17th of June, kicking off at 9am EDT. Registration is free and you can sign up here

Hope to see you there!

14

Running Azure SQL Database Edge on a Raspberry Pi


Update – October 2020 – This post will take you through the whole process of getting an Azure IoT Hub setup and linking Azure SQL Edge running from a Raspberry Pi to it.

If you want to just run Azure SQL Edge without the IoT Hub, you can follow the MS Docs here: –
https://docs.microsoft.com/en-us/azure/azure-sql-edge/disconnected-deployment


One of the coolest new projects out there is Azure SQL Database Edge: –

https://azure.microsoft.com/en-us/services/sql-database-edge/

This allows SQL to run on ARM devices, just think how many devices are out there that run ARM.

That includes my favourite device, the Raspberry Pi.

So, let’s run through how to get SQL running on a Raspberry Pi!

First, Azure SQL Database Edge is in public preview so we’ll need to sign up here.

Once in the preview we need to set up our Raspberry Pi. We’ll need to use a 64-bit OS (Raspbian is 32-bit) so for this setup we’re going to use Ubuntu 18.04 which can be downloaded here.

Once downloaded, plug the SD card into a laptop and use Rufus to flash the card: –

Enable ssh by dropping a file called ssh onto the boot partition of the SD card (see Section 3 here).

Then plug the SD card into the Pi, and connect the Pi to a router (this avoids having to attach a monitor and keyboard in order to setup a wifi connection).

Power on the Pi and give it a minute to spin up. To find the Pi’s IP address we can use nmap to scan the local network: –

nmap -sP 192.168.1.0/24

Then ssh to the Pi via (default username and password is ubuntu): –

ssh ubuntu@<THE PI IP ADDRESS>

N.B – We’ll be prompted to change our password when we first log in.

Ok, that’s our Pi ready to go. Now, in order to get Azure SQL Database Edge running on it we need to create an IoT Hub in Azure and connect our Pi to it. This will then allow us to create a deployment in Azure that’ll push SQL Edge down to our Pi and run it in a Docker container.

To set the Iot Hub up, we’re going to use the azure-cli.

In order to use the IoT commands we need to make sure that we’ve got at least v2.0.70 of the azure-cli installed:-

az version

N.B. – We can grab the .msi to update azure-cli here.

Now add the azure-iot extension: –

az extension add –-name azure-iot

Log in to azure: –

az login

Create a resource group to hold all the objects that we are going to create: –

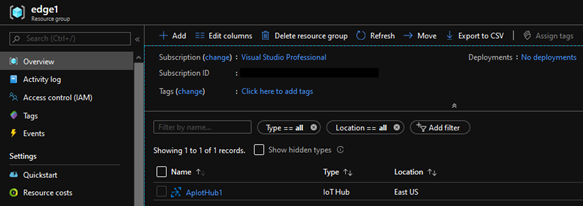
az group create --name edge1 --location eastus

Now we can create an IoT Hub: –

az iot hub create --name ApIotHub1 --resource-group edge1

Register a device with the hub: –

az iot hub device-identity create --device-id raspberry-pi-k8s-1 --hub-name ApIotHub1 --edge-enabled

Retrieve the connection string for the device: –

az iot hub device-identity show-connection-string --device-id raspberry-pi-k8s-1 --hub-name ApIotHub1

Once we have the connection string, we can install the IoT Edge runtime on the Raspberry Pi.

SSH into the Pi: –

ssh ubuntu@<THE PI IP ADDRESS>

Get the repository information: –

curl https://packages.microsoft.com/config/ubuntu/18.04/multiarch/prod.list > ./microsoft-prod.list

Copy the repository to the sources list: –

sudo cp ./microsoft-prod.list /etc/apt/sources.list.d/

Install the MS GPG public key: –

curl https://packages.microsoft.com/keys/microsoft.asc | gpg --dearmor > microsoft.gpg
sudo cp ./microsoft.gpg /etc/apt/trusted.gpg.d/

Now we can install the container runtime. Note that we’re not installing Docker, we’re installing the tools from the Moby project (which is the project that docker is built from, so the commands we’re familiar with, docker run, docker images etc. are available): –

sudo apt-get update && sudo apt-get install –y moby-engine moby-cli

Install the IoT Edge security daemon: –

sudo apt-get install –y iotedge

Now we need to add our connection string to the security daemon config: –

sudo nano /etc/iotedge/config.yaml

Find the section below and add the connection string obtained earlier (remove “connectionString”: from it): –

'provisioning:
source: "manual"
device_connection_string: "CONNECTION STRING' \

Save the changes, exit, and restart the security daemon: –

sudo systemctl restart iotedge

And then confirm that the daemon is running: –

sudo systemctl status iotedge
sudo iotedge check
sudo iotedge list

N.B. – We may have to ctrl+c out of the check command.

We can also check that the agent image is there: –

docker image ls

Ok, everything is setup! Now we can install SQL Edge on the Raspberry Pi!

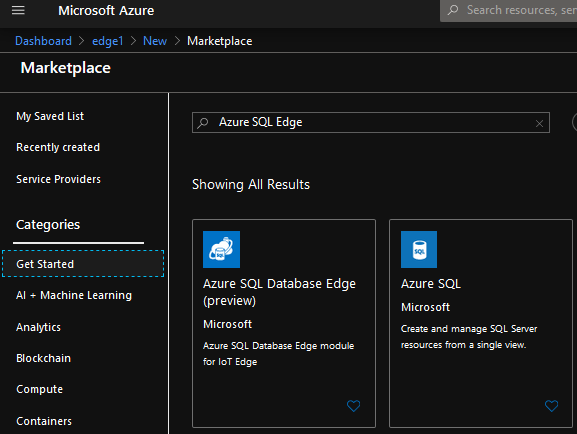
Go back to the portal and search for Azure SQL Edge: –

Select Azure SQL Database Edge Developer and hit Create: –

On the next page, hit Find Device. The Raspberry Pi should be there: –

Select the device and on the next page hit Create: –

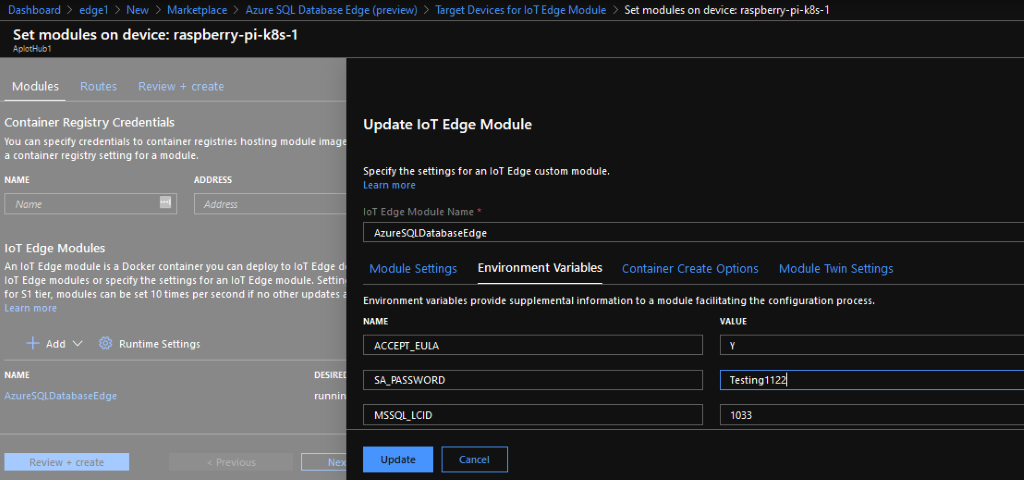
This will take us to a page to configure the deployment: –

Click AzureSQLDatabaseEdge and on the Environment Variables page, enter a SA Password: –

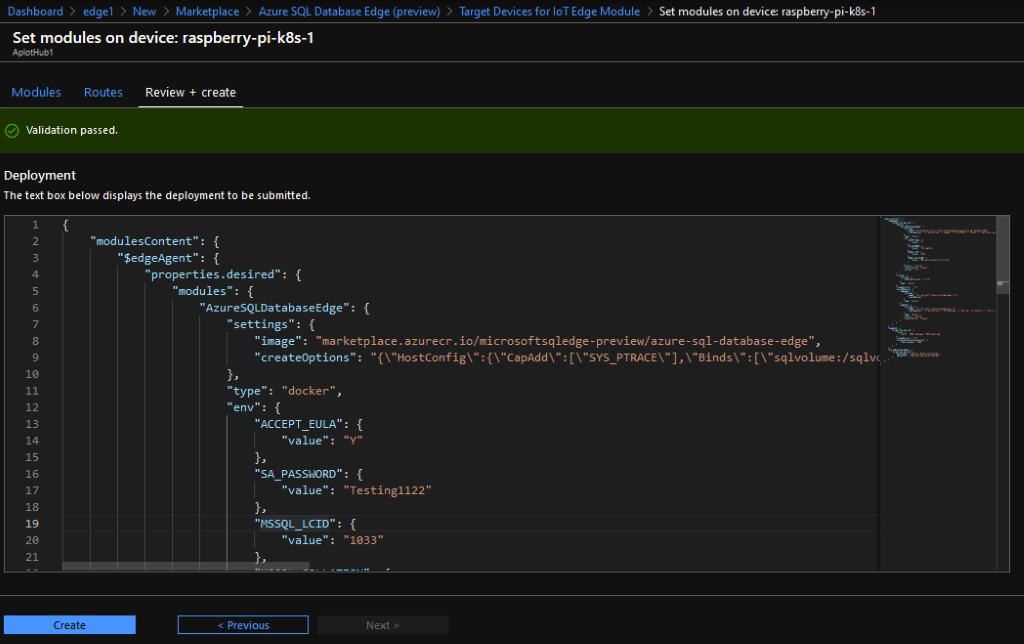
Hit Update and then Review + Create: –

Review the JSON, it should all be OK, and hit Create.

This will take us back to the hub page: –

The IoT Edge Module Count should be 3. Click on the device: –

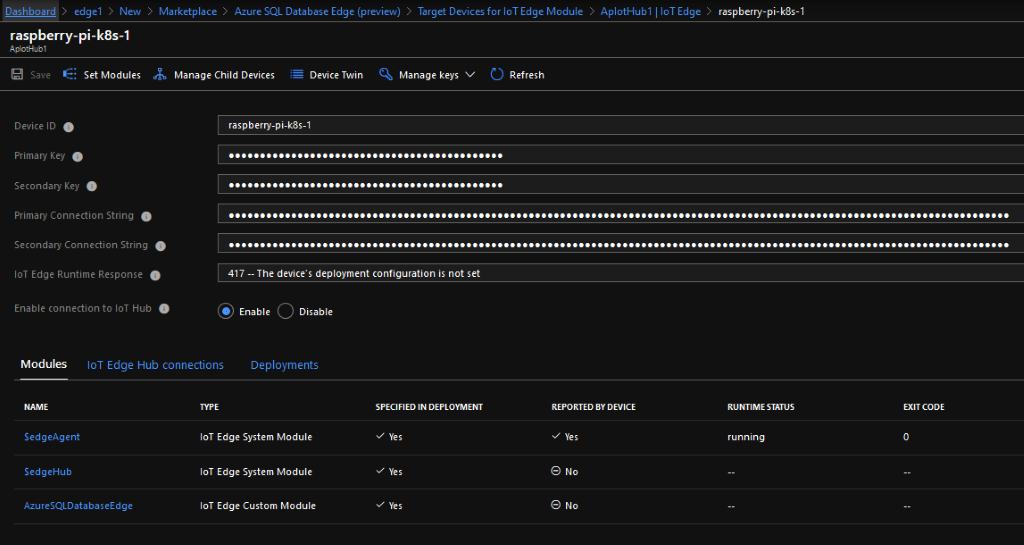
Now we’re waiting for the modules to be deployed to the Raspberry Pi.

After a few minutes we should see (don’t worry if there’s a 500 error, it’ll clear once the images are pulled to the device): –

And on the Pi itself: –

docker image ls

docker container ls

If the container is up and running, we can connect remotely using our Pi’s IP address in SSMS (or ADS): –

And that’s Azure SQL Database Edge running on a Raspberry Pi! How cool is that?!

Thanks for reading!

0

EightKB – A new virtual SQL Server event

With all the events that have been cancelled over the next few months due to the on-going COVID-19 crisis, Mark Wilkinson (b|t), Anthony Nocentino (b|t), and I wanted to do something for the SQL community.

So, why not put on a virtual event?

There are a few great new events coming up so how do we make our event stand out?

Enter, EightKB. A new virtual event running on June 17th that focuses solely on SQL Server internals hosting level 300 sessions and above.

We want this event to delve into SQL Server…with some truly mind melting sessions! We’re looking for in-depth technical sessions, with the more demos, the better!

Our call for speakers is open until the end of April. So if you have a session focusing on internals, we would love for you to submit!

If this sounds like an event you’d want to attend, it’s completely free and you can sign up here.

We’ll announce the full schedule at the start of May and from the quality of the sessions already submitted…it looks to be a good one!

Hope to see you there!

3

Adjusting pod eviction time in Kubernetes

One of the best features of Kubernetes is the built-in high availability.

When a node goes offline, all pods on that node are terminated and new ones spun up on a healthy node.

The default time that it takes from a node being reported as not-ready to the pods being moved is 5 minutes.

This really isn’t a problem if you have multiple pods running under a single deployment. The pods on the healthy nodes will handle any requests made whilst the pod(s) on the downed node are waiting to be moved.

But what happens when you only have one pod in a deployment? Say, when you’re running SQL Server in Kubernetes? Five minutes really isn’t an acceptable time for your SQL instance to be offline.

The simplest way to adjust this is to add the following tolerations to your deployment: –

      tolerations:
      - key: "node.kubernetes.io/unreachable"
        operator: "Exists"
        effect: "NoExecute"
        tolerationSeconds: 10
      - key: "node.kubernetes.io/not-ready"
        operator: "Exists"
        effect: "NoExecute"
        tolerationSeconds: 10

N.B.- You can read more about taints and tolerations in Kubernetes here

This will move any pods in the deployment to a healthy node 10 seconds after a node is reported as either not-ready or unreachable

But what if you wanted to change the default setting across the cluster?

I was trying to work out how to do this last week and the official docs here reference a flag for the controller manager: –

–pod-eviction-timeout duration Default: 5m0s
The grace period for deleting pods on failed nodes.

Great stuff! That’s exactly what I was looking for!

Unfortunately, it seems that this flag no longer works.

The way to set the eviction timeout value now is to set the flags on the api-server.

Now, this is done differently depending on how you installed Kubernetes. I installed this cluster with kubeadm so needed to create a kubeadm-apiserver-update.yaml file: –

apiVersion: kubeadm.k8s.io/v1beta2
kind: ClusterConfiguration
kubernetesVersion: v1.18.0
apiServer:
  extraArgs:
    enable-admission-plugins: DefaultTolerationSeconds
    default-not-ready-toleration-seconds: "10"
    default-unreachable-toleration-seconds: "10"

N.B.- Make sure the kubernetesVersion is correct

And then apply: –

sudo kubeadm init phase control-plane apiserver --config=kubeadm-apiserver-update.yaml

You can verify that the change has been applied by checking the api-server pods in the kube-system namespace (they should refresh) and by checking here: –

cat /etc/kubernetes/manifests/kube-apiserver.yaml

Let’s see it in action! I’ve got one pod running SQL Server in a K8s cluster on node kubernetes-w1. Let’s shut down that node…

Alright, that’s not exactly 10 seconds…there’s a couple of other things going on. But it’s a lot better than 5 mins!

The full deployment yaml that I used is here.

Ok, it is a bit of a contrived test, I’ll admit. The node was shutdown gracefully and I haven’t configured any persistent storage BUT this is still better than having to wait 5 minutes for the pod to be spun up on the healthy node.

N.B.- If you’re working with a managed Kubernetes service, such as AKS or EKS, you won’t be able to do this. You’ll need to add the tolerations to your deployment.

Thanks for reading!