I’ve been working with containers for a while now and one of the questions that always gets asked when I demo the technology to people is, is there a graphical user interface out there that can be used to manage containers?
Now, I’m happy with working on the command line and in many ways, I prefer it. But everyone has different preferences so I went out and had a look to see what’s available. It didn’t take me long to run into Portainer who have built exactly what I was looking for. A management UI for Docker.
So let’s run through the setup and then look at the system. There’s a couple of pre-requisities to this I’m afraid, the first one is that you must setup remote administration using TLS on the Docker host that you want to manage via Portainer. I’ve detailed how to do this here.
Also, Portainer doesn’t support managing a local Docker Engine running on Windows so the way I’ve set it up is to run Portainer locally on Windows 10 and then point it at a server running the Docker Engine I want to manage. This means that you’ll need to install Docker locally, you can do that here.
EDIT: Anthony Lapenna (t) has let me know that you can run Portainer outside of docker, so you don’t need to have the engine running on your Windows 10 machine if you don’t want to. Instructions are here (at the bottom of the page).
Ok, so once you’ve got Docker running locally, run the following to see the Portainer image in the Docker Hub: –
docker search portainer

There’s the image that we need at the top, so pull that image down to your local repository: –
docker pull portainer/portainer

Once the image is down, verify that you can connect to the Docker Engine on the remote server from a powershell window on your local machine: –
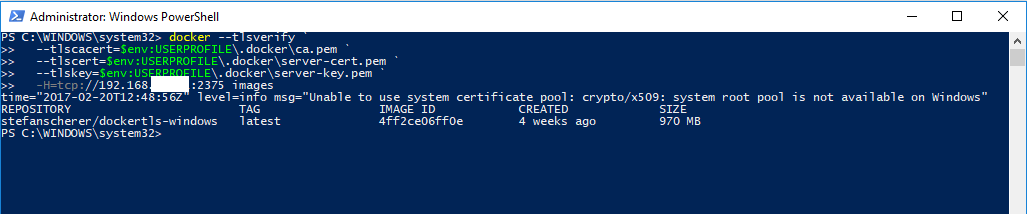
docker --tlsverify `
  --tlscacert=$env:USERPROFILE\.docker\ca.pem `
  --tlscert=$env:USERPROFILE\.docker\server-cert.pem `
  --tlskey=$env:USERPROFILE\.docker\server-key.pem `
  -H=tcp://XX.XX.XX.XX:2375 images
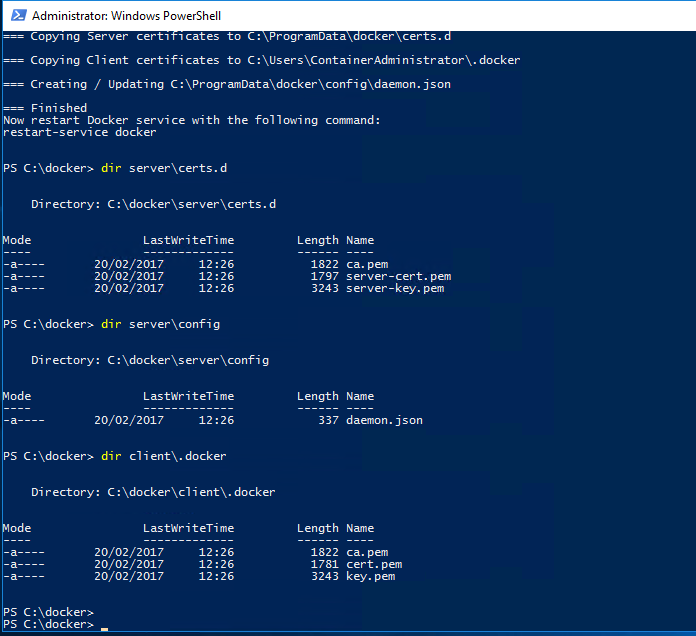
What I’ve done here is copy the TLS certs generated on the server to my local machine and reference them via $env:USERPROFILE. Full details on setting this up is here.
Also, ignore the warning “Unable to use system certificate pool: crypto/x509: system root pool is not available on Windows“. Apparently it’s benign
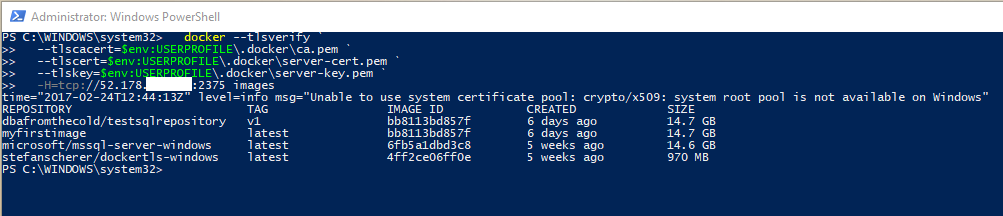
If everything is working you should see the same output as running docker images on the server: –
OK, next step is to copy the certs into your C:\temp folder as the following script will copy them from that location into the container running Portainer. This is needed so that Portainer can connect to the Docker Engine running on the server.
copy-item $env:USERPROFILE\.docker\ca.pem C:\Temp
copy-item $env:USERPROFILE\.docker\server-cert.pem C:\Temp
copy-item $env:USERPROFILE\.docker\server-key.pem C:\Temp
Now we can create and run our Portainer container!
docker run -d -p 9000:9000 --name portainer1 -vC:/temp:C:/temp portainer/portainer -H tcp://XX.XX.XX.XX:2375 --tlsverify --tlscacert=C:/temp\ca.pem --tlscert=C:/temp\server-cert.pem --tlskey=C:/temp\server-key.pem

Once you’ve verified that the container is up and running you need to grab the private IP assigned to it: –
docker inspect portainer1

So the private IP address assigned to the container I’ve built is 172.26.17.197 so I’ll enter http://172.26.17.197:9000 into my web browser. If all has gone well you should see: –

Specify a password and then login. You will then see the Portainer dashboard:-

Viewing Containers: –

Viewing Images: –

It’s a pretty cool UI. Not only can you start/stop existing containers, you can pull new images down. I know it’s a bit fiddly to setup but if you can do this and hand it off to your users (don’t run it on your desktop though)…how much are they going to love you? 🙂
Thanks for reading!