Automatically restarting Docker containers

One of the problems that I’ve encountered since moving my Dev/QA departments to using SQL Server within containers is that the host machine is now a single point of failure.

Now there’s a whole bunch of posts I could write about this but the one point I want to bring up now is…having to start up all the containers after patching the host.

I know, I know…technically I shouldn’t bother. After patching and bouncing the host, the containers should all be blown away and new ones deployed. But this is the real world and sometimes people want to retain the container(s) that they’re working with.

I have found it best practice to stop all containers before restarting the host (with the docker stop command) and then starting them back up (with the docker start command) once the host has come online.

However I need not have bothered! Docker gives you the option of setting a restart policy for your containers with the following options: –

  • no: Never automatically restart (the default)
  • on-failure: Restart if there’s been an issue which isn’t critical
  • unless-stopped: Restart unless Docker stops or is explicitly stopped
  • always: Always restart unless explicitly stopped

Let’s run through a quick test using Docker on Windows Server 2016. First let’s run a container: –

docker run -d -p 15789:1433 --restart always --env ACCEPT_EULA=Y --env SA_PASSWORD=Testing1122 --name testcontainer microsoft/mssql-server-windows

docker ps

I’ve used the always option here, so Docker won’t restart my container, but what happens when I bounce the server?

restart-computer -force

Wait for the server to restart and then I can compare system uptime to container uptime: –

$wmi = Get-WmiObject -Class Win32_OperatingSystem
$wmi.ConvertToDateTime($wmi.LocalDateTime) - $wmi.ConvertToDateTime($wmi.LastBootUpTime)

docker ps

N.B. – code to check system uptime is from here

From the above screen shot I can see that the server came up ~6 mins ago and the container came up ~4 mins ago. OK, there’s a bit of a delay there (probably due to the host OS booting, my Azure VMs aren’t really high spec) but the container has come up automatically! So with this switch there’s no need to have to manually start up all the containers on the host.

I’d recommend specifying this switch for all containers if they are being used for active development as this would be pretty handy if there was ever a case of an unexpected host reboot. I don’t want to have to be running start commands whilst a load of developers are waiting for their SQL instances to spin up 🙂

Thanks for reading!

Creating SQL Server containers with docker compose

Up until now my posts about containers have been talking about working with one container only. In the real world this will never be the case, at any one time there will be multiple containers (I have over 30) running on a host.

I need a way to get multiple containers up and running easily. There are two different approaches to doing this: –

  • Application server driven
  • Container host driven

In the application server driven approach, the application server will contact the container host, build & run a container and capture details of the container (such as the port number) in order for the application(s) to connect.

This ad-hoc approach works well as containers are only spun up and used when needed, conserving resources on the host. However, this does mean that the applications will have to wait until the containers come online.

Ok, I know that spinning up containers is a short process, but I’m all about reducing deployment time.

What if we know how many containers will be needed? What if we want our applications to instantly connect to containers the second they are deployed?

This post is going to go through the steps needed in order to use docker compose to build multiple containers at once. Compose is a tool defined as: –

A tool for defining and running multi-container Docker applications.

As SQL Server people we’re only going to be interested in one application but that doesn’t mean we can’t use compose to our advantage.

What I’m going to do is go through the steps to spin up 5 containers running SQL Server, all listening on different ports with different sa passwords.

Bit of prep before we run any commands. I’m going to create a couple of folders on my C:\ drive that’ll hold the compose and dockerfiles: –

mkdir C:\docker
mkdir C:\docker\builds\dev1
mkdir C:\docker\compose

Within the C:\docker\builds\dev1 directory, I’m going to drop my database files and my dockerfile: –

N.B. – note the name of the dockerfile (dockerfile.dev1)

Here’s the code within my dockerfile: –

# building our new image from the microsft SQL 2017 image
FROM microsoft/mssql-server-windows


# creating a directory within the container
RUN powershell -Command (mkdir C:\\SQLServer)


# copying the database files into the container
# no file path for the files so they need to be in the same location as the dockerfile
COPY DevDB1.mdf C:\\SQLServer
COPY DevDB1_log.ldf C:\\SQLServer

COPY DevDB2.mdf C:\\SQLServer
COPY DevDB2_log.ldf C:\\SQLServer

COPY DevDB3.mdf C:\\SQLServer
COPY DevDB3_log.ldf C:\\SQLServer

COPY DevDB4.mdf C:\\SQLServer
COPY DevDB4_log.ldf C:\\SQLServer

COPY DevDB5.mdf C:\\SQLServer
COPY DevDB5_log.ldf C:\\SQLServer


# attach the databases into the SQL instance within the container
ENV attach_dbs="[{'dbName':'DevDB1','dbFiles':['C:\\SQLServer\\DevDB1.mdf','C:\\SQLServer\\DevDB1_log.ldf']}, \ 
	{'dbName':'DevDB2','dbFiles':['C:\\SQLServer\\DevDB2.mdf','C:\\SQLServer\\DevDB2_log.ldf']}, \ 
	{'dbName':'DevDB3','dbFiles':['C:\\SQLServer\\DevDB3.mdf','C:\\SQLServer\\DevDB3_log.ldf']}, \ 
	{'dbName':'DevDB4','dbFiles':['C:\\SQLServer\\DevDB4.mdf','C:\\SQLServer\\DevDB4_log.ldf']}, \ 
	{'dbName':'DevDB5','dbFiles':['C:\\SQLServer\\DevDB5.mdf','C:\\SQLServer\\DevDB5_log.ldf']}]"

In the C:\docker\compose directory, I’m going to create one file called
docker-compose.yml which is a file for defining the services I want to run in my containers.

The code inside that file is: –

# specify the compose file format
# this depends on what version of docker is running
version: '3'


# define our services, all database containers
# each section specifies a container... 
# the dockerfile name and location...
# port number & sa password
services:
  db1:
    build:
        context: C:\docker\builds\dev1
        dockerfile: dockerfile.dev1
    environment:
      SA_PASSWORD: "Testing11@@"
      ACCEPT_EULA: "Y"
    ports:
      - "15785:1433"
  db2:
    build:
        context: C:\docker\builds\dev1
        dockerfile: dockerfile.dev1
    environment:
      SA_PASSWORD: "Testing22@@"
      ACCEPT_EULA: "Y"
    ports:
      - "15786:1433"
  db3:
    build:
        context: C:\docker\builds\dev1
        dockerfile: dockerfile.dev1
    environment:
      SA_PASSWORD: "Testing33@@"
      ACCEPT_EULA: "Y"
    ports:
      - "15787:1433"
  db4:
    build:
        context: C:\docker\builds\dev1
        dockerfile: dockerfile.dev1
    environment:
      SA_PASSWORD: "Testing44@@"
      ACCEPT_EULA: "Y"
    ports:
      - "15788:1433"
  db5:
    build:
        context: C:\docker\builds\dev1
        dockerfile: dockerfile.dev1
    environment:
      SA_PASSWORD: "Testing55@@"
      ACCEPT_EULA: "Y"
    ports:
      - "15789:1433"

N.B. – To check which versions of docker are compatible with which compose file formats, there is a compatibility matrix here

Now that we have our files created, let’s run our first compose command. To check if it’s installed run: –

docker-compose

N.B. – this is a test command, you should see a help reference output if it is installed (and you can skip the next part).

Hmm…

So we need to install. To do this, run:-

Invoke-WebRequest "https://github.com/docker/compose/releases/download/1.14.0/docker-compose-Windows-x86_64.exe" -UseBasicParsing -OutFile $Env:ProgramFiles\docker\docker-compose.exe

The 1.14.0 in the command above is the latest version. To check what the latest version, jump onto this GitHub page.

Once the install has finished, verify the version: –

docker-compose version

We need to navigate to the C:\docker\compose directory before we run our first compose command: –

cd C:\docker\compose

And now we can run our compose command. The command to utilise compose to build our containers is very simple: –

docker-compose up -d

This script has worked through the docker-compose.yml file and built 5 containers referencing dockerfile.dev1

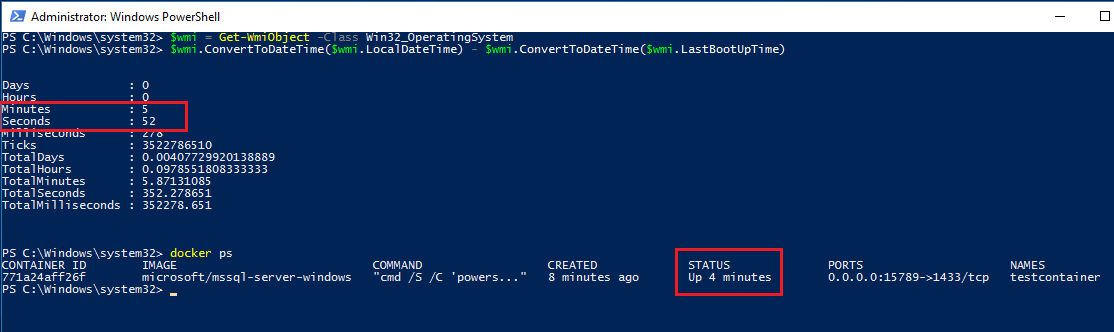
I can confirm this by running: –

docker ps

Excellent, five containers up and running! By using docker compose we can build multiple containers running SQL with one command. Very useful for building a development environment, once our applications are deployed they can connect to SQL within the containers instantly.

Final note

One thing to mention, you may come across this error: –

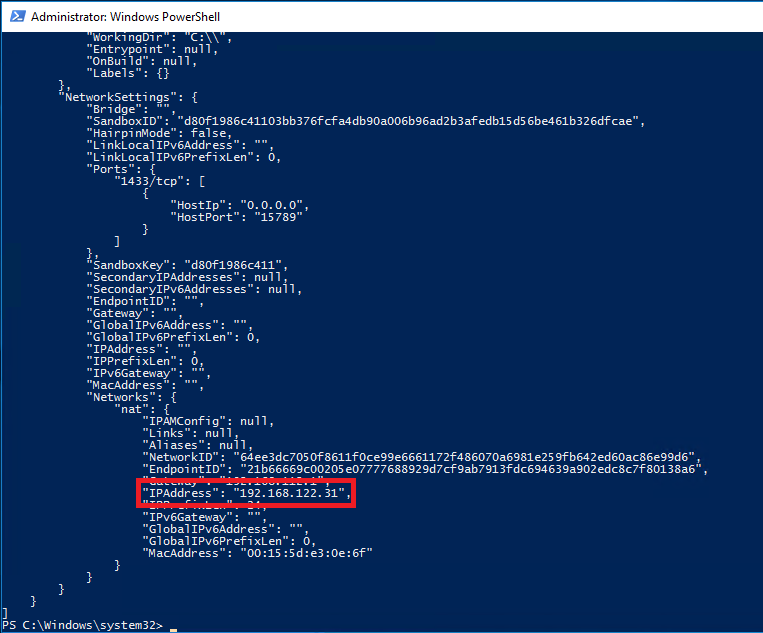
The way I got around this was to disable the existing vEthernet (HNS Internal NIC) adapter in my network connections. Running compose seems to create a new virtual NIC, so you will end up with: –

Let me know if you come across any other issues and I’ll investigate 🙂

Thanks for reading!

Persisting data in docker containers – Part Three

Last week in Part Two I went through how to create named volumes and map them to containers in order to persist data.

However, there is also another option available in the form of data volume containers.

The idea here is that create we a volume in a container and then mount that volume into another container. Confused? Yeah, me too but best to learn by doing so let’s run through how to use these things now.

So first we create the data volume container and create a data volume: –

docker create -v C:\SQLServer --name Datastore microsoft/windowsservercore

Note – that we’re not using an image running SQL Server. The windowservercore & mssql-server-windows images use common layers so we can save space by using the windowsservercore image for our data volume container.

Now create a container and mount the directory from data volume container to it: –

docker run -d -p 16789:1433 --env ACCEPT_EULA=Y --env sa_password=Testing11@@ --volumes-from Datastore --name testcontainer microsoft/mssql-server-windows

Actually, let’s also create another container but not start it up: –

docker create -d -p 16789:1433 --env ACCEPT_EULA=Y --env sa_password=Testing11@@ --volumes-from Datastore --name testcontainer2 microsoft/mssql-server-windows

So we now have three containers: –

Let’s confirm that the volume is within the first container: –

docker exec -i testcontainer powershell
ls

Update – April 2018
Loopback has now been enabled for Windows containers, so we can use localhost,16789 to connect locally. You can read more about it here

Ok, let’s get the private IP of the first container and connect to it: –

docker inspect testcontainer

Once you have the IP, connect to the SQL instance within the container and create a database (same as in Part One): –

USE [master];
GO
 
CREATE DATABASE [TestDB]
    ON PRIMARY
(NAME = N'TestDB', FILENAME = N'C:\SQLServer\TestDB.mdf')
    LOG ON
(NAME = N'TestDB_log', FILENAME = N'C:\SQLServer\TestDB_log.ldf')
GO

USE [TestDB];
GO
 
CREATE TABLE dbo.testtable
(ID INT);
GO
 
INSERT INTO dbo.testtable
(ID)
VALUES
(10);
GO 100

Now, let’s stop the first container and start the second container: –

docker stop testcontainer

docker start testcontainer2

And let’s have a look in the container: –

docker exec -i testcontainer2 powershell

ls

cd sqlserver

ls

So the files of the database that we created in the first container are available to the second container via the data container!

Ok, so that’s all well and good but why would I want to use data volume containers instead of the other methods I covered in Part One & Part Two?

The docker documentation here says that it’s best to use a data volume container however they don’t give a reason as to why!

The research that I’ve been doing into this has brought me to discussions where people say that there’s no point in using data volume containers and that just using volumes will do the trick.

I tend to agree that there’s not much point in using data volume containers, volumes will give you everything that you need. But it’s always good to be aware of the different options that a technology can provide.

So which method of data persistence would I recommend?

I would recommend using volumes mapped from the host if you’re going to need to persist data with containers. By doing this you can have greater resilience in your setup by separating your database files from the drive that your docker system is hosted on. I also prefer to have greater control over where the files live as well, purely because I’m kinda anal about these things 🙂

I know there’s an argument about using named volumes as it keeps everything within the docker ecosystem but for me, I don’t really care. I have control over my docker host so it doesn’t matter that there’s a dependency on the file system. What I would say though is, try each of these methods out, test thoroughly and come to decision on your own (there, buck successfully passed!).

Thanks for reading!

Persisting data in docker containers – Part Two

Last week in Part One I went through how to mount directories from the host server into a docker container in order to persist data.

However, you don’t have to do this in order to share volumes between containers. Another method is to create named volumes within the docker ecosystem (as it were) and then map those volumes into containers upon creation.

Here’s how to do it.

First we create the volume that we want to share within docker: –

docker volume create sqldata
docker volume ls


Now let’s create two containers both referencing the volume. One will be up and running whilst the other remains in the stopped state: –

docker run -d -p 15789:1433 -v sqldata:C\sqldata --env ACCEPT_EULA=Y --env sa_password=Testing11@@ --name testcontainer microsoft/mssql-server-windows


docker create -p 15789:1433 -v sqldata:C\sqldata --env ACCEPT_EULA=Y --env sa_password=Testing11@@ --name testcontainer2 microsoft/mssql-server-windows


Let’s have a look in the first container to see if the volume is there: –

docker exec -i testcontainer powershell


Update – April 2018
Loopback has now been enabled for Windows containers, so we can use localhost,15789 to connect locally. You can read more about it here

Ok, it’s there. So grab the private IP address of the container so that we can connect to it in SSMS: –

docker inspect testcontainer


Now we’ll create a database with its files in that location: –

USE [master];
GO
 
CREATE DATABASE [TestDB]
    ON PRIMARY
(NAME = N'TestDB', FILENAME = N'C:\sqldata\TestDB.mdf')
    LOG ON
(NAME = N'TestDB_log', FILENAME = N'C:\sqldata\TestDB_log.ldf')
GO

USE [TestDB];
GO
 
CREATE TABLE dbo.testtable
(ID INT);
GO
 
INSERT INTO dbo.testtable
(ID)
VALUES
(10);
GO 100


Right, now let’s blow that first container away and spin up the second one: –

docker stop testcontainer

docker rm testcontainer

docker start testcontainer2


Hmm, all looks good. But let’s check that the volume is there with the database’s files: –

docker exec -i testcontainer2 powershell

cd sqldata

ls


Cool! The files are there, so let’s connect to the SQL instance within the second container and see if we can attach the database: –

docker inspect testcontainer2


Let’s try the attach: –

USE [master]
GO
CREATE DATABASE [TestDB] ON 
( FILENAME = N'C:\sqldata\TestDB.mdf' ),
( FILENAME = N'C:\sqldata\TestDB_log.ldf' )
 FOR ATTACH
GO


Awesome stuff! We’ve got a database that was created in another container successfully attached into another one.

So at this point you may be wondering what the advantage is of doing this over mounting folders from the host? Well, to be honest, I really can’t see what the advantages are.

The volume is completely contained within the docker ecosystem so if anything happens to the docker install, we’ve lost the data. OK, OK, I know it’s in C:\ProgramData\docker\volumes\ on the host but still I’d prefer to have more control over its location.

I like the idea of mounted volumes better if I’m honest. I can specify where my database files are with much more control and I can also have access if needed.

However, each to their own personal preference and if you have a good reason for using named volumes over mounted volumes, let me know 🙂

Thanks for reading!

Persisting data in docker containers – Part One

Normally when I work with SQL instances within containers I treat them as throw-away objects. Any modifications that I make to the databases within will be lost when I drop the container.

However, what if I want to persist the data that I have in my containers? Well, there are options to do just that. One method is to mount a directory from the host into a container.

Full documentation can be found here but I’ll run through an example step-by-step here.

First create a directory on the host that we will mount into the container: –

mkdir D:\SQLServer

And now build a container using the -v flag to mount the directory: –

docker run -d -p 15789:1433 -v D:\SQLServer:C:\SQLServer --env ACCEPT_EULA=Y --env sa_password=Testing11@@ --name testcontainer microsoft/mssql-server-windows


So that’s built us a container running an empty instance of SQL Server with the D:\SQLServer directory on the host mounted as C:\SQLServer in the container.

Update – April 2018
Loopback has now been enabled for Windows containers, so we can use localhost,15789 to connect locally. You can read more about it here

Now, let’s create a database on the drive that we’ve mounted in the container. First grab the container private IP (as we’re connecting locally on the host): –

docker inspect testcontainer


And use it to connect to the SQL instance within the container:-


Now create the database with its files in the mounted directory : –

USE [master];
GO

CREATE DATABASE [TestDB]
	ON PRIMARY 
(NAME = N'TestDB', FILENAME = N'C:\SQLServer\TestDB.mdf')
	LOG ON 
(NAME = N'TestDB_log', FILENAME = N'C:\SQLServer\TestDB_log.ldf')
GO

And let’s create a simple table with some data: –

USE [TestDB];
GO

CREATE TABLE dbo.testtable
(ID INT);
GO

INSERT INTO dbo.testtable
(ID)
VALUES
(10);
GO 100

Cool, if we check the directory on the host, we’ll see the database’s files: –


OK, now let’s blow that container away: –

docker stop testcontainer

docker rm testcontainer

If you check the host, the directory with the database files should still be there.

Now, let’s create another container, mounting the directory back in: –

docker run -d -p 15799:1433 -v D:\SQLServer:C:\SQLServer --env ACCEPT_EULA=Y --env sa_password=Testing11@@ --name testcontainer2 microsoft/mssql-server-windows

Same as before, grab the private IP and connect into SQL Server: –


No database! Of course, we need to attach it! So…


And there it is!


Cool, so a database created in one container has been attached into a SQL instance running in another. Notice that I didn’t detach the database before stopping and then dropping the container. Now, that doesn’t mean that the process of shutting down a container stops the SQL instance gracefully. It’d be interesting to see what happens if a container is stopped whilst queries are running, I bet if we deleted the container without stopping it first the database would be corrupt.

Anyway, using the -v flag to mount directories from the host into a container is one way of persisting data when using docker.

Thanks for reading!