SQL Server on Linux has been out for a bit now and I’ve played around a little (see here) but haven’t really used it in “anger” nor will I for the foreseeable future if I’m honest. Nevertheless it’s an area that I find very interesting as I know very little when it comes to the Linux operating system and as it’s such a huge area, it’s something that I want to learn more about.
I feel the best way to learn is to actually try and do something with it. Sure, I could sit down and read articles on the web but I learn best by doing. So I began to think about what would be the first thing I’d try and do if presented with an instance of SQL Server running on Linux that I had to manage.
Right, well being a DBA, setting up backups and restores I guess but I want something a little more involved. How about setting up a warm standby instance! Log shipping! It’s perfect as it’s a fairly simple process within SQL but should teach me a bit about the Linux environment (copying files etc.) as SQL on Linux doesn’t have an Agent so this have to be done manually.
But before I go through how I set this up…
DISCLAIMERS!
- I have published this as a purely academic exercise, I wanted to see if I could do it.
- At no point should this be considered to have followed best practices.
- This should NOT be used in a production environment.
- There are probably better ways of doing this, if you have one then let me know.
Here goes!
What I’m going to do is setup two instances of SQL Server running on linux and log ship one database from one to another. So the first thing I did was get two VMs running Ubuntu 16.04.1 LTS which can be download from here.
Once both servers were setup (remember to enable ssh) I then went about getting SQL setup, I’m not going to go through the install in this post as the process is documented fully here. Don’t forget to also install the SQL Tools, full guide is here.
N.B. – when installing the tools I’ve always just run:-
sudo apt-get install mssql-tools
The link will tell you to add unixodbc-dev to the end of the statement but that’s caused me issues in the past.
You’ll also need to run:-
echo 'export PATH="$PATH:/opt/mssql-tools/bin"' >> ~/.bash_profile
echo 'export PATH="$PATH:/opt/mssql-tools/bin"' >> ~/.bashrc
And then log out and log straight back in otherwise you won’t be able to run sqlcmd
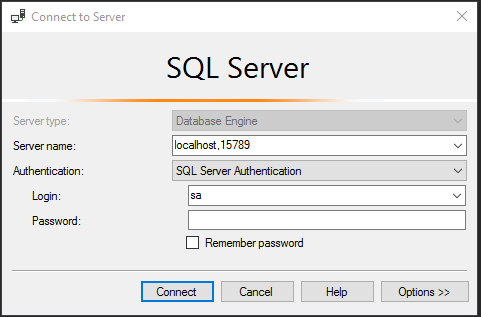
Anyway, once that’s setup verify that you can connect to both instances, either by sqlcmd on the server or through SSMS remotely.
Ok, now we need to create folders on both servers to hold the scripts and backups needed. So in your favourite shell (I’m using bash on windows), ssh into your first server and run: –
mkdir SQLScripts
mkdir SQLBackups
This will create two folders in your default home location, for me that’s… /home/andrew
Next thing to do is sort out access to these folders so that SQL Server can write backups to them. I found this kinda tricky if I’m honest as linux permissions are completely new to me but this is how I went about it.
When SQL Server is installed a group called mssql is created. What I’m going to do is add my user into that group and then change the ownership and group access to these folders to that group. So, run:-
sudo usermod -a -G mssql andrew
This change can then be verified by running:-
id andrew
N.B.- You’ll have to log out and then back in for this to take effect
Then we can change the permissions on the folders:-
sudo chown mssql SQLScripts
sudo chown mssql SQLBackups

sudo chgrp mssql SQLScripts
sudo chgrp mssql SQLBackups
I also need to modify what the owner and group members can do in those folders. I’ve played around with these permissions a bit and the best configuration I’ve found is set by running: –
sudo chmod 770 SQLScripts
sudo chmod 770 SQLBackups
This will allow the owner of the folder (mssql) and members of the group mssql to do what they want. More details on setting permissions in linux can be found here.
Once that’s done you can verify the change by running:-
ls -al

On server 2 run all the above scripts to setup the same folders and permissions. Once that’s done we also need to setup an Archive folder (only on server 2) to move the transaction log backups into once they are restored. So run the following (same code as above really):-
cd /home/andrew/SQLBackups

mkdir Archive
sudo chown mssql Archive
sudo chgrp mssql Archive
sudo chmod 770 Archive

Once that’s done we can initialize a database for log shipping. So in your first instance of SQL we will create a login to run the backups, create a database, create a user for the login (with membership of the db_backupoperator role), take a full backup and then take a log backup:-
USE [master];
GO
CREATE LOGIN [logshipper] WITH PASSWORD='Testing11@@',CHECK_POLICY=OFF,CHECK_EXPIRATION=OFF;
GO
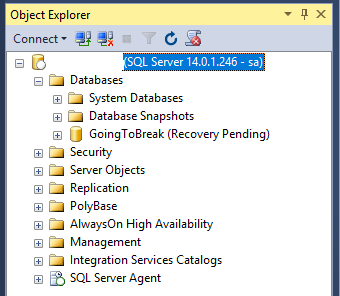
CREATE DATABASE [LogShipped];
GO
BACKUP DATABASE [LogShipped]
TO DISK = 'C:\home\andrew\SQLBackups\LogShipped.bak';
GO
BACKUP LOG [LogShipped]
TO DISK = 'C:\home\andrew\SQLBackups\LogShipped.trn';
GO
USE [LogShipped];
GO
CREATE USER [logshipper] FOR LOGIN [logshipper];
GO
ALTER ROLE [db_backupoperator] ADD MEMBER [logshipper];
GO
N.B.- note that SQL Server does recognise linux pathways. SQL thinks that the backup folder we created lives at C:\home\andrew\SQLBackups not /home/andrew/SQLBackups
Now we push these over to the secondary server so that we can restore them. To do this I’m going to use a program called scp, so back in your shell session on the first server, navigate to your SQLBackups folder and run: –
scp LogShipped.bak andrew@192.168.xx.xx:/home/andrew/SQLBackups
scp LogShipped.trn andrew@192.168.xx.xx:/home/andrew/SQLBackups
Before you’ll be able to restore the database backups we need to allow the SQL Server instance on server 2 to be able to read the files we’ve just transferred over. To do this, ssh to server 2 and run:-
cd /home/andrew/SQLBackups
chmod 666 LogShipped.bak
chmod 666 LogShipped.trn
Ok, once the files are on the secondary server, connect to the second instance of SQL via SSMS to restore the database and transaction log backups as normal when setting up log shipping:-
USE [master];
GO

RESTORE DATABASE [LogShipped]
FROM DISK = 'C:\home\andrew\SQLBackups\LogShipped.bak'
WITH NORECOVERY;
GO

RESTORE LOG [LogShipped]
FROM DISK = 'C:\home\andrew\SQLBackups\LogShipped.trn'
WITH NORECOVERY;
GO
Now we need to create a login to perform the restores:-
USE [master];
GO

CREATE LOGIN [logshipper] WITH PASSWORD='Testing11@@',CHECK_POLICY=OFF,CHECK_EXPIRATION=OFF;
GO

ALTER SERVER ROLE [dbcreator] ADD MEMBER [logshipper];
GO
N.B.- I’ve noticed that even though the above permissions are correct to restore the log, this won’t work with sqlcmd. The work around I have is to make the logshipper login a member of the sysadmin role, not ideal I know.
One thing I noticed when looking into this behaviour is a note on the documentation for the sqlcmd utility here:-
SQL Server Management Studio (SSMS) uses the Microsoft.NET FrameworkSqlClient for execution in regular and SQLCMD mode in Query Editor. When sqlcmd is run from the command line, sqlcmd uses the ODBC driver. Because different default options may apply, you might see different behavior when you execute the same query in SQL Server Management Studio in SQLCMD Mode and in the sqlcmd utility.
I’m going to keep researching this to see what’s going on but for now let’s continue with the setup.
Now that the initial database and transaction log backups have been restored, move them into the Archive folder setup earlier:-
cd /home/andrew/SQLBackups

mv LogShipped.bak Archive
mv LogShipped.trn Archive
Ok cool, barring some sqlcmd oddness, that’s our secondary SQL instance setup.
By the way, did you get asked to enter your password to connect to the secondary server? That’s going to be a problem for us as we want to have the log shipping process running automatically.
The way I sorted this was to setup public and private keys on the servers and then transfer the public key of server 1 to server 2. This then allows passwordless file transfers between the servers.
So on both servers run:-
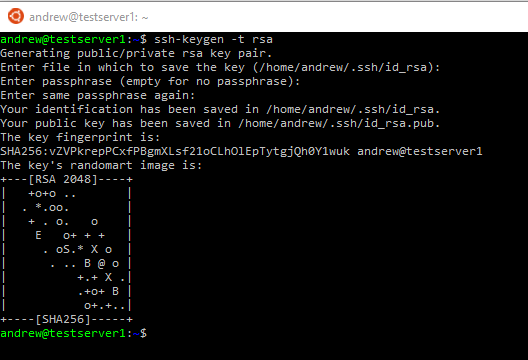
ssh-keygen -t rsa
Don’t enter anything in the prompts, just keep hitting enter until you see:-
Then we transfer over the public key generated on server 1 to server 2 using the scp command:-
scp ~/.ssh/id_rsa.pub andrew@192.168.xx.xx:/home/andrew
Then on server 2 we need to copy the server 1 public key into ~/.ssh/authorized keys. So in your home directory (or wherever you copied server 1’s public key to) run:-
cat id_rsa.pub >> ~/.ssh/authorized_keys
chmod 700 ~/.ssh/authorized_keys
The last line is important as it changes the settings of the keys folder to be restricted to the owner. Passwordless file transfer won’t work if access to the keys is too open.
Right, now we can create the scripts required to perform log shipping. So back on the first server go to the SQLScripts folder and run: –
nano BackupTLog.sql
This will create a new file and open it in the nano text editor (use other editors at your own peril!). In the file drop in:-
USE [master];
GO

DECLARE @SQL NVARCHAR(MAX);
DECLARE @DateStamp NVARCHAR(20);
DECLARE @DBNAME SYSNAME;

SET @DateStamp = CONVERT(NVARCHAR(10),GETUTCDATE(),112) + '_'
                                + CONVERT(NVARCHAR(2),DATEPART(HOUR,GETUTCDATE()))
                                + CONVERT(NVARCHAR(2),DATEPART(MINUTE,GETUTCDATE()))
                                + CONVERT(NVARCHAR(2),DATEPART(SECOND,GETUTCDATE()))

SET @DBName = 'LogShipped';
SET @sql = 'BACKUP LOG [' + @DBName + '] to disk = ''C:\home\andrew\SQLBackups\' +
                   @DBName + '_TL_Backup_' + @DateStamp + '.trn''';

EXEC [master].dbo.sp_executesql @sql;
GO
Nice and easy, this simply will create a time stamped transaction log of the database.
So we have the SQL script to backup the database, let’s create the script to move the transaction log backups from server 1 to server 2. So back in the SQLScripts folder on server 1:-
nano CopyFileToServer.sh
And drop in:-
cd /home/andrew/SQLBackups

file=$(ls -Art | tail -1)

rsync --chmod=666 $file andrew@192.168.xx.xx:/home/andrew/SQLBackups/
Now what this is doing is selecting the most recent file in the backups folder and then using a program called rsync to copy the file to server 2.
The reason I am using rsync is that I ran into the same issue with permissions that we corrected when copying the initial backups to server 2. The file that’s copied is owned by myself and as such the instance of SQL Server on server 2 couldn’t access it. What rsync allows you to do is setup the permissions of the copied file, so I used chmod 666 to allow everyone on server 2 to read and write the file (I know, I know).
Final script on server 1 is to run the backup and then kick off the copy, so:-
nano RunLogShipping.sh
And drop in: –
cd /home/andrew/SQLScripts

sqlcmd -S . -U logshipper -P Testing11@@ -i ./BackupTLog.sql

sleep 10

./CopyFileToServer.sh
The script navigates to the SQLScripts folder, takes a backup using sqlcmd, waits 10 seconds and then copies the file across.
Finally on server 1 we need to make the scripts executable so:-
chmod 770 BackupTLog.sql
chmod 770 CopyFileToServer.sh
chmod 770 RunLogShipping.sh
OK, so let’s create the script to restore the transaction log backups on the second server. So in the SQLScripts folder on server 2 run:-
nano RestoreTLog.sql
And then drop in:-
SET NOCOUNT ON;

DECLARE @FileName nvarchar(100)
DECLARE @SQL nvarchar(max)
DECLARE @TLFILE TABLE
(ID INT IDENTITY(1, 1),
 BackupFile VARCHAR(200),
 ParentId INT,
 Depth INT,
 ISFILE BIT)

INSERT INTO @TLFILE
(BackupFile, Depth, ISFILE)
EXEC xp_dirtree 'c:\home\andrew\SQLBackups\', 10, 1

SET @FileName = (SELECT TOP 1 BackupFile FROM @TLFILE  WHERE ISFILE = 1 AND DEPTH = 1 ORDER BY BackupFile DESC)

SET @sql = 'RESTORE LOG [LogShipped] from disk = ''c:\home\andrew\SQLBackups\' + @FileName + ''' WITH NORECOVERY'

EXEC sp_executeSQL @SQL;
GO
Nice and easy again, simply using xp_dirtree to find the latest file (err..see below) in the backups folder and use that to restore the database.
Now there’s a bug in the above script that stops it from selecting the most recent transaction log backup file. Instead of mucking about with xp_cmdshell I thought a simpler process would be to archive the files after they’re used (hence the Archive folder). So we need two more scripts to move the files and one to execute the restore and move.
First, the move: –
nano ArchiveTLogBackup.sh
And drop in:-
cd /home/andrew/SQLBackups

file=$(ls -Art | tail -1)

mv $file /home/andrew/SQLBackups/Archive
Very similar to the copy script created on server 1. It simply looks for the most recent file and moves it into the Archive folder. Let’s create the script to run both of them:-
nano RunLogRestore.sh
And drop in: –
sqlcmd -S . -U logshipper -P Testing11@@ -i /home/andrew/SQLScripts/RestoreTLog.sql

/home/andrew/SQLScripts/ArchiveTLogBackup.sh
And as on server 1, we need to make these scripts executable:-
chmod 770 ArchiveTLogBackup.sh
chmod 770 RestoreTLog.sql
chmod 770 RunLogRestore.sh
Cool!
So we have all our scripts and a database ready to but how are we actually going to perform log shipping? These SQL instances have no agent so the answer is crontab, a task scheduler that comes with Linux.
To open up crontab run (on server 1):-
crontab -e
You’ll probably get a menu to choose your editor, if you use anything other than nano you’re on your own 🙂
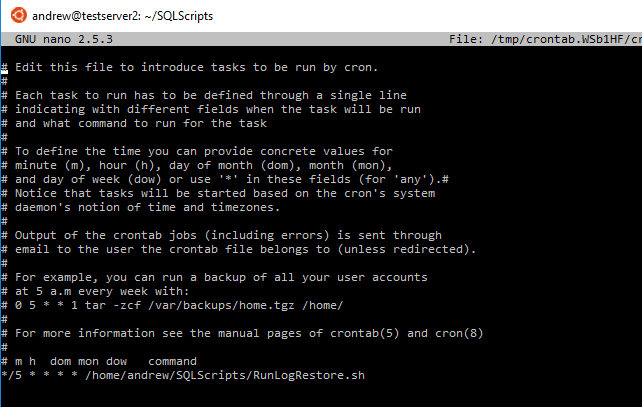
Here’s what I setup on server 1:-

The code inserted is:-
*/5 * * * * /home/andrew/SQLScripts/RunLogShipping.sh
What this is going to do is run that log shipping script every 5 mins.
Now we need to setup a similar job on server 2 to restore the transferred log backup. So hop onto server 2 and run the same command:-
crontab -e
Here’s what I setup:-

The code inserted is: –
*/5 * * * * /home/andrew/SQLScripts/RunLogRestore.sh
And what this code is going to do is look for the latest file in the SQLBackups folder, restore it and move the transaction log backup into the Archive folder every 5 minutes. Because of the 10 second delay in the log shipping script, the restored database on server 2 is always going to be 5 minutes behind.
So we’re pretty much done! The last thing to do is monitor as the scripts will start to be executed automatically.
On the second instance you can run the following to monitor:-
SELECT
	 [h].[destination_database_name]
	,[h].[restore_date]
	,[m].[physical_device_name]
FROM msdb.dbo.restorehistory h
INNER JOIN msdb.dbo.backupset s ON [h].[backup_set_id] = [s].[backup_set_id]
INNER JOIN msdb.dbo.backupmediafamily m ON [s].[media_set_id] = [m].[media_set_id]
ORDER BY [h].[restore_date] DESC

You will also be able to check the system log on the Linux boxes by running:-
tail /var/log/syslog
And you can limit it to the crontab output:-
grep CRON /var/log/syslog
Remember, it’ll take 10 mins for the restores to kick off as the way this has been setup is that the restore script will restore the transaction log backup taken 5 mins previously. You can see this above as the timestamp on the log backups is 5 mins behind the time of the restore.
Phew! If you’ve made it this far then fair play to you. That was long and involved but good fun to try and figure out (if at times completely infuriating! 🙂 ). I know it’s very rough around the edges but I’m genuinely chuffed that I got it working and as the whole point was to learn more about the linux operating system, I feel it’s been worthwhile.
Thanks for reading!