Adjusting pod eviction time in Kubernetes

One of the best features of Kubernetes is the built-in high availability.

When a node goes offline, all pods on that node are terminated and new ones spun up on a healthy node.

The default time that it takes from a node being reported as not-ready to the pods being moved is 5 minutes.

This really isn’t a problem if you have multiple pods running under a single deployment. The pods on the healthy nodes will handle any requests made whilst the pod(s) on the downed node are waiting to be moved.

But what happens when you only have one pod in a deployment? Say, when you’re running SQL Server in Kubernetes? Five minutes really isn’t an acceptable time for your SQL instance to be offline.

The simplest way to adjust this is to add the following tolerations to your deployment: –

      tolerations:
      - key: "node.kubernetes.io/unreachable"
        operator: "Exists"
        effect: "NoExecute"
        tolerationSeconds: 10
      - key: "node.kubernetes.io/not-ready"
        operator: "Exists"
        effect: "NoExecute"
        tolerationSeconds: 10

N.B.- You can read more about taints and tolerations in Kubernetes here

This will move any pods in the deployment to a healthy node 10 seconds after a node is reported as either not-ready or unreachable

But what if you wanted to change the default setting across the cluster?

I was trying to work out how to do this last week and the official docs here reference a flag for the controller manager: –

–pod-eviction-timeout duration Default: 5m0s
The grace period for deleting pods on failed nodes.

Great stuff! That’s exactly what I was looking for!

Unfortunately, it seems that this flag no longer works.

The way to set the eviction timeout value now is to set the flags on the api-server.

Now, this is done differently depending on how you installed Kubernetes. I installed this cluster with kubeadm so needed to create a kubeadm-apiserver-update.yaml file: –

apiVersion: kubeadm.k8s.io/v1beta2
kind: ClusterConfiguration
kubernetesVersion: v1.18.0
apiServer:
  extraArgs:
    enable-admission-plugins: DefaultTolerationSeconds
    default-not-ready-toleration-seconds: "10"
    default-unreachable-toleration-seconds: "10"

N.B.- Make sure the kubernetesVersion is correct

And then apply: –

sudo kubeadm init phase control-plane apiserver --config=kubeadm-apiserver-update.yaml

You can verify that the change has been applied by checking the api-server pods in the kube-system namespace (they should refresh) and by checking here: –

cat /etc/kubernetes/manifests/kube-apiserver.yaml

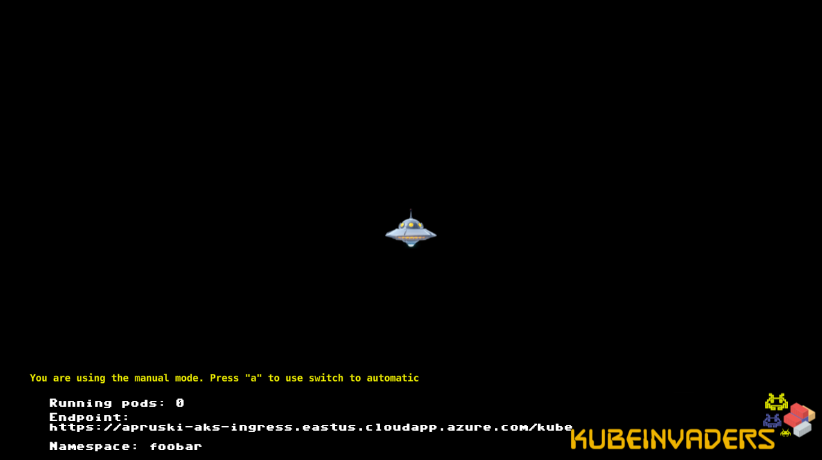
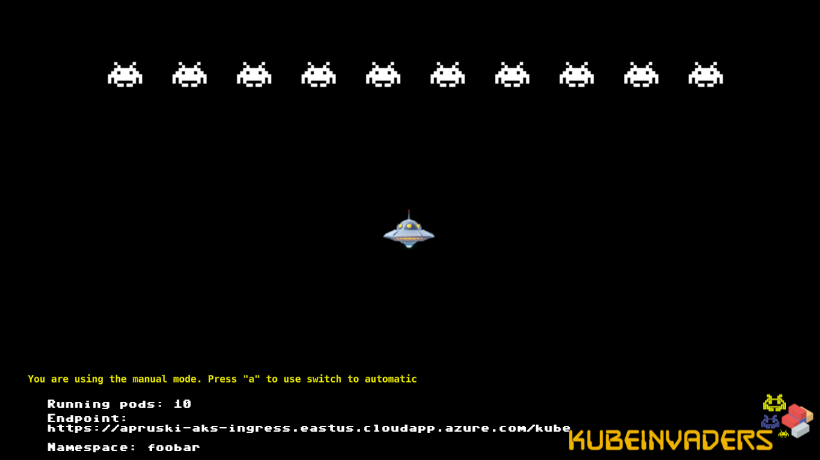
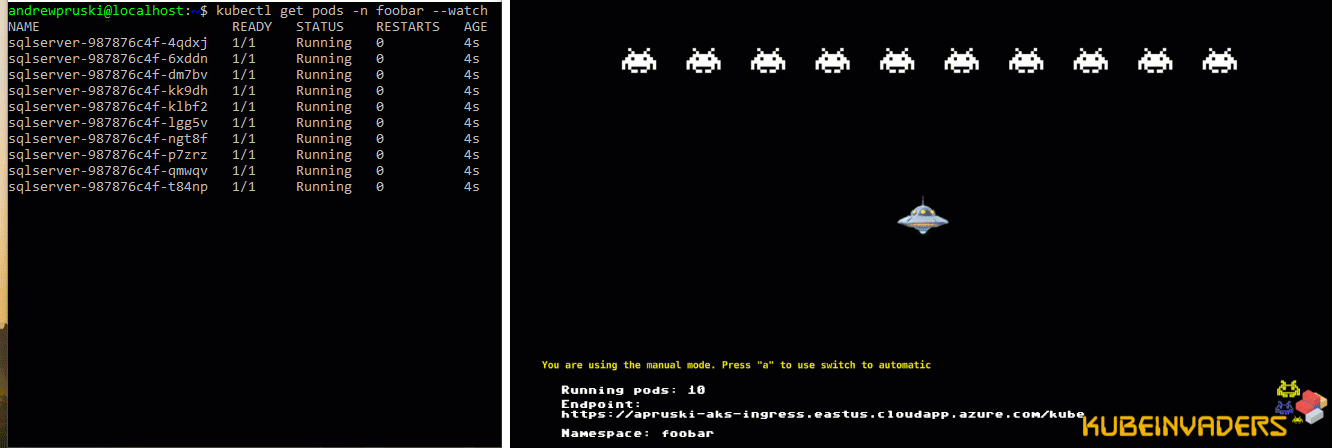
Let’s see it in action! I’ve got one pod running SQL Server in a K8s cluster on node kubernetes-w1. Let’s shut down that node…

Alright, that’s not exactly 10 seconds…there’s a couple of other things going on. But it’s a lot better than 5 mins!

The full deployment yaml that I used is here.

Ok, it is a bit of a contrived test, I’ll admit. The node was shutdown gracefully and I haven’t configured any persistent storage BUT this is still better than having to wait 5 minutes for the pod to be spun up on the healthy node.

N.B.- If you’re working with a managed Kubernetes service, such as AKS or EKS, you won’t be able to do this. You’ll need to add the tolerations to your deployment.

Thanks for reading!

Merge kubectl config files on Windows

When working with multiple Kubernetes clusters, at some point you’ll want to merge your kubectl config files.

I’ve seen a few blogs on how to merge kubectl config files but haven’t seen any on how to do it on Windows. It’s pretty much the same process, just adapted for powershell on Windows.

In this example, I’ll merge a new config file in C:\Temp to my existing config file in C:\users\andrew.pruski\.kube

N.B.- If you’re working with AKS, az aks get-credentials will do this for you

Firstly, backup the existing config file:-

cp C:\users\andrew.pruski\.kube\config C:\users\andrew.pruski\.kube\config_backup

Copy the new config file into the .kube directory: –

Copy-Item C:\Temp\config C:\users\andrew.pruski\.kube\config2

Set the KUBECONFIG environment variable to point at both config files:-

$env:KUBECONFIG="C:\users\andrew.pruski\.kube\config;C:\users\andrew.pruski\.kube\config2"

Export the output of the config view command (which references both config files) to a config_tmp file: –

kubectl config view  --raw > C:\users\andrew.pruski\.kube\config_tmp

Check all is working as expected (all clusters can be seen):-

kubectl config get-clusters --kubeconfig=C:\users\andrew.pruski\.kube\config_tmp

If all is working as expected, replace the old config file with the config_tmp file: –

Remove-Item C:\users\andrew.pruski\.kube\config
Move-Item C:\users\andrew.pruski\.kube\config_tmp C:\users\andrew.pruski\.kube\config

Finally, confirm it’s working: –

kubectl config get-clusters

Thanks for reading!

Use port forwarding to access SQL Server running in Kubernetes

A really handy feature in Kubernetes is port forwarding. This can be used to narrow down an issue when connections are failing to SQL Server running in a cluster.

Say we have deployed the following to a Kubernetes cluster: –

apiVersion: apps/v1beta1
kind: Deployment
metadata:
  name: sqlserver
spec:
  replicas: 1
  template:
    metadata:
      labels:
        name: sqlserver
    spec:
      containers:
      - name: sqlserver1
        image: mcr.microsoft.com/mssql/server:2019-RC1-ubuntu
        ports:
        - containerPort: 1433
        env:
        - name: SA_PASSWORD
          value: "Testing1122"
        - name: ACCEPT_EULA
          value: "Y"
---
apiVersion: v1
kind: Service
metadata:
  name: sqlserver-service
spec:
  ports:
  - name: sqlserver
    port: 1433
    targetPort: 1433
  selector:
    name: sqlserver
  type: LoadBalancer

This will create the following in the Kubernetes cluster: –

The load balanced service’s IP can be usually be used to connect into the SQL instance running in the pod, but what if we’re unable to connect? Does the issue lie with the service or the pod?

In order to narrow this down, port forwarding can be used to directly connect to the pod: –

kubectl port-forward pod/sqlserver-889b56d7b-nb2b4 15789:1433

This will allow us to use 127.0.0.1,15789 (localhost won’t work) and connect from our local machine to the pod running in the Kubernetes cluster (in a separate window): –

mssql-cli -S 127.0.0.1,15789 -U sa

We can use the same port to connect via ADS and SSMS as well: –

If a connection can be established to the pod via the forwarded port then we know that the issue doesn’t lie with the pod but with the service or the connection from the service to the pod.

Thanks for reading!

Converting SQL Server docker compose files for Kubernetes with Kompose

Docker compose is a great tool for easily deploying docker container without having to write lengthy docker run commands. But what if I want to deploy my docker-compose.yaml file into Kubernetes?

Kompose is a tool that can convert docker compose files so that they can be deployed to a Kubernetes cluster.

Here’s a typical docker-compose.yaml file I use: –

version: '3'
 
services:
    sqlserver1:
        image: mcr.microsoft.com/mssql/server:2019-CTP3.1-ubuntu
        ports:  
          - "15789:1433"
        environment:
          SA_PASSWORD: "Testing1122"
          ACCEPT_EULA: "Y"
          MSSQL_DATA_DIR: "/var/opt/sqlserver/data"
          MSSQL_LOG_DIR: "/var/opt/sqlserver/log"
          MSSQL_BACKUP_DIR: "/var/opt/sqlserver/backup"
        volumes: 
          - sqlsystem:/var/opt/mssql/
          - sqldata:/var/opt/sqlserver/data
          - sqllog:/var/opt/sqlserver/log
volumes:
  sqlsystem:
  sqldata:
  sqllog:

This will spin up one container running SQL Server 2019 CTP 3.1, accept the EULA, set the SA password, and set the default location for the database data/log/backup files using named volumes created on the fly.

Let’s convert this using Kompose and deploy to a Kubernetes cluster.

To get started with Kompose first install by following the instructions here. I installed on my Windows 10 laptop so I downloaded the binary and added to my PATH environment variable.

Before running Kompose I had to make a slight change to the docker-compose.yaml file because when I deploy SQL Server to Kubernetes I want to create a LoadBalanced service so that I can connect to the SQL instance remotely. To get Kompose to create a LoadBalanced service I had to add the following to my docker-compose.yaml file (under the first volumes section): –

        labels:
          kompose.service.type: LoadBalancer

Then I navigated to the location of my docker-compose.yaml file and ran: –

kompose convert -f docker-compose.yaml

Which created the corresponding yaml files!

Looking through the created files, they all look good! The PVCs will use the default storage class of the Kubernetes cluster that you’re deploying to and the deployment/service don’t need any adjustment either.

So now that I have the yaml files to deploy into Kubernetes, I simply run:-

kompose up

And the files will be deployed to my Kubernetes cluster!

OK, kubectl describe pods will show errors initially when the pod is first created as the PVCs haven’t been created but it will retry.

Once the pod is up and the service has an external IP address, the SQL instance can be connected to. Nice and easy!

Cleaning up is also a cinch, just run:-

kompose down

And the objects will be deleted from the cluster.

Thanks for reading!

Chaos engineering for SQL Server running on AKS using KubeInvaders


UPDATE – March 2022
I have publised an updated guide to deploying KubeInvaders on AKS here: –
Space Invaders on Kubernetes


A couple of weeks ago I came across an awesome GitHub repo called KubeInvaders which is the brilliant work of Eugenio Marzo (b|t)

KubeInvaders allows you to play Space Invaders in order to kill pods in Kubernetes and watch new pods be created (this actually might be my favourite github repo of all time).

I demo SQL Server running in Kubernetes a lot so really wanted to get this working in my Azure Kubernetes Service cluster. Here’s how you get this up and running.


Prerequisites

1. A DockerHub repository
2. An Azure Kubernetes Service cluster – I blogged about spinning one up here
3. A HTTPS ingress controller on AKS with a FQDN for the ingress controller IP. I didn’t have to change anything in the instructions in the link but don’t worry if the final test doesn’t work…it didn’t work for me either.


Building the image

First, clone the repo:-

git clone https://github.com/lucky-sideburn/KubeInvaders.git

Switch to the AKS branch:-

cd KubeInvaders
git checkout aks

Build the image:-

docker build -t kubeinvaders .

Once the image has built, tag it with a public repository name and then push:-

docker tag kubeinvaders dbafromthecold/kubeinvaders:aks
docker push

Deploying to AKS

Now that the image is in a public repository, we can deploy to Kubernetes. Eugenio has provided all the necessary yaml files, so it’s really easy! Only a couple of changes are needed.

First one is the the kubeinvaders-deployment.yaml file, the image name needs to be updated:-

    spec:
      containers:
      - image: dbafromthecold/kubeinvaders:aks

And the host in the kubeinvaders-ingress.yaml file needs to be set to the FQDN of your ingress (set when following the MS docs): –

spec:
  tls:
  - hosts:
    - apruski-aks-ingress.eastus.cloudapp.azure.com
  rules:
  - host: apruski-aks-ingress.eastus.cloudapp.azure.com

Cool. So now each of the files can be deployed to your cluster: –

kubectl apply -f kubernetes/kubeinvaders-namespace.yml

kubectl apply -f kubernetes/kubeinvaders-deployment.yml -n kubeinvaders

kubectl expose deployment kubeinvaders --type=NodePort --name=kubeinvaders -n kubeinvaders --port 8080

kubectl apply -f kubernetes/kubeinvaders-ingress.yml -n kubeinvaders

kubectl create sa kubeinvaders -n foobar 

kubectl apply -f kubernetes/kubeinvaders-role.yml

kubectl apply -f kubernetes/kubeinvaders-rolebinding.yml

Finally, set some environment variables: –

TARGET_NAMESPACE='foobar'
TOKEN=`kubectl describe secret $(kubectl get secret -n foobar | grep 'kubeinvaders-token' | awk '{ print $1}') -n foobar | grep 'token:' | awk '{ print $2}'`
ROUTE_HOST=apruski-aks-ingress.eastus.cloudapp.azure.com

kubectl set env deployment/kubeinvaders TOKEN=$TOKEN -n kubeinvaders
kubectl set env deployment/kubeinvaders NAMESPACE=$TARGET_NAMESPACE -n kubeinvaders
kubectl set env deployment/k/ubeinvaders ROUTE_HOST=$ROUTE_HOST -n kubeinvaders

Now navigate to the FQDN of the ingress in a browser and you should see…


Testing the game!

By default KubeInvaders points to a namespace called foobar so we need to create it: –

kubectl create namespace foobar

And now create a deployment running 10 SQL Server pods within the foobar namespace: –

kubectl run sqlserver --image=mcr.microsoft.com/mssql/server:2019-CTP3.1-ubuntu --replicas=10 -n foobar

Now the game will have 10 invaders which represent the pods!

Let’s play! Watch the pods and kill the invaders!

kubectl get pods -n foobar --watch

How awesome is that! You can even hit a to switch to automatic mode!

What a cool way to demo pod regeneration in Kubernetes.

Thanks for reading!