In a previous post I went through how to run SQL Server in Docker Swarm and in this post I want to continue delving into the Docker Swarm platform by looking at secrets.
Like Kubernetes, Docker Swarm has functionality to store sensitive data in secrets. When running SQL Server in containers we usually have to manually type out the environment variable for the MSSQL_SA_PASSWORD which isn’t great if we want to store that code in a public repository so being able to obfuscate that password is great!
Let’s have a look how it works. I’m going to use my lab detailed in the previous post.
First thing to do is create the secret: –
printf "Testing1122" | docker secret create mssql_sa_secret -
And confirm that the secret has been created: –
docker secret ls

WARNING – the first docker service create statement below doesn’t work! I’ve included it to show how I ended up at my end solution!
Ok, now we can reference the secret in our docker service create statement by using the –secret flag. This mounts the secret in the container at /run/secrets/secret_name which we can then reference in a –env flag.
Now we can create a service in Docker Swarm to run SQL Server, referencing that secret: –
docker service create \
--name sqlswarm1 \
--replicas 1 \
--publish 15789:1433 \
--secret source=mssql_sa_secret \
--env MSSQL_SA_PASSWORD=/run/secrets/mssql_sa_secret \
--env ACCEPT_EULA=Y \
mcr.microsoft.com/mssql/server:2022-CU4-ubuntu-20.04
Confirm that the service is up: –
docker service ls

And let’s connect to SQL from our local machine using the IP address of the manager node in the swarm and the port we specified in the docker service create statement (15789): –
mssql-cli -S 10.0.0.40,15789 -U sa -P Testing1122 -Q "SELECT @@VERSION AS [Version];"

Ah, that didn’t work! Let’s have a look why…
The password should be stored as an environment variable in the container so let’s find the node in the swarm that the container is running on: –
docker service ps sqlswarm1

And then run the following on the node: –
docker exec $(docker ps -aq) printenv

DOH!
It hasn’t taken the values within the file, it’s just taken the text that we entered into the container run statement!
Urgh, this is my fault. I’m referencing the documentation here but the docker service run statement I’m using as a guide is for a mysql container. MySQL has an environment variable that can reference a password file, no such luck with SQL Server.
So how do we reference the password within the file?
NOTE – there might be a better way to do this but this is the way I’ve come up with 🙂
Ok, so let’s get rid of that service: –
docker service rm sqlswarm1
Create an environmentvars.sh file: –
#!/bin/bash

export MSSQL_SA_PASSWORD=$(cat /run/secrets/mssql_sa_password)
In this file we reference the password file and set the environment variable.
Now create a custom image from a dockerfile: –
FROM mcr.microsoft.com/mssql/server:2022-CU4-ubuntu-20.04

USER root

COPY environmentvars.sh /var/opt/mssql/

RUN chown mssql /var/opt/mssql/environmentvars.sh

RUN chmod +x /var/opt/mssql/environmentvars.sh

USER mssql

CMD . /var/opt/mssql/environmentvars.sh && /opt/mssql/bin/sqlservr
Build the custom image: –
docker build -t customsqlimage .

NOTE – As this is a custom image not in a repository we’ll have to build the image on each of the nodes in the cluster
Ok, now we can recreate the service: –
docker service create \
--name sqlswarm1 \
--replicas 1 \
--publish 15789:1433 \
--secret source=mssql_sa_secret,target=mssql_sa_password \
--env ACCEPT_EULA=Y \
customsqlimage

NOTE – We’re removing the ENV for the MSSQL_SA_PASSWORD as it’s handled in the environmentvars.sh file. We also get a warning that the customsqlimage is not available in a registry so Docker will look for local images on each node (which could lead to a mismatch of image versions).
We have our service up so let’s try connect to SQL again: –
mssql-cli -S 10.0.0.40,15789 -U sa -P Testing1122 -Q "SELECT @@VERSION AS [Version];"
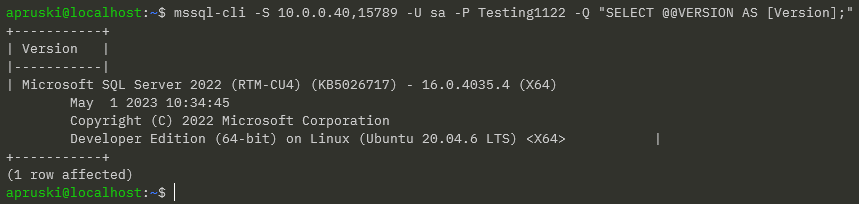
Ah ha! Success!
OK, I admit…not the greatest solution! BUT, we could use that environmentvars.sh file to create more environment variables than just MSSQL_SA_PASSWORD so it could (possibly) be useful?
Thanks for reading!


