Limiting resources available to containers

One question that I get asked regularly is, “can you limit the host resources to individual containers?”

This is a great question as you don’t want one container consuming all the resources on your host, starving all the other containers.

It’s actually really simple to limit the resources available to containers, there’s a couple of switches that can be specified at runtime. For example: –

docker run -d -p 15789:1433 `
		--cpus=2 --memory=2048m `
			--env ACCEPT_EULA=Y --env SA_PASSWORD=Testing11@@ `
				--name testcontainer microsoft/mssql-server-linux:2017-GA

What I’ve done here is use the cpus and memory switches to limit that container to a maximum of 2 CPUs and 2GB of RAM. There are other options available, more info is available here.

Simple, eh? But it does show something interesting.

I’m running Docker on my Windows 10 machine, using Linux containers. The way this works is by spinning up a Hyper-V Linux VM to run the containers (you can read more about this here).

When that Linux VM first spins up it only has 2GB of RAM available to it. This isn’t enough to run SQL containers, if you try you’ll get the following error: –

The Linux VM has to have at least 3250MB of RAM available to it in order to run a SQL Server container. But when you run an individual container you can limit that container to less than 3250MB, as I’ve done here.

But how do you decide what limits to impose? Well, there’s always trial and error (it’s served me well) or use the docker stats command.

What I’d recommend doing is spinning up a few containers using docker compose, running some workload against them, and then monitoring using: –

docker stats

This way you can monitor the resources consumed by the containers and make an informed decision when it comes to setting limits.

Thanks for reading!

Exploring the Kubernetes dashboard in Azure Container Services

Last week I went through how to run SQL Server in Kubernetes on Azure Container Services (ACS)

This week I want to explore the built-in Kubernetes dashboard which is available in ACS by default. (N.B. – You will need to have run through the steps in my last post to follow here)

The Kubernetes dashboard is available in a pod but can only be seen by running an additional flag with the kubectl get pods command: –

kubectl get pods --all-namespaces

In order to access the dashboard the kubectl proxy command needs to be run which starts a proxy to the Kubernetes API server:-

kubectl proxy

The dashboard then becomes available at http://localhost:8001/ui

From the dashboard all the objects that were created in my last post can be viewed, such as the pod created (on the main page): –

The nodes of the cluster: –

And the service created in order to access SQL within the pod: –

But not only can existing objects be viewed, new ones can be created.

In my last post I created a single pod running SQL Server, I want to move on from that as you’d generally never just deploy one pod. Instead you would create what’s called a deployment.

The dashboard makes it really simple to create deployments. Just click Deployments on the right-hand side menu and fill out the details: –

Don’t forget to click on Advanced Details and enter in the environment variables required.

At a minimum variables for ACCEPT_EULA (otherwise the container will not run) and SA_PASSWORD (otherwise you will not be able to connect to SQL Server) need to be specified: –

Hit Deploy and then the following screen will show the progress of the deployment: –

The new objects will have a green tick next to them once the deployment is complete: –

The external IP used to connect to SQL within the pod created can be found by clicking on the newly created service (found on the right-hand side menu).

That IP can then be dropped into SSMS (along with the SA username and password set) and boom! A connection to SQL Server running in a Kubernetes pod that was created via a deployment from the dashboard: –

Thanks for reading!

Running SQL Server in Kubernetes on Azure Container Services

NOVEMBER 2017 UPDATE – Microsoft has now released a new version of Azure Container Services (AK) specifically for Kubernetes. I’ve blogged about it here


I’ve been meaning to get to grips with Kubernetes for a while now but I have to admit, I was completely overwhelmed when I first approached the subject. There’s so much information and documentation out there, it’s difficult to know where to start.

What really helped was James Anderson’s (t) excellent post on Orchestrating SQL Server with Kubernetes

After working through the instructions in James’ post and playing with Minikube for a while, I wanted to try setting up and configuring a larger Kubernetes cluster.

Back in July Microsoft announced Azure Container Services (ACS) so I started learning how to spin up SQL Server containers in a Kubernetes cluster in that environment.

This post will detail how to build a three node Kubernetes cluster, running a SQL Server container in ACS.

In order to follow the steps in this post you will need Bash on Windows installed and a Azure account

The first thing to do is install azure-cli: –

echo "deb [arch=amd64] https://packages.microsoft.com/repos/azure-cli/ wheezy main" | \
     sudo tee /etc/apt/sources.list.d/azure-cli.list
	 
sudo apt-key adv --keyserver packages.microsoft.com --recv-keys 417A0893
sudo apt-get install apt-transport-https
sudo apt-get update && sudo apt-get install azure-cli	 

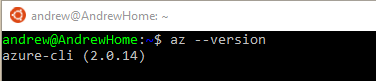
Confirm the install: –

az --version

Now log in to Azure by running the following: –

az login

Bit of an odd login process imho. Copy the link into a web browser and then enter the code when prompted. You’ll then be taken to the Azure login page, enter your details and then close the page when prompted.

I don’t really understand why a username and password aren’t enough but anyway, once logged in we can then start building a cluster.

First thing to create is a resource group to hold all the objects in the cluster: –

az group create --name apresgroup --location westeurope

Now the cluster can be created.

The following script will create a three node Kubernetes cluster. With one linux master node and two windows nodes (where we will run our SQL container).

To setup the cluster run (this will take some time as it’s creating VMs and all the other object required for the cluster): –

az acs create --orchestrator-type=kubernetes \
    --resource-group apresgroup \
    --name=myK8sSQLCluster \
    --agent-count=2 \
    --generate-ssh-keys \
    --windows --admin-username andrew \
    --admin-password Testing1122

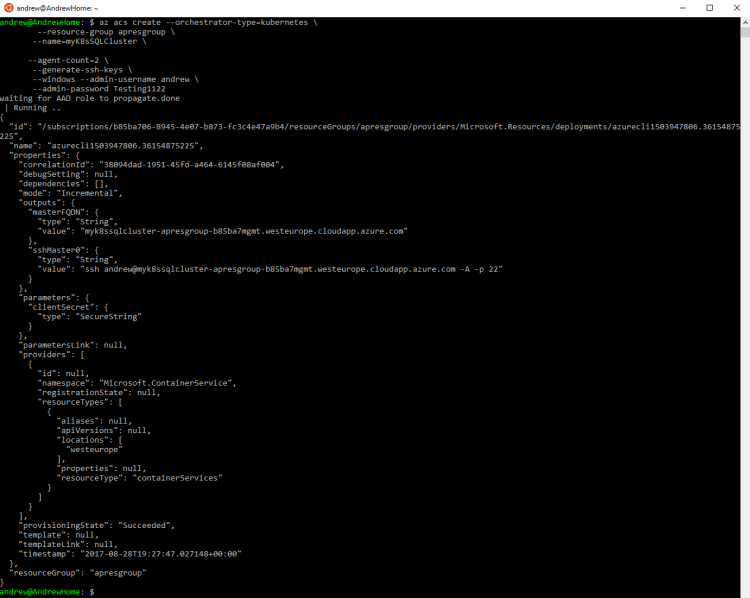
Great stuff, we have a three node cluster up and running in ACS! The next thing to do is install kubectl which is a command line interface for managing Kubernetes clusters.

To install kubectl run: –

az acs kubernetes install-cli

Verify the install (don’t worry about the error): –

kubectl version

Cool, so far so good. Next thing to do is connect kubectl to the cluster.

To allow kubectl to connect to cluster: –

az acs kubernetes get-credentials --resource-group=apresgroup --name=myK8sSQLCluster

Ok, we’re connected. Let’s have a look at the cluster nodes.

To view the nodes in the cluster run:-

kubectl get nodes

Excellent we have our three node cluster, our master and two agents. Now we can build our container running SQL Server.

To do this we will create a yaml file locally which will contain the configuration of our container.

So create a yaml file that will spin up the containers in a Kubernetes pod: –

nano sqlserver.yaml

And enter the following into the file: –

apiVersion: v1
kind: Pod
metadata:
  name: sqlserver
  labels:
    name: sqlserver
spec:
  containers:
  - name: sqlserver1
    image: microsoft/mssql-server-windows:latest
    ports:
    - containerPort: 1433
    env:
    - name: SA_PASSWORD
      value: "Testing1122"
    - name: ACCEPT_EULA
      value: "Y"
  nodeSelector:
    beta.kubernetes.io/os: windows

This will create one pod which will have one container running SQL Server 2017. We can use the file to spin up the pod with the container by running: –

kubectl apply -f sqlserver.yaml

The pod will be created quite quickly but it takes a bit of time for the container within it to be spun up (9 minutes in my setup). This is probably due to the fact that the process has to pull the container image down from the docker hub.

To check the status of the pod/container run: –

kubectl get pods

Once the container has been spun up, the pod will have a status of running: –

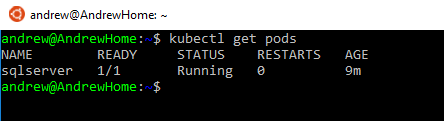
Great stuff! All looks good! We have a pod up and running. But is SQL Server?

The following script will check that SQL is running within the pod: –

kubectl logs sqlserver

Looks pretty good to me! SQL is up and has accepted the config value within our yaml file to change the SA password. But how are we going to connect to it?

What we need to do now is define a Kubernetes service. A service is a level of abstraction over pods to allow connections to the containers within the pods regardless of where the pod is located in the cluster. So let’s setup a service.

To do this, create a yaml file locally to define the service: –

nano service.yaml

Enter the following code into the yaml file: –

kind: Service
apiVersion: v1
metadata:
  name: sqlserver-service
spec:
  ports:
  - name: sqlserver
    port: 1433
    targetPort: 1433
  selector:
    name: sqlserver
  type: LoadBalancer

Note the type of service we’re creating. A type of LoadBalancer does exactly what you expect. It creates a Azure Load Balancer to allow external connections into the pods mapped to the service.

Also note that with the all these objects I’m not trying to do anything fancy with the ports that they’re listening on. I’m setting all the ports to the SQL Server default of 1433.

OK, run the following to create the service: –

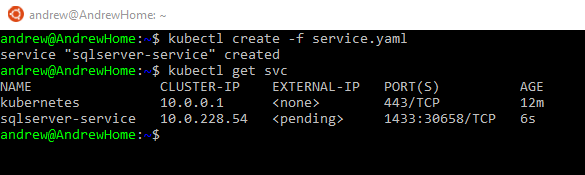
kubectl create -f service.yaml

Now we’re waiting for the service to be assigned an external IP that we can use to connect to SQL Server.

To check the status of the service: –

kubectl get svc

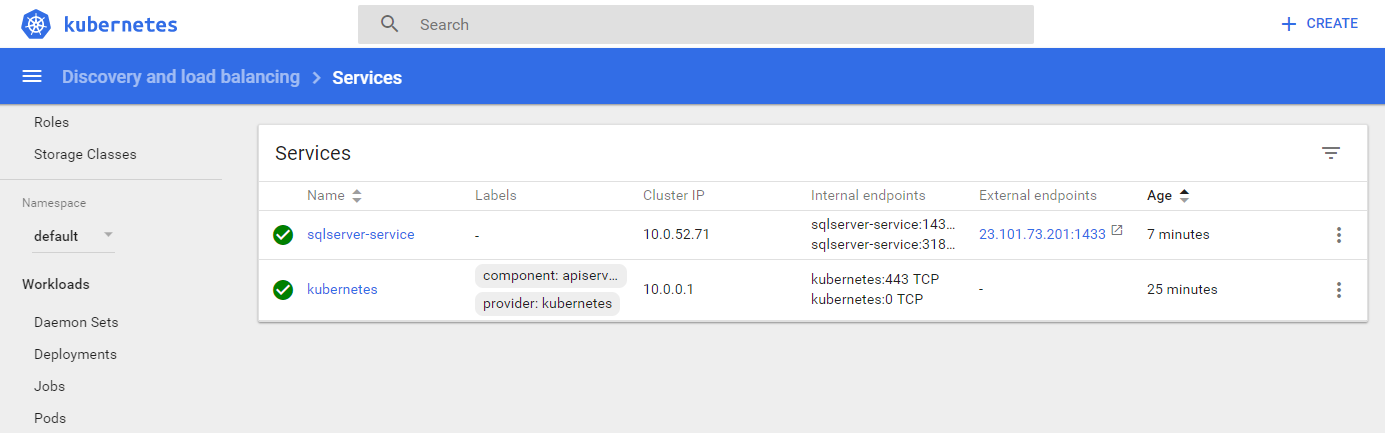
After a period of time (7 minutes in my setup) the service will be assigned an external IP address: –

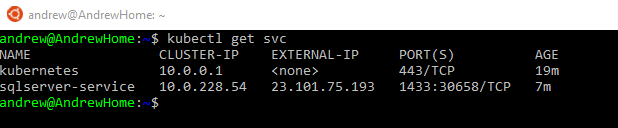
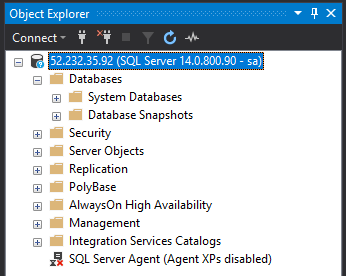
Excellent stuff! We can now drop that external IP into SSMS to connect to SQL: –

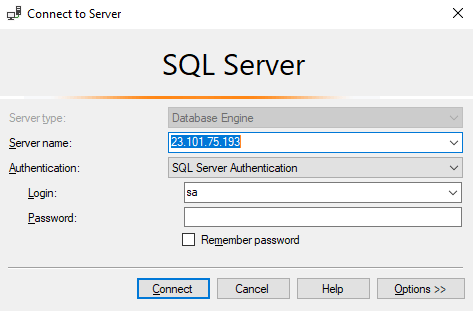
Enter in the sa username and password that we defined in the yaml file used to create the pod and boom!

We’re connected 🙂

So that’s how to setup SQL Server running in a container on a Kubernetes cluster in Azure Container Services. Phew!

This is a really simple setup, there’s so much more to explore with Kubernetes and ACS but I hope that gives you a good grounding to be able to play around with this yourself.

Hopefully in the next few weeks I’ll be able to write a couple more posts about exploring what this technology stack has to offer.

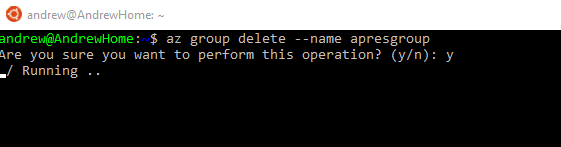
By the way, if you don’t want to leave everything running after following these steps there’s a simple command that will delete all the objects created: –

az group delete --name apresgroup

Thanks for reading!

Attaching databases via a dockerfile


There’s been an update posted about this topic here-

Attaching databases via a dockerfile – UPDATE


Last week I presented my session on SQL Server & Containers for the PASS Virtualization Group and during my prep I noticed that there’s some functionality available to Windows containers and not Linux containers.

One of the (if not the) main benefits of working with SQL in a container is that you can create a custom image to build container from that has all of your development databases available as soon as the container comes online.

This is really simple to do with Windows containers. Say I want to attach DatabaseA that has one data file (DatabaseA.mdf) and a log file (DatabaseA_log.ldf): –

ENV attach_dbs="[{'dbName':'DatabaseA','dbFiles':['C:\\SQLServer\\DatabaseA.mdf','C:\\SQLServer\\DatabaseA_log.ldf']}]"

Nice and simple! One line of code and any containers spun up from the image this dockerfile creates will have DatabaseA ready to go.

However this functionality is not available when working with Linux containers. Currently you cannot use an environment variable to attach a database to a SQL instance running in a Linux container.

This was a problem for me as I wanted to change things up a little for the Virtualization Group’s webinar. I wanted to show all the code in my slides running on Windows Server but do my demos on my Windows 10 desktop but working with Linux containers. I wanted to do this as I thought it would be cool to show how you can work with SQL on Linux from Windows.

I started doing some research online and there are different work arounds to attaching the database into SQL in a Linux container but they all involved separate scripts outside of the dockerfile. I wanted to keep things simple, only show minor changes from Windows containers so I had to get a bit creative.

Here’s what I came up with: –

HEALTHCHECK --interval=10s  \
	CMD /opt/mssql-tools/bin/sqlcmd -S . -U sa -P Testing11@@ \
		-Q "CREATE DATABASE [DatabaseA] ON (FILENAME = '/var/opt/sqlserver/DatabaseA.mdf'),(FILENAME = '/var/opt/sqlserver/DatabaseA_log.ldf') FOR ATTACH"

EDIT – 2018-12-11 – Finally came back to this and blogged about attaching databases via a script here

A bit more involved but it performs the same functions as the attach_dbs environment variable in the dockerfile for Windows containers. Here’s what each part of the code does: –

# Instruct docker to wait for 10 seconds (to allow SQL to initialise) and then perform a check to ensure the container is running as expected
HEALTHCHECK --interval=10s

# Use sqlcmd to connect to the SQL instance within the container
CMD /opt/mssql-tools/bin/sqlcmd -S . -U sa -P Testing11@@

# Runs a SQL script to attach the database
-Q "CREATE DATABASE [DatabaseA] ON (FILENAME = '/var/opt/sqlserver/DatabaseA.mdf'),(FILENAME = '/var/opt/sqlserver/DatabaseA_log.ldf') FOR ATTACH"

So that’s how you can get the same result, an image in which you can create containers with DatabaseA available on startup, whether you are working with Linux or Windows containers by running: –

docker build -t demoimage <pathtodockerfilelocation>

If you want to see the full dockefiles, I’ve made both the Windows and Linux versions that I use for my demos available on my GitHub here.

Thanks for reading!

Automating installation of Docker & SQL command line tools on Linux

I’ve been getting to grips with Docker SQL Containers on Linux (specifically Ubuntu 16.04) and have found that I’ve been running the same commands over and over when I’m configuring a new server.

The old adage goes that if you run anything more than once it should be automated, right?

So I’ve created a repository on GitHub that pulls together the code from Docker to install the Community Edition and the code from Microsoft to install the SQL command line tools.

The steps it performs are: –

  • Installs the Docker Community Edition
  • Installs the SQL Server command line tools
  • Pulls the latest SQL Server on Linux image from the Docker Hub

To run this yourself, first clone a copy of the repository onto the server: –

git clone https://github.com/dbafromthecold/InstallDockerOnUbuntu.git

Then navigate to the directory: –

cd InstallDockerOnUbuntu

Make the script executable: –

chmod +x installdocker.sh

Then run the script!

./installdocker.sh

N.B. – This is setup for Ubuntu 16.04 so it will not work on other distros

Contact me @dbafromthecold on twitter or email dbafromthecold@gmail.com if you have any issues or have any improvements to the script 🙂

Thanks for reading!