Creating a user for a STONITH resource in vSphere

I previously blogged about how to create a STONITH resource for a pacemaker cluster in VMWare virtual machines.

Ok, I have a confession…you need to specify credentials when creating the resource to connect to vSphere, and the credentials I used had admin rights.

Not great…I shouldn’t have done that (yes yes, it’s a lab but still).

So, how can we create a user in vSphere that only has the required permissions that the STONITH resource needs (it needs to be able to power on/off the machines in the pacemaker cluster).

First thing to do is create a user in vSphere: –

Then we create a role that only has permissions to power on/off machines: –

Then we assign that role and user to the VMs in the cluster. Go to the virtual machine > permissions > add > select the user and the role we just created.

Now we can test!

sudo crm node fence <<SERVERNAME>>

We should now see the server reboot in vSphere…all is working!

To make sure that the user can only reboot the machines in the cluster, remove the user from one machine in the cluster and try the test again.

The machine should not reboot in vSphere and we should see a failed fencing action in the cluster: –

N.B. – in order to remove the failed notification run: –

stonith_admin --cleanup --history=<<SERVERNAME>>

Including that as trying to work that out drove me mad! 🙂

OK, so that’s how to configure a user for a STONITH resource so we don’t have to use admin credentials.

Thanks for reading!

Granting read access to SQL Server services with Just Enough Administration

We’ve all been there as DBAs…people requesting access to the servers that we look after to be able to view certain things.

I’ve always got, well, twitchy with giving access to servers tbh…but what if we could completely restrict what users could do via powershell?

Enter Just Enough Administration. With JEA we can grant remote access via powershell sessions to servers and limit what users can do.

So let’s run through an example. Here we’re going to create a configuration to allow users to view the status of the MSSQLSERVER and SQLSERVERAGENT services only.

Firstly, let’s create a session configuration file: –

New-PSSessionConfigurationFile -SessionType RestrictedRemoteServer  -Path .\JeaSqlConfig.pssc

I stripped out pretty much all the default settings in the file to leave it as this: –

@{

# Version number of the schema used for this document
SchemaVersion = '2.0.0.0'

# ID used to uniquely identify this document
GUID = '60732de2-33cc-420b-a745-5596b27cf761'

# Author of this document
Author = 'Andrew Pruski'

# Description of the functionality provided by these settings
Description = 'Allow users to view and restart SQL Server services'

# Session type defaults to apply for this session configuration. Can be 'RestrictedRemoteServer' (recommended), 'Empty', or 'Default'
SessionType = 'RestrictedRemoteServer'

# Directory to place session transcripts for this session configuration
TranscriptDirectory = 'C:\JEA\SQLSERVER'

# Whether to run this session configuration as the machine's (virtual) administrator account
RunAsVirtualAccount = $true

# User roles (security groups), and the role capabilities that should be applied to them when applied to a session
RoleDefinitions = @{ 'DOMAIN\testuser' = @{ RoleCapabilityFiles = 'C:\JEA\SQLSERVER\JeaSqlConfig.psrc' }; } 

}

The important part in the file is this: –

RoleDefinitions = @{ 'DOMAIN\testuser' = @{ RoleCapabilityFiles = 'C:\JEA\SQLSERVER\JeaSqlConfig.psrc' }; }

This defines the user(s) that have access to the server…in this case [DOMAIN\testuser]. However we haven’t set what that user can do…for that we need a role capability file. Also note, we’re not granting any other permissions on the server to this user…permissions and capabilities are solely defined in JEA config files.

Now create the role capability file: –

New-PSRoleCapabilityFile -Path .\JeaSqlConfig.psrc

Again, I stripped out all the defaults and left the file as: –

@{

# ID used to uniquely identify this document
GUID = '44de606d-8ac0-4b27-bd3f-07cad2378717'

# Author of this document
Author = 'apruski'

# Description of the functionality provided by these settings
Description = 'JEA Role Capability File for SQL Server Services'

# Company associated with this document
CompanyName = 'Pure Storage'

# Copyright statement for this document
Copyright = '(c) 2022 Andrew Pruski. All rights reserved.'

# Cmdlets to make visible when applied to a session
VisibleCmdlets = @{ Name = 'Get-Service'; Parameters = @{ Name = 'Name'; ValidateSet = 'MSSQLSERVER', 'SQLSERVERAGENT' }}

}

The last part of the file is again the important part. Here the file is saying that the user can run the Get-Service cmdlet for the MSSQLSERVER and SQLSERVERAGENT services on the target server.

OK, now copy the files to the target server: –

Invoke-Command -ComputerName <<SERVERNAME>> -Script {New-Item C:\JEA\SQLSERVER -Type Directory}

Copy-Item .\JeaSqlConfig* \\<<SERVERNAME>>\C$\JEA\SQLSERVER

OK, now we can create the configuration on the target server. A word of warning however…this can be done via a remote powershell session but it sometimes errors out. If you get an error, RDP to the server and then run the command: –

Register-PSSessionConfiguration -Name SqlConfig -Path C:\JEA\SQLSERVER\JeaSqlConfig.pssc

To view the configuration: –

Get-PSSessionConfiguration -Name SqlConfig


N.B. – I’m using my lab for my Chaos Engineering demos to set this up, that’s why the domain for the user is “Chaos” 🙂

Ok, now we can test. Create a credential for the test user and open a remote powershell session to the target server:-

$Cred = Get-Credential
Enter-Pssession -ComputerName <<SERVERNAME>> -ConfigurationName sqlconfig -Credential $Cred

And then test viewing the MSSQLSERVER service: –

Get-Service -Name MSSQLSERVER

The results should display as normal: –

However if they try to view another service, an error will display: –

Similarly, if they try to run a different cmdlet: –

And that’s how to use JEA to give user’s access to view ONLY the SQL Server services on a target server. That’s a very basic demo of JEA as there’s a tonne of cool stuff that you can do with it but I hope that’s useful.

Thanks for reading!

Creating a STONITH resource for a pacemaker cluster on VMWare virtual machines

A while back I wrote a post about creating a pacemaker cluster to run SQL Server availability group using the new Ubuntu images in Azure.

Recently I had to create another pacemaker cluster, this time on-premises using VMWare virtual machines. The steps to create the pacemaker cluster and deploy an availability group where pretty much the same as in my original post (minus any Azure marlarkey) but one step was different, creating the STONITH resource.

A STONITH resource is needed in a pacemaker cluster as this is what prevents the dreaded split brain scenario…two nodes thinking that they’re the primary node. If the resource detects a failed node in the cluster it’ll restart that node, hopefully allowing it to come up in the correct state.

There are different types of STONITH resources, in my original post I used a fence_azure_arm type, not available to me for my on-premises cluster.

So which type do you use and how do you configure it?

N.B. – This was a three node cluster running Ubuntu 20.04 and I configured it using crmsh

In order to list which types are available, run:-

crm ra list stonith

There are a few ones related to VMWare, I ended up going with the fence_vmware_rest type.

To test the resource before deploying: –

fence_vmware_rest -a <VSPHERE IP ADDRESS> -l <LOGIN> -p <PASSWORD> --ssl-insecure -z -o list | egrep "(<NODE1>|<NODE2>|<NODE3>)"
fence_vmware_rest -a <VSPHERE IP ADDRESS> -l <LOGIN> -p <PASSWORD> --ssl-insecure -z -o status -n <NODE1>

Now we can create the resource: –

sudo crm configure primitive fence_vmware stonith:fence_vmware_rest \
params \
ipaddr="<VSPHERE IP ADDRESS>" \
action=reboot \
login="<LOGIN>" \
passwd="<PASSWORD>" \
ssl=1 ssl_insecure=1 \
pcmk_reboot_timeout=900 \
power_timeout=60 \
op monitor \
interval=3600 \
timeout=120

There are a whole load of properties that can be set, to check them out run: –

crm ra info stonith:fence_vmware_rest

We can also configure additional properties: –

sudo crm configure property cluster-recheck-interval=2min
sudo crm configure property start-failure-is-fatal=true
sudo crm configure property stonith-timeout=900

A good explanation of these properties can be found here.

Now enable the STONITH resource: –

sudo crm configure property stonith-enabled=true

Now that the resource has been created and enabled, confirm the cluster status: –

sudo crm status

Awesome, we have our STONITH resource up and running in the cluster!

If you want to test the resource, this will fence a node: –

sudo crm node fence <NODE>

So that’s how to deploy a STONITH resource for a pacemaker cluster on VMWare virtual machines. If you want to see the whole process of creating the cluster, the code is available here.

One word of caution, there are a lot of STONITH and cluster properties that can be set…please remember to test your configuration fully before deploying to production!

Thanks for reading!

Overcoming a storage failover issue with SQL Server on Kubernetes using Portworx

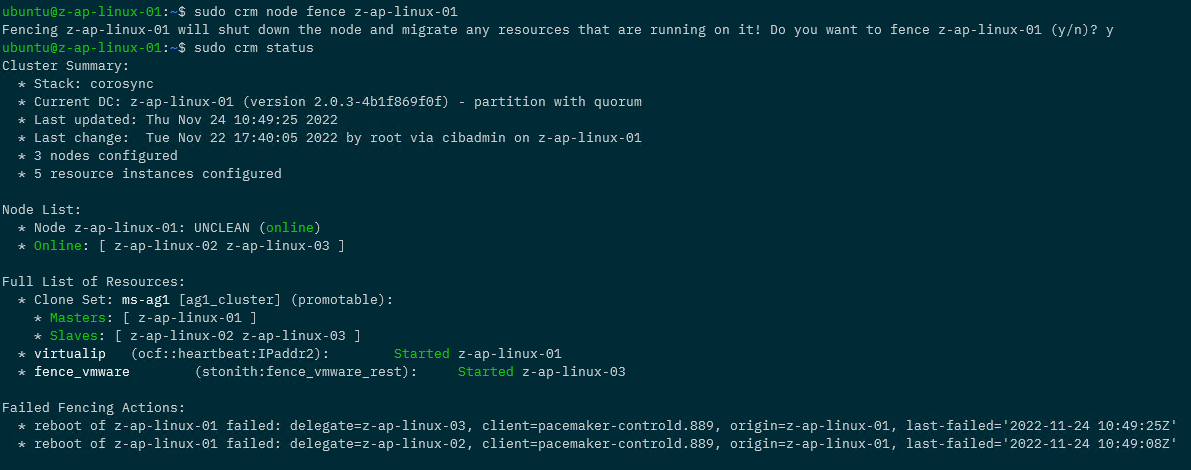
In a previous post I talked about an issue with storage failover when a Kubernetes node goes offline.

In a nutshell, the issue is that the attachdetach-controller in Kubernetes won’t detach storage from an offline node until that node is either brought back online or is removed from the cluster. What this means is that a pod spinning up on a new node that requires that storage can’t come online.


UPDATE – This issue has been resolved in Kubernetes version 1.26. Details are on this github issue: –
https://github.com/kubernetes/kubernetes/issues/65392

And there’s more on the official Kubernetes blog (when a feature called non-graceful node shutdown when into beta): –
https://kubernetes.io/blog/2022/12/16/kubernetes-1-26-non-graceful-node-shutdown-beta/


Aka, if you’re running SQL Server in Kubernetes and a node fails, SQL won’t be able to come back online until someone manually brings the node online or deletes the node.

Not great tbh, and it’s been a blocker for my PoC testing.

However, there are ways around this…one of them is by a product called Portworx which I’m going to demo here.


DISCLAIMER – I now work for Pure Storage who own Portworx…there are other options to get around this issue (Azure Arc Data Services being one) but I’ve found Portworx to be the simplest solution and everything I’m demoing here is completely free so you can go and test it for yourself


So let’s run through using Portworx to first create storage in Kubernetes for SQL Server, and then test a node failure.

First thing to do is log into Azure using the azure-cli: –

az login

Then create a role for portworx in Azure: –

az role definition create --role-definition '{
    "Name": "portworx",
    "Description": "",
    "AssignableScopes": [
        "/subscriptions/<subscription-id>"
    ],
    "Actions": [
        "Microsoft.ContainerService/managedClusters/agentPools/read",
        "Microsoft.Compute/disks/delete",
        "Microsoft.Compute/disks/write",
        "Microsoft.Compute/disks/read",
        "Microsoft.Compute/virtualMachines/write",
        "Microsoft.Compute/virtualMachines/read",
        "Microsoft.Compute/virtualMachineScaleSets/virtualMachines/write",
        "Microsoft.Compute/virtualMachineScaleSets/virtualMachines/read"
    ],
    "NotActions": [],
    "DataActions": [],
    "NotDataActions": []
}'

Then grab the resource group that the Kubernetes cluster resources are in: –

az aks show --name <cluster-name> --resource-group <cluster-resource-group> | jq -r '.nodeResourceGroup'

Then create a service principal in Azure dropping the subscription ID and Kubernetes resource group in: –

az ad sp create-for-rbac --role="portworx" --scopes="/subscriptions/<subscription-id>/resourceGroups/<resource-group>"

Now create secret for portworx to access Azure APIs using the service principal’s details: –

kubectl create secret generic -n kube-system px-azure --from-literal=AZURE_TENANT_ID=<tenant> \
                                                      --from-literal=AZURE_CLIENT_ID=<appId> \
                                                      --from-literal=AZURE_CLIENT_SECRET=<password>

Now we need to go to the Portworx Portal to generate a yaml file to deploy to the AKS cluster: –
https://central.portworx.com

Create an account and once in, select Portworx Enterprise (don’t worry there’s a free option coming): –

Now select Portworx Essentials and click Continue: –

On the next page, leave everything as the default and click Next: –

Then on the Storage page, select the Cloud option, then Azure, and pick a size for the disks (I went with 50GB): –

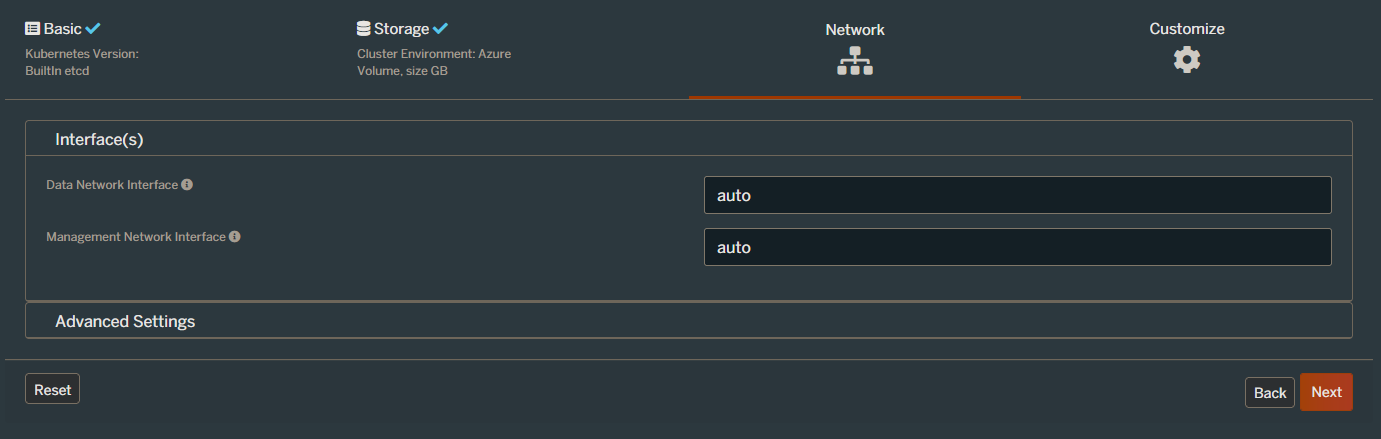
Leave everything as the default settings on the next page (the Network page) and click Next.

And on the final, Customise page, select AKS and hit Finish: –

N.B. – you can also go into the Advanced Settings section and choose what options to deploy for Portworx here. I disabled pretty much everything for this demo but you can leave the defaults.

Ok, on the next page we have some instructions. The first thing to do is deploy the Portworx operator: –

kubectl apply -f 'https://install.portworx.com/2.10?comp=pxoperator'

Once that’s deployed we can download the spec generated: –

Great! We are ready to deploy Portworx to the cluster: –

kubectl apply -f portworx_essentials_sql_demo.yaml

Let’s have a look at some of the resource that deployed. View the Portworx pods: –

kubectl get pods -n=kube-system -l name=portworx -o wide

N.B. – These may take around 5 minutes to come online

To confirm Portworx’s status: –

PX_POD=$(kubectl get pods -l name=portworx -n kube-system -o jsonpath='{.items[0].metadata.name}')
kubectl exec $PX_POD -n kube-system -- /opt/pwx/bin/pxctl status

Now we can create a Portworx storage class. Create the following px_storageclass.yaml file: –

kind: StorageClass
apiVersion: storage.k8s.io/v1
metadata:
    name: px-mssql-sc
provisioner: kubernetes.io/portworx-volume
parameters:
   repl: "3"
   io_profile: "db_remote"
   priority_io: "high"
allowVolumeExpansion: true

Then deploy to the cluster: –

kubectl apply -f .\px_storageclass.yaml

Confirm the storage class is now available: –

kubectl get storageclass

Now create a px_pvc.yaml file referencing the Portworx storage class: –

apiVersion: v1
kind: PersistentVolumeClaim
metadata:
   name: mssql-system
   annotations:
     volume.beta.kubernetes.io/storage-class: px-mssql-sc
spec:
   accessModes:
     - ReadWriteOnce
   resources:
     requests:
       storage: 1Gi
---
apiVersion: v1
kind: PersistentVolumeClaim
metadata:
   name: mssql-data
   annotations:
     volume.beta.kubernetes.io/storage-class: px-mssql-sc
spec:
   accessModes:
     - ReadWriteOnce
   resources:
     requests:
       storage: 1Gi
---
apiVersion: v1
kind: PersistentVolumeClaim
metadata:
   name: mssql-log
   annotations:
     volume.beta.kubernetes.io/storage-class: px-mssql-sc
spec:
   accessModes:
     - ReadWriteOnce
   resources:
     requests:
       storage: 1Gi

Create the PVCs: –

kubectl apply -f .\px_pvc.yaml.yaml

Confirm the PVCs: –

kubectl get pvc

And the corresponding PVs: –

kubectl get pv

Now we can deploy SQL Server using the PVCs. Create the following px_sqlserver.yaml file: –

apiVersion: apps/v1
kind: Deployment
metadata:
  creationTimestamp: null
  labels:
    app: sqlserver
  name: sqlserver
spec:
  replicas: 1
  selector:
    matchLabels:
      app: sqlserver
  template:
    metadata:
      creationTimestamp: null
      labels:
        app: sqlserver
    spec:
      securityContext:
        fsGroup: 10001
      containers:
      - image: mcr.microsoft.com/mssql/server:2019-CU11-ubuntu-18.04
        name: sqlserver
        env:
        - name: ACCEPT_EULA
          value: "Y"
        - name: MSSQL_SA_PASSWORD
          value: "Testing1122"
        resources:
          requests:
            memory: "1024Mi"
            cpu: "1000m"
          limits:
            memory: "2048Mi"
            cpu: "2000m"
        volumeMounts:
        - name: system
          mountPath: /var/opt/mssql
        - name: user
          mountPath: /var/opt/sqlserver/data
        - name: log
          mountPath: /var/opt/sqlserver/log
      tolerations:
      - key: "node.kubernetes.io/unreachable"
        operator: "Exists"
        effect: "NoExecute"
        tolerationSeconds: 10
      - key: "node.kubernetes.io/not-ready"
        operator: "Exists"
        effect: "NoExecute"
        tolerationSeconds: 10
      volumes:
      - name: system
        persistentVolumeClaim:
          claimName: mssql-system
      - name: user
        persistentVolumeClaim:
          claimName: mssql-data
      - name: log
        persistentVolumeClaim:
          claimName: mssql-log
  strategy:
    type: Recreate

And deploy: –

kubectl apply -f .\px_sqlserver.yaml

Confirm the deployment: –

kubectl get deployments

View pod created: –

kubectl get pods

View pod events: –

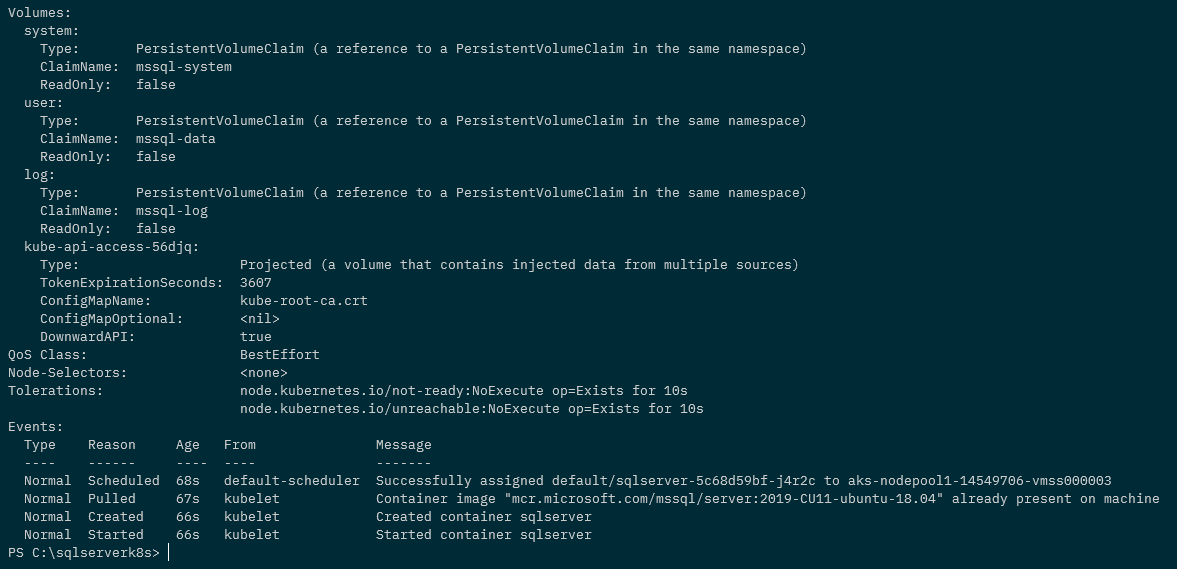
kubectl describe pods

N.B. – Note that we have the PVCs attached to the pod but there are no events for the attachdetach-controller in the pod events

Ok, now that we have a pod running SQL Server in the cluster…let’s see what happens when we shut down the node the pod is running on.

Confirm the node that the pod is running on: –

kubectl get pods -o wide

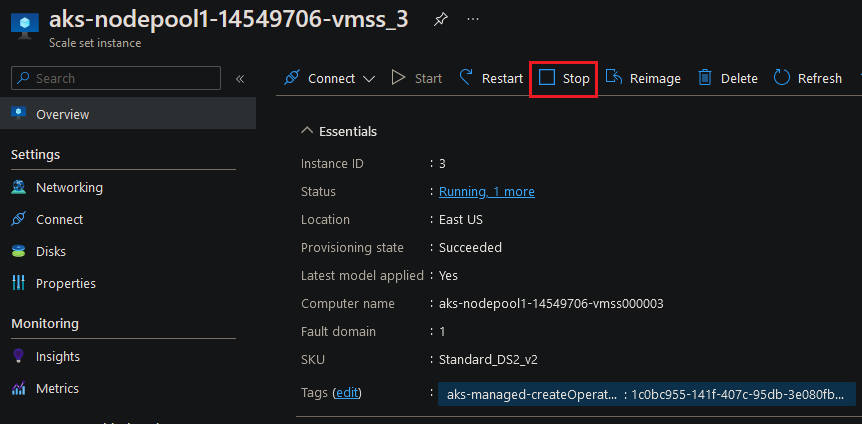
And then shut that node down in the portal: –

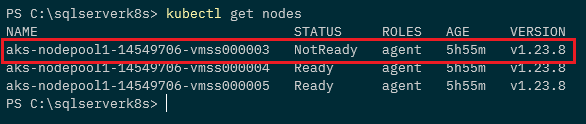
Confirm the node is down: –

kubectl get nodes

And then watch the pods: –

kubectl get pods --watch

A new pod is spun up and goes into the running status on another node: –

kubectl get pods -o wide

Ok, the old pod will stay in the terminated status until the offline node is either brought back online or removed from the cluster…but we have SQL Server up and running!

So Portworx fixes the issue that we saw in my previous post…which was a show stopper when I was running a proof of concept for SQL Server in Azure Kubernetes Service.

Thanks for reading!

Running SQL Server in Windows Subsystem for Linux (WSL)

I previously wrote a post on how to convert a SQL Server Docker image to a Windows Subsystem for Linux distribution.

I did this because if you tried to run SQL Server in WSL before now, you’ll be presented with this error: –

This happens because up until now, WSL did not support systemd. However recently Microsoft announced systemd support for WSL here: –
https://devblogs.microsoft.com/commandline/systemd-support-is-now-available-in-wsl/

This is pretty cool and gives us another option for running SQL Server locally on linux (great for testing and getting to grips with the Linux platform).

So how can we get this up and running?


Before going any further, the minimum version required for to get this running is OS version 10.0.22000.0 (a recent version of Windows 11).

I tried getting this to work on Windows 10, but no joy I’m afraid

UPDATE – 2022-11-23 – Microsoft have now made this available on Windows 10 (but I have not tested it I’m afraid) – the announcement is here: –
https://devblogs.microsoft.com/commandline/the-windows-subsystem-for-linux-in-the-microsoft-store-is-now-generally-available-on-windows-10-and-11/


First thing to do is get WSL up to the version that supports systemd. It’s only currently available through the store to Windows Insiders but you can download the installer from here: –
https://github.com/microsoft/WSL/releases

Run the installer once downloaded and then confirm the version of WSL: –

Now install a distro to run SQL Server on from the Microsoft Store: –

N.B. – I’m using Ubuntu 20.04.5 for this…I did try with Ubuntu 22.04 but couldn’t get it to work.

Once installed and log into WSL…update and upgrade: –

sudo apt update
sudo apt upgrade

Cool, ok now we are going to enable systemd in WSL. Create a /etc/wsl.conf file and drop in the following: –

[boot]
systemd=true

Exit out of WSL and then run: –

wsl --shutdown

Jump straight back into WSL and run the following to confirm systemd is running: –

systemctl list-unit-files --type=service

Great stuff, now we can run through the usual SQL install process (detailed here)

Import the GPG keys: –

wget -qO- https://packages.microsoft.com/keys/microsoft.asc | sudo apt-key add -

Register the repository: –

sudo add-apt-repository "$(wget -qO- https://packages.microsoft.com/config/ubuntu/20.04/mssql-server-preview.list)"

Update and install SQL Server: –

sudo apt-get update
sudo apt-get install -y mssql-server

Once that’s complete, you’ll be able to configure SQL Server with mssql-conf: –

sudo /opt/mssql/bin/mssql-conf setup

Confirm SQL Server is running: –

We can also confirm the processes running by: –

ps aux | grep mssql

Finally, connect to SQL Server in SSMS (using 127.0.0.1 not localhost): –

And there we have it, SQL Server running in a Windows Subsystem for Linux distro!

Thanks for reading!