Visualising SQL Server in Kubernetes

The other day I came across an interesting repo on github, KubeDiagrams.

What this repo does is generate Kubernetes architecture diagrams from Kubernetes manifest files…nice!

Deploying applications to Kubernetes can get complicated fast…especially with stateful applications such as SQL Server.

So having the ability to easily generate diagrams is really helpful…because we all should be documenting everything, right? 🙂

Plus I’m rubbish at creating diagrams!

So let’s have a look at how this works. First, install the dependencies via pip: –

pip install pyyaml
pip install diagrams

And install graphviz: –

sudo apt install graphviz

Great, now pull down the repo: –

git clone https://github.com/philippemerle/KubeDiagrams.git

And we’re good to go! So here’s an example manifest file to deploy a SQL Server statefulset to Kubernetes: –

apiVersion: v1
kind: Namespace
metadata:
  name: mssql
---
apiVersion: storage.k8s.io/v1
kind: StorageClass
metadata:
  name: mssql-sc
provisioner: docker.io/hostpath
reclaimPolicy: Delete
volumeBindingMode: Immediate
---
apiVersion: v1
kind: Service
metadata:
  name: mssql-headless
  namespace: mssql
spec:
  clusterIP: None
  selector:
    name: mssql-pod
  ports:
    - name: mssql-port
      port: 1433
      targetPort: 1433
---
apiVersion: apps/v1
kind: StatefulSet
metadata:
  name: mssql-statefulset
  namespace: mssql
spec:
  serviceName: "mssql-headless"
  replicas: 1
  podManagementPolicy: Parallel
  selector:
    matchLabels:
      name: mssql-pod
  template:
    metadata:
      labels:
        name: mssql-pod
    spec:
      securityContext:
        fsGroup: 10001
      containers:
        - name: mssql-container
          image: mcr.microsoft.com/mssql/server:2022-CU16-ubuntu-20.04
          ports:
            - containerPort: 1433
              name: mssql-port
          env:
            - name: MSSQL_PID
              value: "Developer"
            - name: ACCEPT_EULA
              value: "Y"
            - name: MSSQL_AGENT_ENABLED
              value: "1"
            - name: MSSQL_SA_PASSWORD
              value: "Testing1122"
          resources:
            requests:
              memory: "1024Mi"
              cpu: "500m"
            limits:
              memory: "2048Mi"
              cpu: "2000m"
          volumeMounts:
            - name: sqlsystem
              mountPath: /var/opt/mssql
            - name: sqldata
              mountPath: /opt/sqlserver/data
            - name: sqllog
              mountPath: /opt/sqlserver/log
  volumeClaimTemplates:
    - metadata:
        name: sqlsystem
        namespace: mssql
      spec:
        accessModes:
         - ReadWriteOncePod
        storageClassName: mssql-sc
        resources:
          requests:
            storage: 25Gi
    - metadata:
        name: sqldata
        namespace: mssql
      spec:
        accessModes:
         - ReadWriteOncePod
        storageClassName: mssql-sc
        resources:
          requests:
            storage: 25Gi
    - metadata:
        name: sqllog
        namespace: mssql
      spec:
        accessModes:
         - ReadWriteOncePod
        storageClassName: mssql-sc
        resources:
          requests:
            storage: 25Gi
---
apiVersion: v1
kind: Service
metadata:
  name: mssql-service
  namespace: mssql
spec:
  ports:
  - name: mssql-ports
    port: 1433
    targetPort: 1433
  selector:
    name: mssql-pod
  type: LoadBalancer

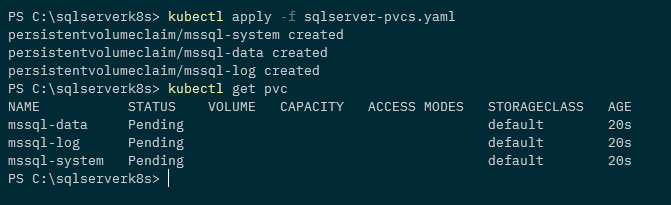
I’m using Docker Desktop here (hence the provisioner: docker.io/hostpath in the storage class). What this’ll create is a namespace, storage class, headless service for the statefulset, the statefulset itself, three persistent volume claims, and a load balanced service to connect to SQL.

Quite a lot of objects for a simple SQL Server deployment, right? (ahh I know it’s a statefulset, but you know what I mean)

So let’s point KubeDiagrams at the manifest: –

./kube-diagrams mssql-statefulset.yaml

And here’s the output!

Pretty cool, eh?

I noticed a couple of quirks. The docs say it’ll work with any version 3 install of python. I had 3.8 installed but had to upgrade to 3.9.

Also I had to add namespace: mssql to the PVCs in the statefulset, otherwise KubeDiagrams threw a warning: –

Error: ‘sqlsystem/mssql/PersistentVolumeClaim/v1’ resource not found!
Error: ‘sqldata/mssql/PersistentVolumeClaim/v1’ resource not found!
Error: ‘sqllog/mssql/PersistentVolumeClaim/v1’ resource not found

But other than those, it works really well and is a great way to visualise objects in Kubernetes.

Massive thank you to the creator, Philippe Merle!

Thanks for reading!

Overcoming a storage failover issue with SQL Server on Kubernetes using Portworx

In a previous post I talked about an issue with storage failover when a Kubernetes node goes offline.

In a nutshell, the issue is that the attachdetach-controller in Kubernetes won’t detach storage from an offline node until that node is either brought back online or is removed from the cluster. What this means is that a pod spinning up on a new node that requires that storage can’t come online.


UPDATE – This issue has been resolved in Kubernetes version 1.26. Details are on this github issue: –
https://github.com/kubernetes/kubernetes/issues/65392

And there’s more on the official Kubernetes blog (when a feature called non-graceful node shutdown when into beta): –
https://kubernetes.io/blog/2022/12/16/kubernetes-1-26-non-graceful-node-shutdown-beta/


Aka, if you’re running SQL Server in Kubernetes and a node fails, SQL won’t be able to come back online until someone manually brings the node online or deletes the node.

Not great tbh, and it’s been a blocker for my PoC testing.

However, there are ways around this…one of them is by a product called Portworx which I’m going to demo here.


DISCLAIMER – I now work for Pure Storage who own Portworx…there are other options to get around this issue (Azure Arc Data Services being one) but I’ve found Portworx to be the simplest solution and everything I’m demoing here is completely free so you can go and test it for yourself


So let’s run through using Portworx to first create storage in Kubernetes for SQL Server, and then test a node failure.

First thing to do is log into Azure using the azure-cli: –

az login

Then create a role for portworx in Azure: –

az role definition create --role-definition '{
    "Name": "portworx",
    "Description": "",
    "AssignableScopes": [
        "/subscriptions/<subscription-id>"
    ],
    "Actions": [
        "Microsoft.ContainerService/managedClusters/agentPools/read",
        "Microsoft.Compute/disks/delete",
        "Microsoft.Compute/disks/write",
        "Microsoft.Compute/disks/read",
        "Microsoft.Compute/virtualMachines/write",
        "Microsoft.Compute/virtualMachines/read",
        "Microsoft.Compute/virtualMachineScaleSets/virtualMachines/write",
        "Microsoft.Compute/virtualMachineScaleSets/virtualMachines/read"
    ],
    "NotActions": [],
    "DataActions": [],
    "NotDataActions": []
}'

Then grab the resource group that the Kubernetes cluster resources are in: –

az aks show --name <cluster-name> --resource-group <cluster-resource-group> | jq -r '.nodeResourceGroup'

Then create a service principal in Azure dropping the subscription ID and Kubernetes resource group in: –

az ad sp create-for-rbac --role="portworx" --scopes="/subscriptions/<subscription-id>/resourceGroups/<resource-group>"

Now create secret for portworx to access Azure APIs using the service principal’s details: –

kubectl create secret generic -n kube-system px-azure --from-literal=AZURE_TENANT_ID=<tenant> \
                                                      --from-literal=AZURE_CLIENT_ID=<appId> \
                                                      --from-literal=AZURE_CLIENT_SECRET=<password>

Now we need to go to the Portworx Portal to generate a yaml file to deploy to the AKS cluster: –
https://central.portworx.com

Create an account and once in, select Portworx Enterprise (don’t worry there’s a free option coming): –

Now select Portworx Essentials and click Continue: –

On the next page, leave everything as the default and click Next: –

Then on the Storage page, select the Cloud option, then Azure, and pick a size for the disks (I went with 50GB): –

Leave everything as the default settings on the next page (the Network page) and click Next.

And on the final, Customise page, select AKS and hit Finish: –

N.B. – you can also go into the Advanced Settings section and choose what options to deploy for Portworx here. I disabled pretty much everything for this demo but you can leave the defaults.

Ok, on the next page we have some instructions. The first thing to do is deploy the Portworx operator: –

kubectl apply -f 'https://install.portworx.com/2.10?comp=pxoperator'

Once that’s deployed we can download the spec generated: –

Great! We are ready to deploy Portworx to the cluster: –

kubectl apply -f portworx_essentials_sql_demo.yaml

Let’s have a look at some of the resource that deployed. View the Portworx pods: –

kubectl get pods -n=kube-system -l name=portworx -o wide

N.B. – These may take around 5 minutes to come online

To confirm Portworx’s status: –

PX_POD=$(kubectl get pods -l name=portworx -n kube-system -o jsonpath='{.items[0].metadata.name}')
kubectl exec $PX_POD -n kube-system -- /opt/pwx/bin/pxctl status

Now we can create a Portworx storage class. Create the following px_storageclass.yaml file: –

kind: StorageClass
apiVersion: storage.k8s.io/v1
metadata:
    name: px-mssql-sc
provisioner: kubernetes.io/portworx-volume
parameters:
   repl: "3"
   io_profile: "db_remote"
   priority_io: "high"
allowVolumeExpansion: true

Then deploy to the cluster: –

kubectl apply -f .\px_storageclass.yaml

Confirm the storage class is now available: –

kubectl get storageclass

Now create a px_pvc.yaml file referencing the Portworx storage class: –

apiVersion: v1
kind: PersistentVolumeClaim
metadata:
   name: mssql-system
   annotations:
     volume.beta.kubernetes.io/storage-class: px-mssql-sc
spec:
   accessModes:
     - ReadWriteOnce
   resources:
     requests:
       storage: 1Gi
---
apiVersion: v1
kind: PersistentVolumeClaim
metadata:
   name: mssql-data
   annotations:
     volume.beta.kubernetes.io/storage-class: px-mssql-sc
spec:
   accessModes:
     - ReadWriteOnce
   resources:
     requests:
       storage: 1Gi
---
apiVersion: v1
kind: PersistentVolumeClaim
metadata:
   name: mssql-log
   annotations:
     volume.beta.kubernetes.io/storage-class: px-mssql-sc
spec:
   accessModes:
     - ReadWriteOnce
   resources:
     requests:
       storage: 1Gi

Create the PVCs: –

kubectl apply -f .\px_pvc.yaml.yaml

Confirm the PVCs: –

kubectl get pvc

And the corresponding PVs: –

kubectl get pv

Now we can deploy SQL Server using the PVCs. Create the following px_sqlserver.yaml file: –

apiVersion: apps/v1
kind: Deployment
metadata:
  creationTimestamp: null
  labels:
    app: sqlserver
  name: sqlserver
spec:
  replicas: 1
  selector:
    matchLabels:
      app: sqlserver
  template:
    metadata:
      creationTimestamp: null
      labels:
        app: sqlserver
    spec:
      securityContext:
        fsGroup: 10001
      containers:
      - image: mcr.microsoft.com/mssql/server:2019-CU11-ubuntu-18.04
        name: sqlserver
        env:
        - name: ACCEPT_EULA
          value: "Y"
        - name: MSSQL_SA_PASSWORD
          value: "Testing1122"
        resources:
          requests:
            memory: "1024Mi"
            cpu: "1000m"
          limits:
            memory: "2048Mi"
            cpu: "2000m"
        volumeMounts:
        - name: system
          mountPath: /var/opt/mssql
        - name: user
          mountPath: /var/opt/sqlserver/data
        - name: log
          mountPath: /var/opt/sqlserver/log
      tolerations:
      - key: "node.kubernetes.io/unreachable"
        operator: "Exists"
        effect: "NoExecute"
        tolerationSeconds: 10
      - key: "node.kubernetes.io/not-ready"
        operator: "Exists"
        effect: "NoExecute"
        tolerationSeconds: 10
      volumes:
      - name: system
        persistentVolumeClaim:
          claimName: mssql-system
      - name: user
        persistentVolumeClaim:
          claimName: mssql-data
      - name: log
        persistentVolumeClaim:
          claimName: mssql-log
  strategy:
    type: Recreate

And deploy: –

kubectl apply -f .\px_sqlserver.yaml

Confirm the deployment: –

kubectl get deployments

View pod created: –

kubectl get pods

View pod events: –

kubectl describe pods

N.B. – Note that we have the PVCs attached to the pod but there are no events for the attachdetach-controller in the pod events

Ok, now that we have a pod running SQL Server in the cluster…let’s see what happens when we shut down the node the pod is running on.

Confirm the node that the pod is running on: –

kubectl get pods -o wide

And then shut that node down in the portal: –

Confirm the node is down: –

kubectl get nodes

And then watch the pods: –

kubectl get pods --watch

A new pod is spun up and goes into the running status on another node: –

kubectl get pods -o wide

Ok, the old pod will stay in the terminated status until the offline node is either brought back online or removed from the cluster…but we have SQL Server up and running!

So Portworx fixes the issue that we saw in my previous post…which was a show stopper when I was running a proof of concept for SQL Server in Azure Kubernetes Service.

Thanks for reading!

Shutting down nodes in Azure Kubernetes Service

A while back I wrote a post on Adjusting Pod Eviction Timings in Kubernetes. To test the changes made in that post I had to shut down nodes in an Azure Kubernetes Service cluster.

This can be done easily in the Azure portal: –

However I did a presentation recently and didn’t want to have to keep jumping into the portal from VS Code…so I wanted to be able to shut down the nodes in code.

So here’s how to use the azure-cli to shut down a node in an Azure Kubernetes Service cluster.


DISCLAIMER – the following code should only be run against a test cluster!


Firstly, to test, let’s deployment a simple application to the cluster: –

kubectl create deployment test --image=nginx

Confirm: –

kubectl get all

To check the node that the pod is running on: –

kubectl get pods -o wide

kubectl get pods -o jsonpath="{.items[0].spec.nodeName}"

Assign the node that the pod is running on to a variable (we’ll use this in a minute): –

NODE=$(kubectl get pods -o jsonpath="{.items[0].spec.nodeName}" | sed 's/.$/\U&/')  && echo $NODE

N.B. – the sed command at the end of the statement above is to make sure that the last character of the node name is in upper case, which is needed to get the instance ID of the VM in a later statement.

OK now we can look at shutting down the node that the pod is running on.

Nodes in AKS run in a nodepool which is a virtual machine scale set that is in a different resource group that the kubernetes cluster itself. The naming convention of that resource group is: –

MC_resourcegroup_clustername_location

The cluster in the examples here is called kubernetes1 in the resource group kubernetes in EASTUS.

So set the resource group name: –

RESOURCEGROUP="MC_kubernetes_kubernetes1_eastus"

Now we can grab the VMSS name in two ways, firstly by running: –

VMSSNAME=$(az vmss list --resource-group $RESOURCEGROUP --query "[].name" -o tsv) && echo $VMSSNAME 

N.B. – AKS clusters can have multiple nodepools in which case the query above will return multiple values and won’t work.

Or we use the $NODE variable we set earlier and strip out the last few characters: –

VMSSNAME=${NODE:0:27} && echo $VMSSNAME 

Once we have the NODE name and the VMSS name, we need to get the instance ID of the VM in the scale set:-

INSTANCEID=$(az vmss list-instances --name $VMSSNAME --resource-group $RESOURCEGROUP --query "[?osProfile.computerName=='$NODE'].[instanceId]" -o tsv) && echo $INSTANCEID

And now we can shut down the node: –

az vmss deallocate --name $VMSSNAME --instance-ids $INSTANCEID --resource-group $RESOURCEGROUP

Confirm that the node is offline: –

kubectl get nodes

Great! The node is offline! Our test pod didn’t have any tolerations set so it’ll take 5 minutes for a new pod to be created on a healthy node. You can check out how to adjust this in my previous post.

Finally, to restart the node: –

az vmss start --name $VMSSNAME --instance-ids $INSTANCEID --resource-group $RESOURCEGROUP

And that’s how to shutdown a node in AKS to test pod eviction!

Thanks for reading!

A storage failover issue with SQL Server on Kubernetes

I’ve been running a proof of concept for SQL Server on Kubernetes over the last year or so (ok, probably longer than that…hey, I’m a busy guy 🙂 ) and have come across an issue that has been sort of a show stopper.


UPDATE – This issue has been resolved in Kubernetes version 1.26.
Details are on this github issue: –
https://github.com/kubernetes/kubernetes/issues/65392

And there’s more on the official Kubernetes blog (when a feature called non-graceful node shutdown when into beta): –
https://kubernetes.io/blog/2022/12/16/kubernetes-1-26-non-graceful-node-shutdown-beta/


There are currently no HA solutions for SQL Server running on plain K8s (not discussing Azure Arc here) so my tests have been relying on the in-built HA that Kubernetes provides but there’s a problem.

Let’s see this in action.

First, as we’re running in AKS for this demo, check the storage classes available: –

kubectl get storageclass

We’re going to be using the default storage class for this demo, note the VOLUMEBINDINGMODE is set to WaitForFirstConsumer

Now create the PVC definitions referencing the default storage class: –

apiVersion: v1
kind: PersistentVolumeClaim
metadata:
  name: mssql-system
spec:
  accessModes:
    - ReadWriteOnce
  storageClassName: default
  resources:
    requests:
      storage: 1Gi
---
apiVersion: v1
kind: PersistentVolumeClaim
metadata:
  name: mssql-data
spec:
  accessModes:
    - ReadWriteOnce
  storageClassName: default
  resources:
    requests:
      storage: 1Gi
---
apiVersion: v1
kind: PersistentVolumeClaim
metadata:
  name: mssql-log
spec:
  accessModes:
    - ReadWriteOnce
  storageClassName: default
  resources:
    requests:
      storage: 1Gi

Save that yaml as sqlserver_pvcs.yaml and deploy: –

kubectl apply -f sqlserver_pvcs.yaml

Confirm the PVCs have been created: –

kubectl get pvc

N.B. – The PVCs are in a status of pending as the VOLUMEBINDINGMODE mode of the storage class is set to WaitForFirstConsumer

Now create a sqlserver.yaml file: –

apiVersion: apps/v1
kind: Deployment
metadata:
  creationTimestamp: null
  labels:
    app: sqlserver
  name: sqlserver
spec:
  replicas: 1
  selector:
    matchLabels:
      app: sqlserver
  strategy: {}
  template:
    metadata:
      creationTimestamp: null
      labels:
        app: sqlserver
    spec:
      securityContext:
        fsGroup: 10001
      containers:
      - image: mcr.microsoft.com/mssql/server:2019-CU11-ubuntu-18.04
        name: sqlserver
        resources: {}
        env:
        - name: ACCEPT_EULA
          value: "Y"
        - name: MSSQL_SA_PASSWORD
          value: "Testing1122"
        volumeMounts:
        - name: system
          mountPath: /var/opt/mssql
        - name: user
          mountPath: /var/opt/sqlserver/data
        - name: log
          mountPath: /var/opt/sqlserver/log
      tolerations:
      - key: "node.kubernetes.io/unreachable"
        operator: "Exists"
        effect: "NoExecute"
        tolerationSeconds: 10
      - key: "node.kubernetes.io/not-ready"
        operator: "Exists"
        effect: "NoExecute"
        tolerationSeconds: 10
      volumes:
      - name: system
        persistentVolumeClaim:
          claimName: mssql-system
      - name: user
        persistentVolumeClaim:
          claimName: mssql-data
      - name: log
        persistentVolumeClaim:
          claimName: mssql-log
status: {}

N.B. – Note the tolerations set for this deployment, if you want to learn more you can check out my blog post here

Deploy that: –

kubectl apply -f sqlserver.yaml

And check that the deployment was successful: –

kubectl get deployments

Now the PVCs and corresponding PVs will have been created: –

kubectl get pvc
kubectl get pv

OK let’s have a look at the events of the pod: –

kubectl describe pod -l app=sqlserver

So we had a couple of errors from the scheduler initially, (probably) because the PVCs weren’t created in time…but then the attachdetach-controller kicked in and attached the volumes for the pod to use.

Now that the pod is up and confirm the node that the pod is running on: –

kubectl get pods -o wide

OK, shutdown the node in the Azure portal to simulate a node failure: –

Wait for the node to become unavailable: –

kubectl get nodes --watch

Once the node is reported as unavailable, check the status of the pod. A new one should be spun up on a new, available node:-

kubectl get pods -o wide

The old pod is in a Terminating state, a new one has been created but is in the ContainerCreating state and there it will stay…never coming online.

We can see why if we look at the events of the new pod: –

kubectl describe pod sqlserver-59c78ddc9f-tj9qr

And here’s the issue. The attachdetach-controller cannot move the volumes for the new pod to use as they’re still attached to the old pod.

(EDIT – Technically the volumes are attached to the node but the error reports that the volumes are in use by the old pod)

This is because the node that the old pod is on is in a state of NotReady…so the cluster has no idea of the state of that pod (it’s being reported as terminating but hasn’t been removed completely).

Let’s restart the node: –

And wait for it to come online: –

kubectl get nodes --watch

Once the node is online, the old pod will be removed and the new pod will come online: –

kubectl get pods -o wide

Looking at the pod events again: –

kubectl describe pod sqlserver-59c78ddc9f-tj9qr

We can see that once the node came online the attachdetach-controller was able to attach the volumes.

This is an issue as it requires manual intervention for the new pod to come online. Someone has to either bring the node back online or remove it from the cluster completely, not what you want as this will mean extended downtime for SQL Server running in the pod.

So what can we do about this? Well we’ve been looking at a couple of solutions which I’ll cover in upcoming blog posts 🙂

Note, if anyone out there knows how to get around this issue (specifically altering the behaviour of the attachdetach-controller) please get in contact!

Thanks for reading!

Adjusting pod eviction time in Kubernetes

One of the best features of Kubernetes is the built-in high availability.

When a node goes offline, all pods on that node are terminated and new ones spun up on a healthy node.

The default time that it takes from a node being reported as not-ready to the pods being moved is 5 minutes.

This really isn’t a problem if you have multiple pods running under a single deployment. The pods on the healthy nodes will handle any requests made whilst the pod(s) on the downed node are waiting to be moved.

But what happens when you only have one pod in a deployment? Say, when you’re running SQL Server in Kubernetes? Five minutes really isn’t an acceptable time for your SQL instance to be offline.

The simplest way to adjust this is to add the following tolerations to your deployment: –

      tolerations:
      - key: "node.kubernetes.io/unreachable"
        operator: "Exists"
        effect: "NoExecute"
        tolerationSeconds: 10
      - key: "node.kubernetes.io/not-ready"
        operator: "Exists"
        effect: "NoExecute"
        tolerationSeconds: 10

N.B.- You can read more about taints and tolerations in Kubernetes here

This will move any pods in the deployment to a healthy node 10 seconds after a node is reported as either not-ready or unreachable

But what if you wanted to change the default setting across the cluster?

I was trying to work out how to do this last week and the official docs here reference a flag for the controller manager: –

–pod-eviction-timeout duration Default: 5m0s
The grace period for deleting pods on failed nodes.

Great stuff! That’s exactly what I was looking for!

Unfortunately, it seems that this flag no longer works.

The way to set the eviction timeout value now is to set the flags on the api-server.

Now, this is done differently depending on how you installed Kubernetes. I installed this cluster with kubeadm so needed to create a kubeadm-apiserver-update.yaml file: –

apiVersion: kubeadm.k8s.io/v1beta2
kind: ClusterConfiguration
kubernetesVersion: v1.18.0
apiServer:
  extraArgs:
    enable-admission-plugins: DefaultTolerationSeconds
    default-not-ready-toleration-seconds: "10"
    default-unreachable-toleration-seconds: "10"

N.B.- Make sure the kubernetesVersion is correct

And then apply: –

sudo kubeadm init phase control-plane apiserver --config=kubeadm-apiserver-update.yaml

You can verify that the change has been applied by checking the api-server pods in the kube-system namespace (they should refresh) and by checking here: –

cat /etc/kubernetes/manifests/kube-apiserver.yaml

Let’s see it in action! I’ve got one pod running SQL Server in a K8s cluster on node kubernetes-w1. Let’s shut down that node…

Alright, that’s not exactly 10 seconds…there’s a couple of other things going on. But it’s a lot better than 5 mins!

The full deployment yaml that I used is here.

Ok, it is a bit of a contrived test, I’ll admit. The node was shutdown gracefully and I haven’t configured any persistent storage BUT this is still better than having to wait 5 minutes for the pod to be spun up on the healthy node.

N.B.- If you’re working with a managed Kubernetes service, such as AKS or EKS, you won’t be able to do this. You’ll need to add the tolerations to your deployment.

Thanks for reading!