I really like the mssql-cli tool. I use it pretty much everyday however it seems like it’s not being maintained anymore and as such, there are issues when trying to install it on Ubuntu 22.04.
The issue with Ubuntu 22.04 is that it has python 3.10 installed by default which the current mssql-cli is not compatible with. I did try installing previous versions of python (3.8 and 3.9) but had no luck so kept the default version.
The steps that follow are how I worked out how to get the mssql-cli installed on an Azure Ubuntu 22.04 fresh install. This is pretty hacky tbh so should only be done on development and test servers.
Also, if you’re running Ubuntu 20.04 only the first steps are required to get the mssql-cli working (as that has python 3.8 installed by default).
First ssh to the VM: –
ssh dbafromthecold@XXXXXXXXXXXXX
Confirm the python version: –
python3 --version

In order to test the mssql-cli we’ll need to spin up a SQL container and to do that we’ll need Docker installed.
The instructions on how to install Docker on Ubuntu are here: – https://docs.docker.com/engine/install/ubuntu/
Once docker is installed, run a SQL container: –
docker container run -d \
--publish 1433:1433 \
--env ACCEPT_EULA=Y \
--env MSSQL_SA_PASSWORD=Testing1122 \
--name sqlcontainer1 \
mcr.microsoft.com/mssql/server:2019-CU15-ubuntu-18.04

Now install pip: –
sudo apt install -y python3-pip
And then install mssql-cli with pip: –
pip install mssql-cli
Add location of mssql-cli to our path: –
export PATH=$PATH:~/.local/bin
N.B. – Add this to .bashrc to make permanent
Ok, now we have the mssql-cli we can test connecting to SQL in our container: –
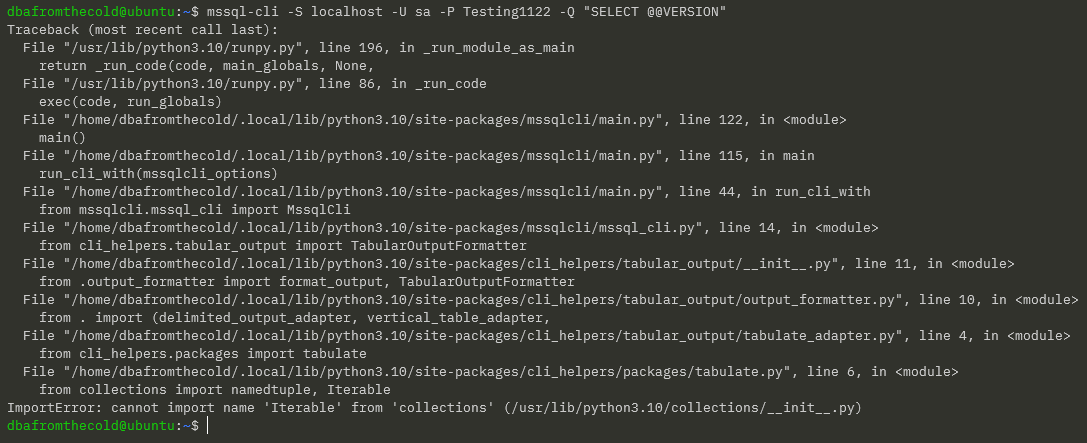
mssql-cli -S localhost -U sa -P Testing1122 -Q "SELECT @@VERSION"
Which gives us this error: –

Ok, let’s have a look at the file: –
cat ~/.local/bin/mssql-cli
The issue is that the reference to python here needs to be updated to python3: –
sed -i 's/python/python3/g' ~/.local/bin/mssql-cli
Confirm the update: –
cat ~/.local/bin/mssql-cli

Test connecting to SQL container again: –
mssql-cli -S localhost -U sa -P Testing1122 -Q "SELECT @@VERSION"
N.B. – if you’re on Ubuntu 20.04 the mssql-cli should now be working

But on Ubuntu 22.04 we get a new error. From looking at the open issues on the mssql-cli issues page on Github…we need to force upgrade the cli-helpers python module: –
pip install cli-helpers --upgrade --force
Test connecting to SQL container again: –
mssql-cli -S localhost -U sa -P Testing1122 -Q "SELECT @@VERSION"

OK new error! Progress 🙂
To resolve this we need to remove references to ownerUri on lines 22 and 93 in the connectionservice.py file: –
vim ~/.local/lib/python3.10/site-packages/mssqlcli/jsonrpc/contracts/connectionservice.py
Test connecting to SQL container again: –
mssql-cli -S localhost -U sa -P Testing1122 -Q "SELECT @@VERSION"

OK that’s pretty clear…install libssl1.0.0: –
wget http://archive.ubuntu.com/ubuntu/pool/main/o/openssl1.0/libssl1.0.0_1.0.2n-1ubuntu5_amd64.deb
sudo dpkg -i libssl1.0.0_1.0.2n-1ubuntu5_amd64.deb
Test connecting to SQL container again: –
mssql-cli -S localhost -U sa -P Testing1122 -Q "SELECT @@VERSION"
Ha, OK another new error!
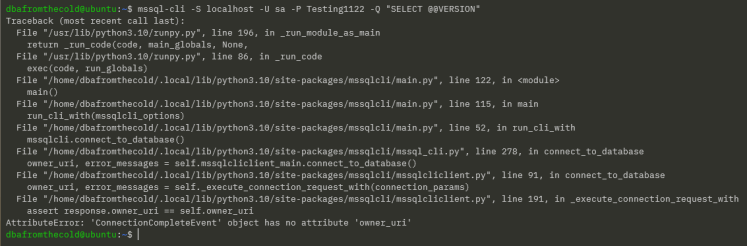
To resolve this one we need to remove references to owner_uri from lines 91, 93, and 191 in the mssqlcliclient.py file: –
vim ~/.local/lib/python3.10/site-packages/mssqlcli/mssqlcliclient.py
One more test connecting to SQL in the container: –
mssql-cli -S localhost -U sa -P Testing1122 -Q "SELECT @@VERSION" to the server: -

Ha success! I’ve dropped all the commands into this gist
Thanks for reading!