SQL Server Distributed Availability Groups and Kubernetes

A while back I wrote about how to use a Cross Platform (or Clusterless) Availability Group to seed a database from a Windows SQL instance into a pod in Kubernetes.

I was talking with a colleague last week and they asked, “What if the existing Windows instance is already in an Availability Group?”

This is a fair question, as it’s fairly rare (in my experience) to run a standalone SQL instance in production…most instances are in some form of HA setup, be it a Failover Cluster Instance or an Availability Group.

Failover Cluster Instances will work with a clusterless Availability Group but it’s a different story when it comes to existing Availability Groups.

A Linux node cannot be added to an existing Windows Availability Group (trust me, I tried for longer than I’m going to admit) so the only way to do it is to use a Distributed Availability Group.

So let’s run through the process!

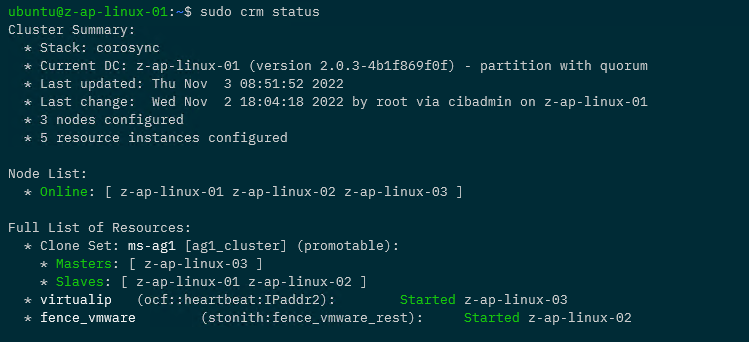
Here is the existing Windows Availability Group: –

Just a standard, 2 node AG with one database already synchronized across the nodes. It’s that database we are going to seed over to the pod running on the Kubernetes cluster using a Distributed Availability Group.

So here’s the Kubernetes cluster: –

kubectl get nodes

Four nodes, one control plane node and three worker nodes.

OK, so first thing to do is deploy a statefulset running one SQL Server pod (using a file called sqlserver-statefulset.yaml): –

kubectl apply -f .\sqlserver-statefulset.yaml

Here’s the manifest of the statefulset: –

apiVersion: apps/v1
kind: StatefulSet
metadata:
  name: mssql-statefulset
spec:
  serviceName: "mssql"
  replicas: 1
  podManagementPolicy: Parallel
  selector:
    matchLabels:
      name: mssql-pod
  template:
    metadata:
      labels:
        name: mssql-pod
      annotations:
        stork.libopenstorage.org/disableHyperconvergence: "true"
    spec:
      securityContext:
        fsGroup: 10001
      hostAliases:
      - ip: "10.225.115.129"
        hostnames:
        - "z-ap-sql-10"
      containers:
        - name: mssql-container
          image: mcr.microsoft.com/mssql/server:2022-CU15-ubuntu-20.04
          ports:
            - containerPort: 1433
              name: mssql-port
          env:
            - name: MSSQL_PID
              value: "Developer"
            - name: ACCEPT_EULA
              value: "Y"
            - name: MSSQL_AGENT_ENABLED
              value: "1"
            - name: MSSQL_ENABLE_HADR
              value: "1"
            - name: MSSQL_SA_PASSWORD
              value: "Testing1122"
          volumeMounts:
            - name: sqlsystem
              mountPath: /var/opt/mssql
            - name: sqldata
              mountPath: /var/opt/sqlserver/data
  volumeClaimTemplates:
    - metadata:
        name: sqlsystem
      spec:
        accessModes:
         - ReadWriteOnce
        resources:
          requests:
            storage: 1Gi
        storageClassName: mssql-sc
    - metadata:
        name: sqldata
      spec:
        accessModes:
         - ReadWriteOnce
        resources:
          requests:
            storage: 25Gi
        storageClassName: mssql-sc

Like my last post, this is pretty stripped down. No resources limits, tolerations etc. It has two persistent volumes, one for the system databases and one for the user databases from a storage class already configured in the cluster.

One thing to note: –

hostAliases:
- ip: "10.225.115.129"
  hostnames:
  - "z-ap-sql-10"

Here an entry in the pod’s hosts file is being created for the listener of the Windows Availability Group.

Next thing to do is deploy two services, one so that we can connect to the SQL instance (on port 1433) and one for the AG (port 5022): –

kubectl apply -f .\sqlserver-services.yaml

Here’s the manifest for the services: –

apiVersion: v1
kind: Service
metadata:
  name: mssql-service
spec:
  ports:
  - name: mssql-ports
    port: 1433
    targetPort: 1433
  selector:
    name: mssql-pod
  type: LoadBalancer
---
apiVersion: v1
kind: Service
metadata:
  name: mssql-ha-service
spec:
  ports:
  - name: mssql-ha-ports
    port: 5022
    targetPort: 5022
  selector:
    name: mssql-pod
  type: LoadBalancer

NOTE – We could use just one service with multiple ports configured but I’m keeping them separate here to try and keep things as clear as possible.

Check that everything looks OK: –

kubectl get all

Now we need to create master key, login, and user in all instances: –

CREATE MASTER KEY ENCRYPTION BY PASSWORD = '<C0m9L3xP@55w0rd!>';
CREATE LOGIN [dbm_login] WITH PASSWORD = '<C0m9L3xP@55w0rd!>';
CREATE USER dbm_user FOR LOGIN dbm_login;

Then create a certificate in the SQL instance in the pod: –

CREATE CERTIFICATE dbm_certificate WITH SUBJECT = 'Mirroring_certificate', EXPIRY_DATE = '20301031'

Backup that certificate: –

BACKUP CERTIFICATE dbm_certificate
TO FILE = '/var/opt/mssql/data/dbm_certificate.cer'
WITH PRIVATE KEY (
        FILE = '/var/opt/mssql/data/dbm_certificate.pvk',
        ENCRYPTION BY PASSWORD = '<C0m9L3xP@55w0rd!>'
    );

Copy the certificate locally: –

kubectl cp mssql-statefulset-0:var/opt/mssql/data/dbm_certificate.cer ./dbm_certificate.cer
kubectl cp mssql-statefulset-0:var/opt/mssql/data/dbm_certificate.pvk ./dbm_certificate.pvk

And then copy the files to the Windows boxes: –

Copy-Item dbm_certificate.cer \\z-ap-sql-02\E$\SQLBackup1\ -Force
Copy-Item dbm_certificate.pvk \\z-ap-sql-02\E$\SQLBackup1\ -Force
Copy-Item dbm_certificate.cer \\z-ap-sql-03\E$\SQLBackup1\ -Force
Copy-Item dbm_certificate.pvk \\z-ap-sql-03\E$\SQLBackup1\ -Force

Once the files are on the Windows boxes, we can create the certificate in each Windows SQL instance: –

CREATE CERTIFICATE dbm_certificate
    AUTHORIZATION dbm_user
    FROM FILE = 'E:\SQLBackup1\dbm_certificate.cer'
    WITH PRIVATE KEY (
    FILE = 'E:\SQLBackup1\dbm_certificate.pvk',
    DECRYPTION BY PASSWORD = '<C0m9L3xP@55w0rd!>'
)

OK, great! Now we need to create a mirroring endpoint in the SQL instance in the pod: –

CREATE ENDPOINT [Hadr_endpoint]
    STATE = STARTED
    AS TCP (   
        LISTENER_PORT = 5022,
        LISTENER_IP = ALL)
    FOR DATA_MIRRORING (
        ROLE = ALL,
        AUTHENTICATION = WINDOWS CERTIFICATE [dbm_certificate],
        ENCRYPTION = REQUIRED ALGORITHM AES
        );
ALTER ENDPOINT [Hadr_endpoint] STATE = STARTED;
GRANT CONNECT ON ENDPOINT::[Hadr_endpoint] TO [dbm_login];

There are already endpoints in the Windows instances, but we need to update them to use the certificate for authentication: –

ALTER ENDPOINT [Hadr_endpoint]
    STATE = STARTED
    AS TCP (   
        LISTENER_PORT = 5022,
        LISTENER_IP = ALL)
    FOR DATABASE_MIRRORING (
    AUTHENTICATION = WINDOWS CERTIFICATE [dbm_certificate]
    , ENCRYPTION = REQUIRED ALGORITHM AES
    );
GRANT CONNECT ON ENDPOINT::[Hadr_endpoint] TO [dbm_login];

Now we can create a one node Clusterless Availability Group in the SQL instance in the pod: –

CREATE AVAILABILITY GROUP [AG2]
   WITH (CLUSTER_TYPE=NONE)
   FOR
   REPLICA ON   
      'mssql-statefulset-0' WITH   
         (  
         ENDPOINT_URL = 'TCP://mssql-statefulset-0.com:5022',   
		 FAILOVER_MODE = MANUAL
		,AVAILABILITY_MODE = SYNCHRONOUS_COMMIT
		,BACKUP_PRIORITY = 50
		,SEEDING_MODE = AUTOMATIC
		,SECONDARY_ROLE(ALLOW_CONNECTIONS = NO)
	)    

No listener here, we are going to use the mssql-ha-service as the endpoint for the Distributed Availability Group.

OK, so on the primary node of the Windows Availability Group, we can create the Distributed Availability Group: –

CREATE AVAILABILITY GROUP [DistributedAG]  
   WITH (DISTRIBUTED)   
   AVAILABILITY GROUP ON  
      'AG1' WITH    
      (   
         LISTENER_URL = 'tcp://Z-AP-SQL-10:5022',    
         AVAILABILITY_MODE = ASYNCHRONOUS_COMMIT,   
         FAILOVER_MODE = MANUAL,   
         SEEDING_MODE = AUTOMATIC   
      ),   
      'AG2' WITH    
      (   
         LISTENER_URL = 'tcp://10.225.115.131:5022',   
         AVAILABILITY_MODE = ASYNCHRONOUS_COMMIT,   
         FAILOVER_MODE = MANUAL,   
         SEEDING_MODE = AUTOMATIC   
      );    

We could use a host file entry for the URL in AG2 (I did that in the previous post) but here we’ll just use the IP address of the mssql-ha-service.

OK, nearly there! We now have to join the Availability Group in the SQL instance in the pod: –

ALTER AVAILABILITY GROUP [DistributedAG]  
   JOIN   
   AVAILABILITY GROUP ON  
      'AG1' WITH    
      (   
         LISTENER_URL = 'tcp://Z-AP-SQL-10:5022',    
         AVAILABILITY_MODE = ASYNCHRONOUS_COMMIT,   
         FAILOVER_MODE = MANUAL,   
         SEEDING_MODE = AUTOMATIC   
      ),   
      'AG2' WITH    
      (   
         LISTENER_URL = 'tcp://10.225.115.131:5022',   
         AVAILABILITY_MODE = ASYNCHRONOUS_COMMIT,   
         FAILOVER_MODE = MANUAL,   
         SEEDING_MODE = AUTOMATIC   
      );    

And that should be it! If we now connect to the SQL instance in the pod…the database is there!

There it is! OK, one thing I haven’t gone through here is how to get auto-seeding working from Windows into a Linux SQL instance. I went through how that works in my previous post (here) but the gist is as long as the database data and log files are located under the Windows SQL instance’s default data and log path…they will auto-seed to the Linux SQL instance’s default data and log paths.

So that’s how to seed a database from a SQL instance that is in a Windows Availability Group into a SQL instance running in a pod in a Kubernetes cluster using a Distributed Availability Group!

Phew! Thanks for reading!

SQL Server Cross Platform Availability Groups and Kubernetes

Say we have a database that we want to migrate a copy of into Kubernetes for test/dev purposes, and we don’t want to backup/restore.

How can it be done?

Well, with cross platform availability groups! We can deploy a pod to our Kubernetes cluster, create the availability group, and then auto-seed our database!

We’ll run through how to do this but first, I just want to point out that everything here firmly belongs in this category…

Ok, now that’s out the way…let’s see how this can be done.

We’ll need a “normal” instance of SQL Server running on Windows and a Kubernetes cluster.

Here I have one instance of SQL Server running SQL 2022 CU15 (HA enabled): –

And a Kubernetes cluster running v1.29.4: –

OK, now we need to deploy a SQL instance to the Kubernetes cluster. Going to use a statefulset for this: –

apiVersion: apps/v1
kind: StatefulSet
metadata:
  name: mssql-statefulset
spec:
  serviceName: "mssql"
  replicas: 1
  selector:
    matchLabels:
      name: mssql-pod
  template:
    metadata:
      labels:
        name: mssql-pod
    spec:
      securityContext:
        fsGroup: 10001
      hostAliases:
      - ip: "10.225.115.136"
        hostnames:
        - "z-ap-sql-01"
      containers:
        - name: mssql-container
          image: mcr.microsoft.com/mssql/server:2022-CU15-ubuntu-20.04
          ports:
            - containerPort: 1433
              name: mssql-port
          env:
            - name: MSSQL_PID
              value: "Developer"
            - name: ACCEPT_EULA
              value: "Y"
            - name: MSSQL_AGENT_ENABLED
              value: "1"
            - name: MSSQL_ENABLE_HADR
              value: "1"
            - name: MSSQL_DATA_DIR
              value: /var/opt/sqlserver/data
            - name: MSSQL_LOG_DIR
              value: /var/opt/sqlserver/data
            - name: MSSQL_SA_PASSWORD
              value: "Testing1122"
          volumeMounts:
            - name: sqlsystem
              mountPath: /var/opt/mssql
            - name: sqldata
              mountPath: /var/opt/sqlserver/data
  volumeClaimTemplates:
    - metadata:
        name: sqlsystem
      spec:
        accessModes:
         - ReadWriteOnce
        resources:
          requests:
            storage: 1Gi
        storageClassName: mssql-sc
    - metadata:
        name: sqldata
      spec:
        accessModes:
         - ReadWriteOnce
        resources:
          requests:
            storage: 25Gi
        storageClassName: mssql-sc

This is fairly stripped down for this example. No tolerations, resource limits etc. Two persistent volumes will be created, one for the system databases and one for the user database data and log from a storage class already configured in the cluster.

A couple of things to note…

- name: MSSQL_ENABLE_HADR
              value: "1"

Here, HA is being enabled.

      hostAliases:
      - ip: "10.225.115.136"
        hostnames:
        - "z-ap-sql-01"

And here, an entry in the pod’s hosts file is being added for the SQL instance running on Windows.

OK, let’s deploy that (file is sqlserver-statefulset.yaml): –

kubectl apply -f sqlserver-statefulset.yaml

Next thing to do is deploy two services, one so that we can connect to the SQL instance (on port 1433) and one for the AG (port 5022): –

apiVersion: v1
kind: Service
metadata:
  name: mssql-service
spec:
  ports:
  - name: mssql-ports
    port: 1433
    targetPort: 1433
  selector:
    name: mssql-pod
  type: LoadBalancer
---
apiVersion: v1
kind: Service
metadata:
  name: mssql-ha-service
spec:
  ports:
  - name: mssql-ha-ports
    port: 5022
    targetPort: 5022
  selector:
    name: mssql-pod
  type: LoadBalancer

And let’s deploy that (file is sqlserver-service.yaml): –

kubectl apply -f sqlserver-service.yaml

Check that everything looks OK: –

kubectl get all

Great! Ok, now an entry in the SQL on Windows hosts file needs to be created for the external IP address of the service listening on port 5022.

In this example: –

10.225.115.132 mssql-statefulset-0

Confirm that we can connect to the SQL instance in Kubernetes in SSMS: –

Let’s start building the availability group!

Following the Microsoft guide here: –
https://learn.microsoft.com/en-us/sql/linux/sql-server-linux-availability-group-cross-platform

Create a login and user on the Windows SQL instance: –

CREATE LOGIN dbm_login WITH PASSWORD = '<C0m9L3xP@55w0rd!>';
CREATE USER dbm_user FOR LOGIN dbm_login;
GO

And then a master key and certificate: –

CREATE MASTER KEY ENCRYPTION BY PASSWORD = '<C0m9L3xP@55w0rd!>';
CREATE CERTIFICATE dbm_certificate WITH SUBJECT = 'dbm';
BACKUP CERTIFICATE dbm_certificate
TO FILE = 'C:\Temp\dbm_certificate.cer'
WITH PRIVATE KEY (
        FILE = 'C:\Temp\dbm_certificate.pvk',
        ENCRYPTION BY PASSWORD = '<C0m9L3xP@55w0rd!>'
    );
GO

Grab the dbm_certificate.cer and dbm_certificate.pvk files, copy to your local machine, and then copy them into the Kubernetes pod: –

kubectl cp dbm_certificate.cer mssql-statefulset-0:/var/opt/mssql/data
kubectl cp dbm_certificate.pvk mssql-statefulset-0:/var/opt/mssql/data

One copied, run the following on the SQL instance in the Kubernetes pod to create a login/user, master key, and the certificate: –

CREATE LOGIN dbm_login WITH PASSWORD = '<C0m9L3xP@55w0rd!>';
CREATE USER dbm_user FOR LOGIN dbm_login;
GO
CREATE MASTER KEY ENCRYPTION BY PASSWORD = '<M@st3rKeyP@55w0rD!>'
GO

CREATE CERTIFICATE dbm_certificate
    AUTHORIZATION dbm_user
    FROM FILE = '/var/opt/mssql/data/dbm_certificate.cer'
    WITH PRIVATE KEY (
    FILE = '/var/opt/mssql/data/dbm_certificate.pvk',
    DECRYPTION BY PASSWORD = '<C0m9L3xP@55w0rd!>'
)
GO

And then create the endpoint for the availability group on both the Windows SQL instance and the instance in the Kubernetes pod: –

CREATE ENDPOINT [Hadr_endpoint]
    AS TCP (LISTENER_IP = (0.0.0.0), LISTENER_PORT = 5022)
    FOR DATA_MIRRORING (
        ROLE = ALL,
        AUTHENTICATION = CERTIFICATE dbm_certificate,
        ENCRYPTION = REQUIRED ALGORITHM AES
        );
ALTER ENDPOINT [Hadr_endpoint] STATE = STARTED;
GRANT CONNECT ON ENDPOINT::[Hadr_endpoint] TO [dbm_login];
GO

Fantastic! Now we can create the availability group!

Run on the Windows SQL instance: –

CREATE AVAILABILITY
GROUP [ag1]
WITH (CLUSTER_TYPE = NONE)
FOR REPLICA
    ON N'z-ap-sql-01'
WITH (
    ENDPOINT_URL = N'tcp://z-ap-sql-01:5022',
    AVAILABILITY_MODE = SYNCHRONOUS_COMMIT,
    SEEDING_MODE = AUTOMATIC,
    FAILOVER_MODE = MANUAL,
    SECONDARY_ROLE(ALLOW_CONNECTIONS = ALL)
    ),
    N'mssql-statefulset-0'
WITH (
    ENDPOINT_URL = N'tcp://mssql-statefulset-0:5022',
    AVAILABILITY_MODE = SYNCHRONOUS_COMMIT,
    SEEDING_MODE = AUTOMATIC,
    FAILOVER_MODE = MANUAL,
    SECONDARY_ROLE(ALLOW_CONNECTIONS = ALL)
    )
GO

And then join the SQL instance in the Kubernetes pod: –

ALTER AVAILABILITY GROUP [ag1] JOIN WITH (CLUSTER_TYPE = NONE);
ALTER AVAILABILITY GROUP [ag1] GRANT CREATE ANY DATABASE;
GO

Once that has completed, we have a cross platform availability group!

Right, final thing to do is get our database into the AG! For this, we are going to auto-seed the database to the Linux instance.

However, Windows and Linux have different file paths! But auto-seeding does work across platform, details are here: –
https://learn.microsoft.com/en-us/sql/database-engine/availability-groups/windows/automatic-seeding-secondary-replicas

As long as the database’s data and log files are located under the Windows SQL instance’s default data and log file paths, the database will be seeded to the Linux instance’s default data and log file paths.

Let’s see this in action! The default file paths for my Windows instance are: –

And the database’s files reside on those file paths: –

And the default file paths for the SQL instance in the pod are: –

So now let’s add the database: –

ALTER AVAILABILITY GROUP [AG1] ADD DATABASE [testdatabase1];
GO

And boom! We have the database auto-seeded into the SQL instance running in the Kubernetes pod: –

Interestingly, if we look at the database’s file paths in SSMS for the instance in the pod: –

SQL in the pod thinks that the files are located at the Windows locations…but that can’t be true…it’s running on Linux!

If we go and check the actual location of the files…they are located at the default file paths for the SQL instance in the pod: –

OK, I fully admit this pretty out there…but it’s just a bit of fun to see what we can do with SQL Server Availability Groups and Kubernetes.

Thanks for reading!

Creating a STONITH resource for a pacemaker cluster on VMWare virtual machines

A while back I wrote a post about creating a pacemaker cluster to run SQL Server availability group using the new Ubuntu images in Azure.

Recently I had to create another pacemaker cluster, this time on-premises using VMWare virtual machines. The steps to create the pacemaker cluster and deploy an availability group where pretty much the same as in my original post (minus any Azure marlarkey) but one step was different, creating the STONITH resource.

A STONITH resource is needed in a pacemaker cluster as this is what prevents the dreaded split brain scenario…two nodes thinking that they’re the primary node. If the resource detects a failed node in the cluster it’ll restart that node, hopefully allowing it to come up in the correct state.

There are different types of STONITH resources, in my original post I used a fence_azure_arm type, not available to me for my on-premises cluster.

So which type do you use and how do you configure it?

N.B. – This was a three node cluster running Ubuntu 20.04 and I configured it using crmsh

In order to list which types are available, run:-

crm ra list stonith

There are a few ones related to VMWare, I ended up going with the fence_vmware_rest type.

To test the resource before deploying: –

fence_vmware_rest -a <VSPHERE IP ADDRESS> -l <LOGIN> -p <PASSWORD> --ssl-insecure -z -o list | egrep "(<NODE1>|<NODE2>|<NODE3>)"
fence_vmware_rest -a <VSPHERE IP ADDRESS> -l <LOGIN> -p <PASSWORD> --ssl-insecure -z -o status -n <NODE1>

Now we can create the resource: –

sudo crm configure primitive fence_vmware stonith:fence_vmware_rest \
params \
ipaddr="<VSPHERE IP ADDRESS>" \
action=reboot \
login="<LOGIN>" \
passwd="<PASSWORD>" \
ssl=1 ssl_insecure=1 \
pcmk_reboot_timeout=900 \
power_timeout=60 \
op monitor \
interval=3600 \
timeout=120

There are a whole load of properties that can be set, to check them out run: –

crm ra info stonith:fence_vmware_rest

We can also configure additional properties: –

sudo crm configure property cluster-recheck-interval=2min
sudo crm configure property start-failure-is-fatal=true
sudo crm configure property stonith-timeout=900

A good explanation of these properties can be found here.

Now enable the STONITH resource: –

sudo crm configure property stonith-enabled=true

Now that the resource has been created and enabled, confirm the cluster status: –

sudo crm status

Awesome, we have our STONITH resource up and running in the cluster!

If you want to test the resource, this will fence a node: –

sudo crm node fence <NODE>

So that’s how to deploy a STONITH resource for a pacemaker cluster on VMWare virtual machines. If you want to see the whole process of creating the cluster, the code is available here.

One word of caution, there are a lot of STONITH and cluster properties that can be set…please remember to test your configuration fully before deploying to production!

Thanks for reading!

Operating system error 995 when adding a database to an availability group

I was adding databases to an availability group (SQL Server 2017 CU20 instance) the other day and one database failed to automatically seed to the secondary.

When I looked in the SQL Server error log I saw this error message: –

BackupIoRequest::ReportIoError: write failure on backup device ‘{GUID}’. Operating system error 995(The I/O operation has been aborted because of either a thread exit or an application request.).

Followed up by: –

Automatic seeding of availability database ‘databasename’ in availability group ‘availabilitygroup’ failed with a transient error. The operation will be retried.

BackupVirtualDeviceFile::RequestDurableMedia: Flush failure on backup device ‘{GUID}’. Operating system error 995(The I/O operation has been aborted because of either a thread exit or an application request.).

Write on “{GUID}” failed: 995(The I/O operation has been aborted because of either a thread exit or an application request.)

A nonrecoverable I/O error occurred on file “{GUID}:” 995(The I/O operation has been aborted because of either a thread exit or an application request.).

OK I was a little concerned…until I went and checked the secondary.

The issue was, even though I’d created the file paths on the secondary for the data files…I hadn’t created the file path for the database’s log file.

So I removed the database from the availability group, created the file path for the database’s log file, and readded to the availability group.

This time the database automatically seeded over to the secondary no problem…phew!

Thanks for reading!